Installation
8
AXB-TPI/3 Touch Panel Interface 3
Preparing captive wires
You will need a wire stripper and flat-blade screwdriver to prepare and connect the captive wires.
1. Strip 0.25 inch (6.35 mm) of insulation off all wires.
2. Insert each wire into the appropriate opening on the connector, according to the wiring
diagrams and connector types described in this section.
3. Tighten the screws to secure the wire in the connector. Do not tighten the screws excessively;
doing so may strip the threads and damage the connector.
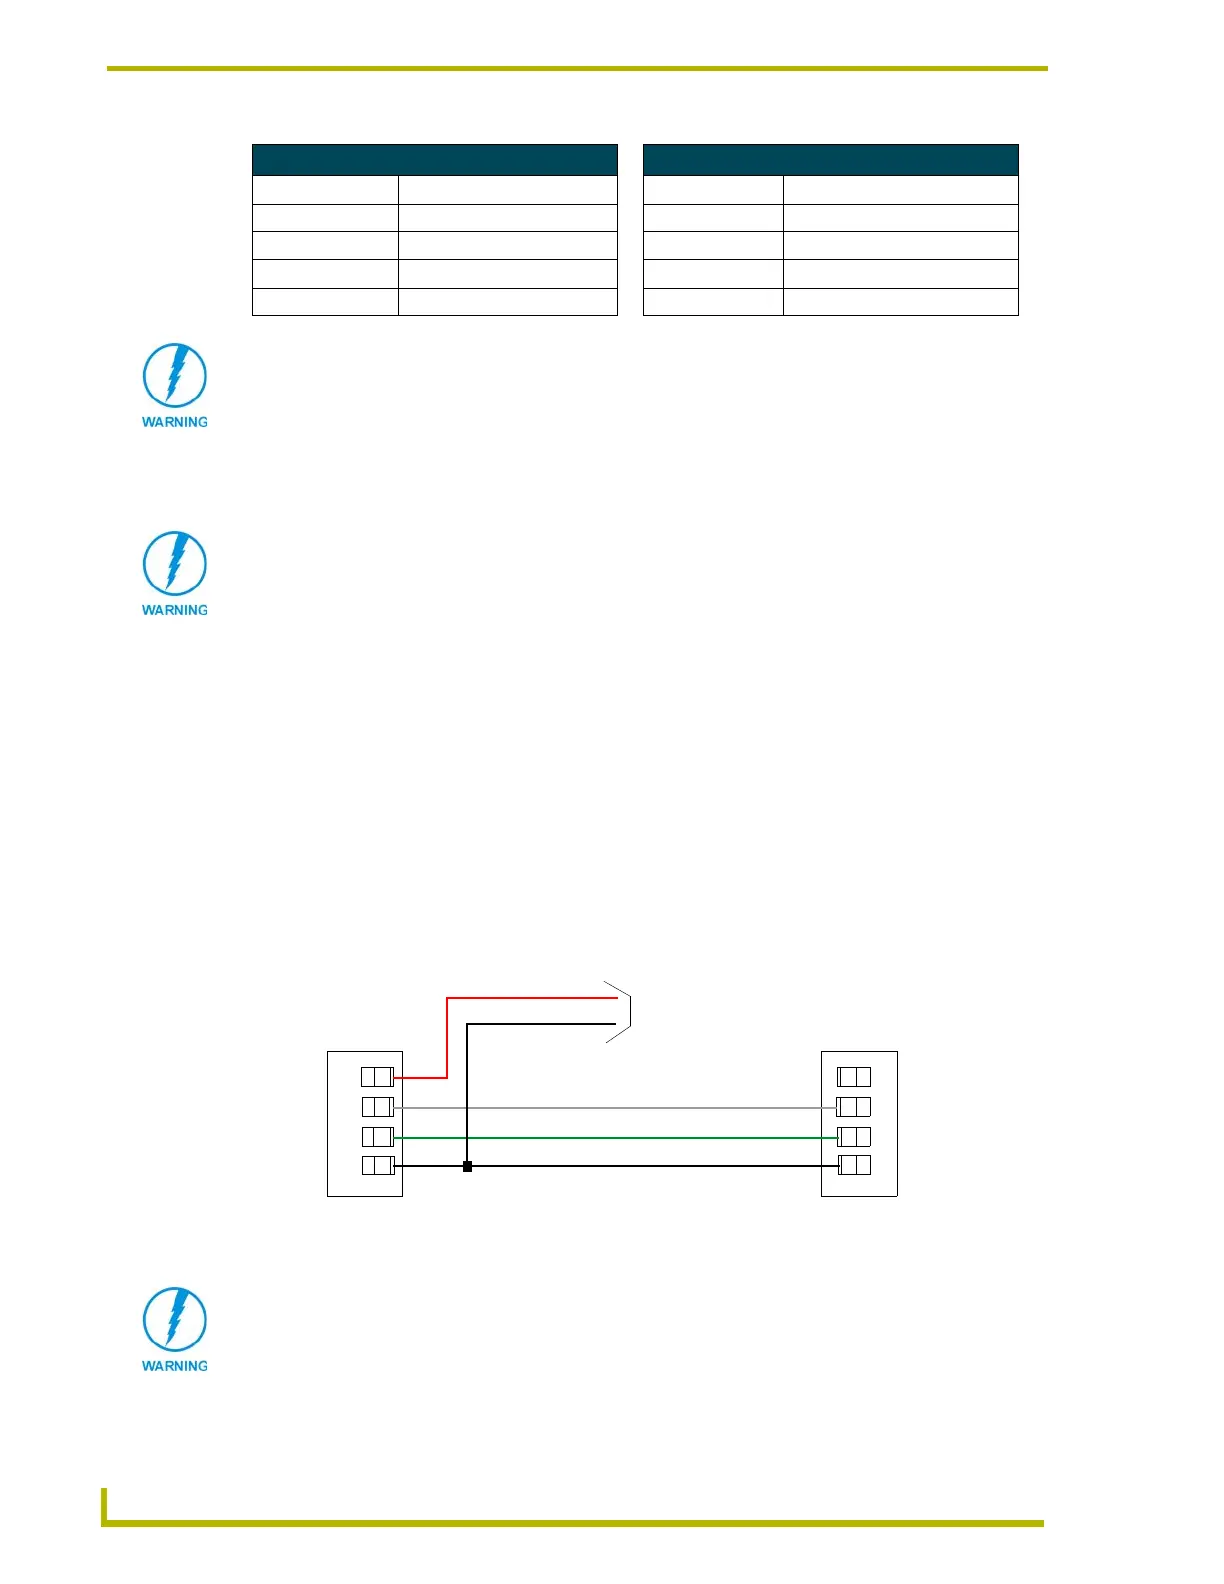
Using the AXlink connector for data and power
To use the AXlink 4-pin connector for data communication with the Central Controller and power
transfer from the PSN6.5 power supply, the incoming PWR and GND cable from the PSN6.5 must
be connected to the AXlink cable connector going to the Central Controller. FIG. 5 shows the
AXlink wiring diagram. Always use a local power supply to power the TPI/3 unit.
1. Unscrew the PWR and GND wires on the terminal end of the PSN6.5 2-pin cable.
Wiring Guidelines - Two Modules Wiring Guidelines - Three Modules
Wire size Maximum wiring length Wire size Maximum wiring length
18 AWG 72.01 feet (21.95 meters) 18 AWG 55.10 feet (16.79 meters)
20 AWG 45.56 feet (13.89 meters) 20 AWG 34.86 feet (10.63 meters)
22 AWG 28.40 feet (8.66 meters) 22 AWG 21.74 feet (6.63 meters)
24 AWG 17.90 feet (5.46 meters) 24 AWG 13.70 feet (4.18 meters)
Using more than one source of power to the AXB-TPI/3 can result in damage to the
internal components and a possible burn out.
Never pre-tin wires for compression-type connections.
FIG. 5 AXlink connector wiring diagram
PWR (+)
GND (-)
Local +12 VDC power supply
(coming from the PSN power supply)
PWR +
AXP/TX
AXM/RX
GND -
PWR +
AXP/TX
AXM/RX
GND -
To the Central Controller
To the AXB-TPI/3
Do not connect the wire from the PWR terminal on the Central Controller to the PWR
terminal on the TPI/3 unit when you connect an external power supply. Make sure to
connect only the AXM, AXP, and GND wires on the TPI/3’s AXlink connector when
using the PSN6.5 power supply.

 Loading...


