Installation and Upgrading
15
NI-2100, NI-3100, NI-4100 Hardware Reference Guide
Compact Flash Upgrades
The NetLinx Integrated Controllers are shipped with a default 2GB Compact Flash module.
Upgrade Compact Flash (factory programmed with firmware):
NXA-CF2NI4G, 4 GB Flash Upgrade (FG2116-07)
This Compact Flash upgrade module is used by the NI-2100, NI-3100 and NI-4100 Controllers.
Accessing The Internal Components On An Integrated Controller
1.
Carefully detach all connectors from the rear of the unit.
2. Remove the chassis housing screws from both the sides and top of the Controller, as shown in FIG. 5 by
using a grounded screwdriver turning in a counter-clockwise rotation.
The NI-2100 and NI-3100 have six screws on top and three on each side.
The NI-4100 has six screws on top and four on each side.
3. Carefully pull-up and remove the housing up and away from the Controller to expose the internal circuit
board (FIG. 5).
4. Refer to the followingInstallation of Compact Flash Upgradesfor detailed replacement information.
It is recommended that ANY MEMORY UPGRADE should be done prior to any
installation. Refer to the following accessing and installation sections for more
information.
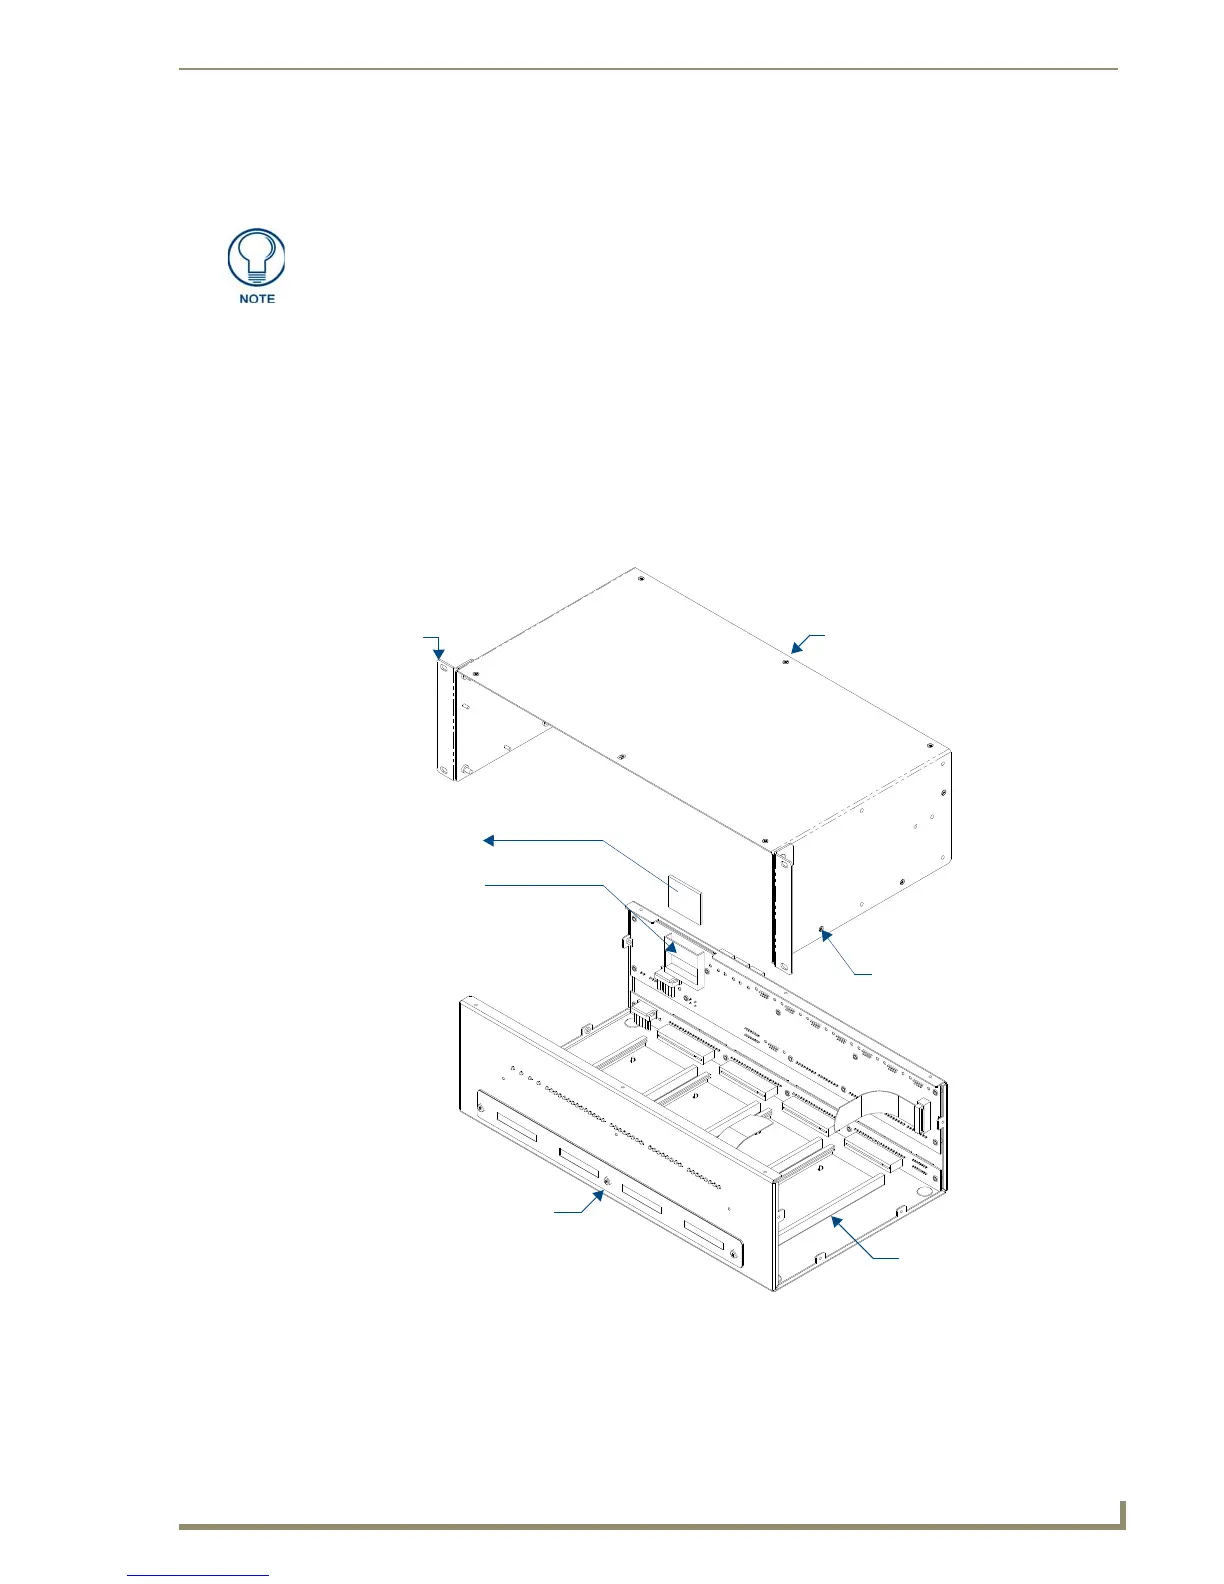
FIG. 5 Location of the Compact Flash (NI-4100 shown)
Compact Flash
Mounting
Brackets
Compact Flash
insert location
NXC Card Slots
NXC Card Slot
faceplate
Chassis housing screws (top)
- 6 on top
- sides vary per model
Chassis housing screws (side)
- 4 on each side of the NI-4100
- 3 on each side of the
NI-3100/2100

 Loading...