EasyManua.ls Logo

AMX NetLinx NI-3101-SIG - User Manual

AMX NetLinx NI-3101-SIG
176 pages
Print Icon
To Next Page IconTo Next Page
Loading...
Operation/Reference Guide
NetLinx Controllers
NI-3101-SIG
Signature Series NetLinx
®
Integrated Controller
Latest Release: 4/14/2008

Table of Contents

Questions and Answers

  • B
    benjamin24Jul 29, 2025
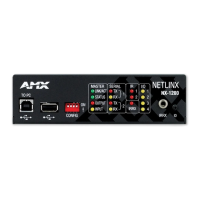
    How to prevent NetLinx devices from dropping offline when communicating over Ethernet with AMX Controller?
    • H
      Heather RojasJul 29, 2025
      To prevent the Master (NI Controller) from auto-negotiating with the network, set the Ethernet mode. Using Telnet or Terminal on NetLinx Masters (like those onboard NIs), send the SET ETHERNET MODE command. Available modes include: SET ETHERNET MODE 10 HALF, SET ETHERNET MODE 10 FULL, SET ETHERNET MODE 100 HALF, SET ETHERNET MODE 100 FULL, and SET ETHERNET MODE AUTO. NI Controllers support all of these Ethernet modes.
  • T
    Teresa VillarrealAug 2, 2025
    What to do if my AMX NI Controller shows the same IP Address after selecting DHCP Server?
    • R
      rodriguezrichardAug 2, 2025
      If the IP Address was set as a fixed IP, the controller might display the same IP Address. To resolve this: * Access the HyperTerminal application and communicate with the controller via the COM port. * Type echo on and press ENTER to send the information to the unit. * Type get ip to display the actual IP Address used by the unit. * Release the static/fixed IP Addresses. * Recycle power to the device and retry obtaining a DHCP address through NetLinx Studio.
  • R
    Robert FlemingAug 6, 2025
    What to do if NetLinx Studio fails to install the last component during AMX NetLinx NI-3101-SIG Controller firmware upgrade?
    • L
      lynchstephanieAug 6, 2025
      This issue occurs when initially upgrading the on-board Master from a firmware build 117 or lower to the new Web Security firmware build 300 or higher. This failure is part of the initial update procedure and won't happen during later firmware uploads. To resolve this: Click Close after the last component fails, then reboot the on-board Master by selecting Tools > Reboot the Master Controller > Continue. After the reboot, the process will continue.
  • J
    Jose SmithAug 11, 2025
    What to do if I can’t detect the AMX NI Controller and the Status LED is blinking irregularly?
    • D
      douglasrogersAug 11, 2025
      When the on-board Master is trying to establish communication, the Status LED might blink irregularly, and the controller might not be detected. Wait a few moments and retry establishing communication using the latest NetLinx Studio. If the problem persists, cycle power to the unit and repeat the procedure. Alternatively, attempt communication via another method (Configuration Port or IP).
  • T
    Troy DeleonAug 15, 2025
    How to troubleshoot AMX NI Controller when it can’t obtain a DHCP Address?
    • H
      Howard DyerAug 15, 2025
      When requesting a DHCP Address, the DHCP Server can take a few minutes to provide the address to the on-board Master. Verify there is an active Ethernet connection attached to the rear of the NI-Series Controller. Select Diagnostics > Network Address from the Main menu and verify the System number. If the IP Address field is still empty, allow the device a few minutes to negotiate a DHCP Address and try again.
  • N
    nunderwoodAug 19, 2025
    Why does NetLinx Studio only detect one of my connected AMX Masters?
    • D
      dwilsonAug 19, 2025
      NetLinx Studio detects only one connected Master, because each Master has the same Device Address of 00000. Only one Master can be assigned to a particular System number. If you want to work with multiple Masters, open different instances of NetLinx Studio and assign each Master its own System value. For example: Assign System #1 to an NXC-ME260/64 and System #2 to an NI-3101-SIG using two open sessions of NetLinx Studio.
  • N
    Nicholas HendersonAug 25, 2025
    What to do if I can’t connect to my AMX NI Controller via the rear Configuration Port using a USB cable?
    • J
      Jesse AndersonAug 25, 2025
      A USB cable is used for Serial communication between the PC and the Master. Verify the USB connectors are securely inserted into their respective ports on both the rear Configuration Port (on the NI) and on the PC. The NI-3101-SIG is configured to a fixed Baud Rate of 115200.

Summary

Introduction

NetLinx Integrated Master Controller Features

Lists key features of the NI-3101-SIG, including USB, RS-232/422/485, IR/Serial, Digital I/O, and Relays.

NI-3101-SIG Specifications

Front Panel Components

Details the POWER, LINK/ACTIVE, and Status LEDs on the front panel of the NI-3101-SIG.

Front Panel LEDs

Explains the function of Input/Output, RS-232/422/485, Relay, IR/Serial, and I/O LEDs.

Rear Panel Connectors Overview

Introduces the rear panel connectors including RS-232/422/485, Relay, Digital I/O, IR/Serial, Configuration, and Ethernet ports.

Digital I;O and IR;Serial Ports

Details the eight-channel binary I/O port and the eight IR/Serial control ports.

Configuration and Ethernet Ports

Covers the Configuration Port, DIP switch, ID button, Ethernet port, and associated LEDs.

AXlink Port and Accessories

Explains the AXlink port, its LED, and lists included accessories.

Connections and Wiring

Wiring Guidelines

Covers general guidelines for connecting power and data cables to the controller.

Wiring Lengths and Wire Prep

Provides wiring length limits and details on preparing captive wires for connectors.

Power and Mini-Phoenix Connections

Details connecting power via 2-pin and data/power via 4-pin mini-Phoenix connectors.

4-Pin Mini-Phoenix with External Power

Describes using the 4-pin connector with an external power source, emphasizing GND connection.

Serial and Relay Port Connections

Covers DB9 connector pinouts for RS-232/422/485 ports and relay connections.

Relay and Input;Output Ports

Details relay connections and I/O port functionality for closures/voltage changes.

IR;Serial Port Connections

Details connecting up to eight IR/Serial devices, IR emitters, and mini-plugs.

Ethernet;RJ-45 Port Connections

Details RJ-45 connector pinouts, signals, pairing, and Ethernet LEDs.

Ethernet Ports Usage

Lists standard Ethernet ports used by NetLinx controllers, including FTP, SSH, Telnet, HTTP, HTTPS/SSL, ICSP, and Integration Solutions.

Timekeeper Battery Replacement

Configuration and Firmware Update

Via Program Port

Details connecting and communicating with the Master using NetLinx Studio via a serial COM port.

Setting System Value

Explains how to access and change the System Value using the Device Addressing dialog.

Using Multiple NetLinx Masters

Discusses assigning separate System values when using more than one NetLinx Master.

Changing Device Address

Guides on changing a NetLinx device's address using the Device Addressing dialog.

Using the ID Button

Explains using the ID button with NetLinx Studio to assign new Device and System numbers.

Resetting Factory Defaults

Details resetting system value and device addresses to factory defaults.

Network Address Configuration

Assigning a Static IP

Guides on assigning a static IP address to the NetLinx Master.

IP Communication

TCP;IP Settings

Explains managing IP addresses and URLs for connections within NetLinx Studio.

User Name and Password

Describes entering username and password for secure connection to the Master.

Firmware Verification

Master Firmware Upgrade

Details upgrading the on-board Master firmware via an IP connection using NetLinx Studio.

Firmware Transfer

Describes using the "Send to NetLinx Device" dialog for firmware transfers.

Controller Firmware Upgrade

Details upgrading the NI Controller firmware via an IP connection using NetLinx Studio.

Controller Firmware Transfer

Describes using the "Send to NetLinx Device" dialog for controller firmware transfers.

NetLinx Security Overview

NetLinx Security Terms

Defines key terms used in NetLinx security, such as User, Administrator, Group, Username, Password, and Access Rights.

Accessing Unsecured Master

Explains how to access an unsecured Master via an HTTP address without requiring credentials.

Default Security Configuration

Outlines the default security settings for HTTP Access and Configuration access.

Master Firmware Security Parameters

Lists key security access parameters for Master firmware, including Terminal, HTTP, Telnet, and ICSP.

Web Control Features

Managing WebControl Connections

Describes accessing the page that displays links to G4 panels running Web Control.

Security Features Overview

System Level Security

Explains how to guarantee valid credentials for accessing features and options.

Security Options

Lists security features that can be enabled/disabled, including Terminal, HTTP, Telnet, Configuration, and ICSP.

Login and Logout

Explains the login process and the Log In/Log Out fields on the web interface.

Setting System Security Options

Describes toggling the requirement for username/password before accessing features.

Group Security Management

ICSP Authentication

Explains the Master-initiated authentication process for IP connections in Master-to-Master systems.

Group Level Security

Details managing groups, including selecting, modifying, adding, or deleting groups and their rights.

Configure Group Properties

Allows configuration of group options and directories, setting access rights for group members.

Adding and Modifying Groups

Guides on creating and modifying group access rights and directory associations.

Deleting an Existing Group

Details the process of removing a group account and associated directory associations.

User Security Management

User Level Security

Guides on adding user accounts and assigning access rights and directory associations.

Configure User Properties

Allows configuration of user options, access rights, and directory associations.

Adding a New User

Details creating a new user account, setting username, password, group, and access rights.

Modifying Existing User

Explains how to modify an existing user's access rights, group assignments, and directory associations.

Deleting an Existing User

Details the process of removing a user account and its associated data.

System Settings

Manage System Page

Describes the Manage System page, including Online Tree navigation and selection item properties.

System Menu Buttons

Explains the buttons available in the System Menu for managing date/time, rebooting, and controlling devices.

Device Management Menu

Device Network Settings

Guides on configuring network settings like Host Name, IP Address, and DNS for a device.

Developing URL List

Explains how to add, view, and remove URLs from a device's URL list.

Changing Device Number

Guides on changing the device number for a selected device using the Device Number dialog.

Control;Emulate Device

Explains how to control or emulate a device, sending commands and strings.

Viewing Device Log

Details how to view the log for a selected device.

Running Diagnostic Filter

Guides on running a diagnostic filter to monitor device activity.

System Diagnostics

Setting Up Diagnostic Filter

Details configuring diagnostic filters using presets and device parameters.

Server Port Configuration

Manage System - Server

Introduces the Server submenu for port settings and SSL certificate management.

Server Port Settings

Details modifying server port settings for services like Telnet, ICSP, and HTTP.

SSL Server Certificate Management

SSL Certificate Creation

Outlines the process for preparing a Master by creating a self-generated certificate.

Certificate Field Information

Details the fields for server certificate information, including Common Name, Organization, and Actions.

Display SSL Certificate

Explains how to display information about an installed SSL server certificate.

Create Self-Generated Certificate

Guides on creating a self-generated SSL certificate using domain name and organization details.

Create Certificate Request

Details creating a certificate request to be sent to a Certificate Authority (CA).

Requesting Certificate from CA

Outlines common steps for requesting a certificate from a Certification Authority (CA).

Export SSL Certificate Request

Details exporting the SSL certificate request text file for submission to a CA.

Import CA Created SSL Certificate

Explains how to import a CA-created SSL certificate into the Master.

Device Management Menu

Configuring Network Settings

Guides on configuring network settings like Host Name, IP Address, and DNS for a device.

Developing URL List

Explains how to add, view, and remove URLs from a device's URL list.

Changing Device Number

Guides on changing the device number for a selected device using the Device Number dialog.

System Settings - License Management

Adding a New License

Guides on adding new license keys using Product ID and Serial Key.

Removing a License

Details the process of removing a license key.

Manage NetLinx Devices

Manage NetLinx Devices Page

Describes the page listing discovered NetLinx Masters and their connected devices.

Displaying NDP-capable Devices

Explains how to expand listings to reveal NDP-capable devices connected to a Master.

Binding;Unbinding Explained

Details the difference between Bound and Orphaned device states and their management.

Obtaining Device Information

Explains how to get detailed device information via mouse-over popups.

Dynamic Device Discovery (DDD)

DDD Configuration Pages

Links to pages for configuring DDD, including device bindings and user-defined devices.

Manage Device Bindings

Used for configuring application-defined virtual devices with discovered physical devices.

Program vs. Run-time Binding

Explains the difference between static (program-defined) and dynamic (run-time) binding in DDD.

Configuring Application-Defined Devices

Details NetLinx code elements and constants for defining devices in DDD.

Creating User-Defined Device

Guides on adding and removing user-defined devices by specifying address, category, and SDK class.

Writing Programs for DDD

Explains how to write programs using Dynamic Device Discovery, including static and dynamic binding.

Configuring Run-time Installation

Details configuring run-time installation for Dynamic binding and verifying Duet modules.

Accessing SSL-Enabled Master

Controlling G4 Panel

Certificate Expiration

Explains certificate validity periods and how to avoid expiration by requesting a new certificate.

NetLinx Security via Terminal

NetLinx Security Features

Lists NetLinx features like NetLinx Master Security, Telnet, Terminal, HTTP, FTP, ICSP, and ICSP Encryption.

Initial Terminal Setup

Details establishing a terminal connection via RS-232/USB for security administration.

Accessing Security Options

Explains how to access security configuration options using terminal commands like 'help security' and 'setup security'.

User and Group Security Management

Display System Security Options

Shows current security options and their enabled/disabled state.

Add User Account

Guides on creating a new user account via terminal commands.

Edit User Account

Details editing user accounts, including password, group, directory, and access rights.

Access Rights Menu

Allows setting access rights for users and groups, including Terminal, HTTP, Telnet, and ICSP.

Delete User Account

Guides on deleting existing user accounts.

Default Security Configuration

Group Directory Associations

Explains managing directory associations for groups, including access to files and directories.

Group Access Rights

Details changing and displaying access rights for groups.

Edit Group Account

Guides on editing group accounts, including directory associations and access rights.

Delete Group Account

Details deleting existing group accounts.

Show Authorized Groups

Displays a list of all authorized group accounts.

Set Telnet Timeout

Allows setting the timeout duration for Telnet sessions.

Terminal Command Help

Programming Commands

Master Send_Commands

Details master-specific commands, including CLOCK for setting date and time.

G4 WC Send Command

Explains the G4WC command for adding G4 Web Control devices to the web control list.

Master IP Local Port Send_Commands

Details commands for sending IP data, specifically UDPSENDTO for UDP local ports.

Using the ID Button

Explains using the ID button with NetLinx Studio to assign new Device and System numbers.

Device Port System (D:P:S)

Configuration Port Commands

ESC Pass Codes

Telnet;Terminal Client Notes

LED Control Commands

RS232;422;485 Ports Channels

Details channels for RS232/422/485 ports, including CTS push channel.

RS-232;422;485 Send_Commands

Covers commands for setting serial port parameters like baud rate, handshaking, and buffer clearing.

RS-232;422;485 Send_String Sequences

Details special SEND_STRING escape sequences for serial communication.

IR;Serial Ports

IR;Serial Send_Commands

Describes commands for sending IR signals and controlling external equipment via IR/Serial ports.

Input;Output Send Commands

Troubleshooting

AMX NetLinx NI-3101-SIG Specifications

General IconGeneral
BrandAMX
ModelNetLinx NI-3101-SIG
CategoryController
LanguageEnglish

Related product manuals