Connections and Wiring
20
NI-2100, NI-3100, NI-4100 Hardware Reference Guide
Working With the Configuration DIP Switch
1.
Disconnect the power supply from the 2-pin PWR (green) connector on the rear of the NetLinx Integrated
Controller.
2. Set DIP switch positions according to the information listed in the Baud Rate Settings on the
Configuration DIP Switch and PRD Mode Settings tables.
3. Reconnect the 12 VDC-compliant power supply to the 2-pin 3.5 mm mini-Phoenix PWR connector.
Setting the CardFrame DIP Switch (NI-4100 only)
Refer to the Setting the NetLinx Control Card Addresses (NI-4100 Only) section on page 13 for a detailed
explanation on this process.
Program Port Connections and Wiring
The Integrated Controllers are equipped with a Program port located on the front of the unit. Use an RS232
programming cable to establish a connection between this Program port to your PC's COM port. This
connection provides communication with the NetLinx Integrated Controller. Then you can download NetLinx
programs to this on-board Master using the NetLinx Studio v 2.4 software program.
Refer to the NetLinx Studio instruction manual for programming instructions. The following table shows the
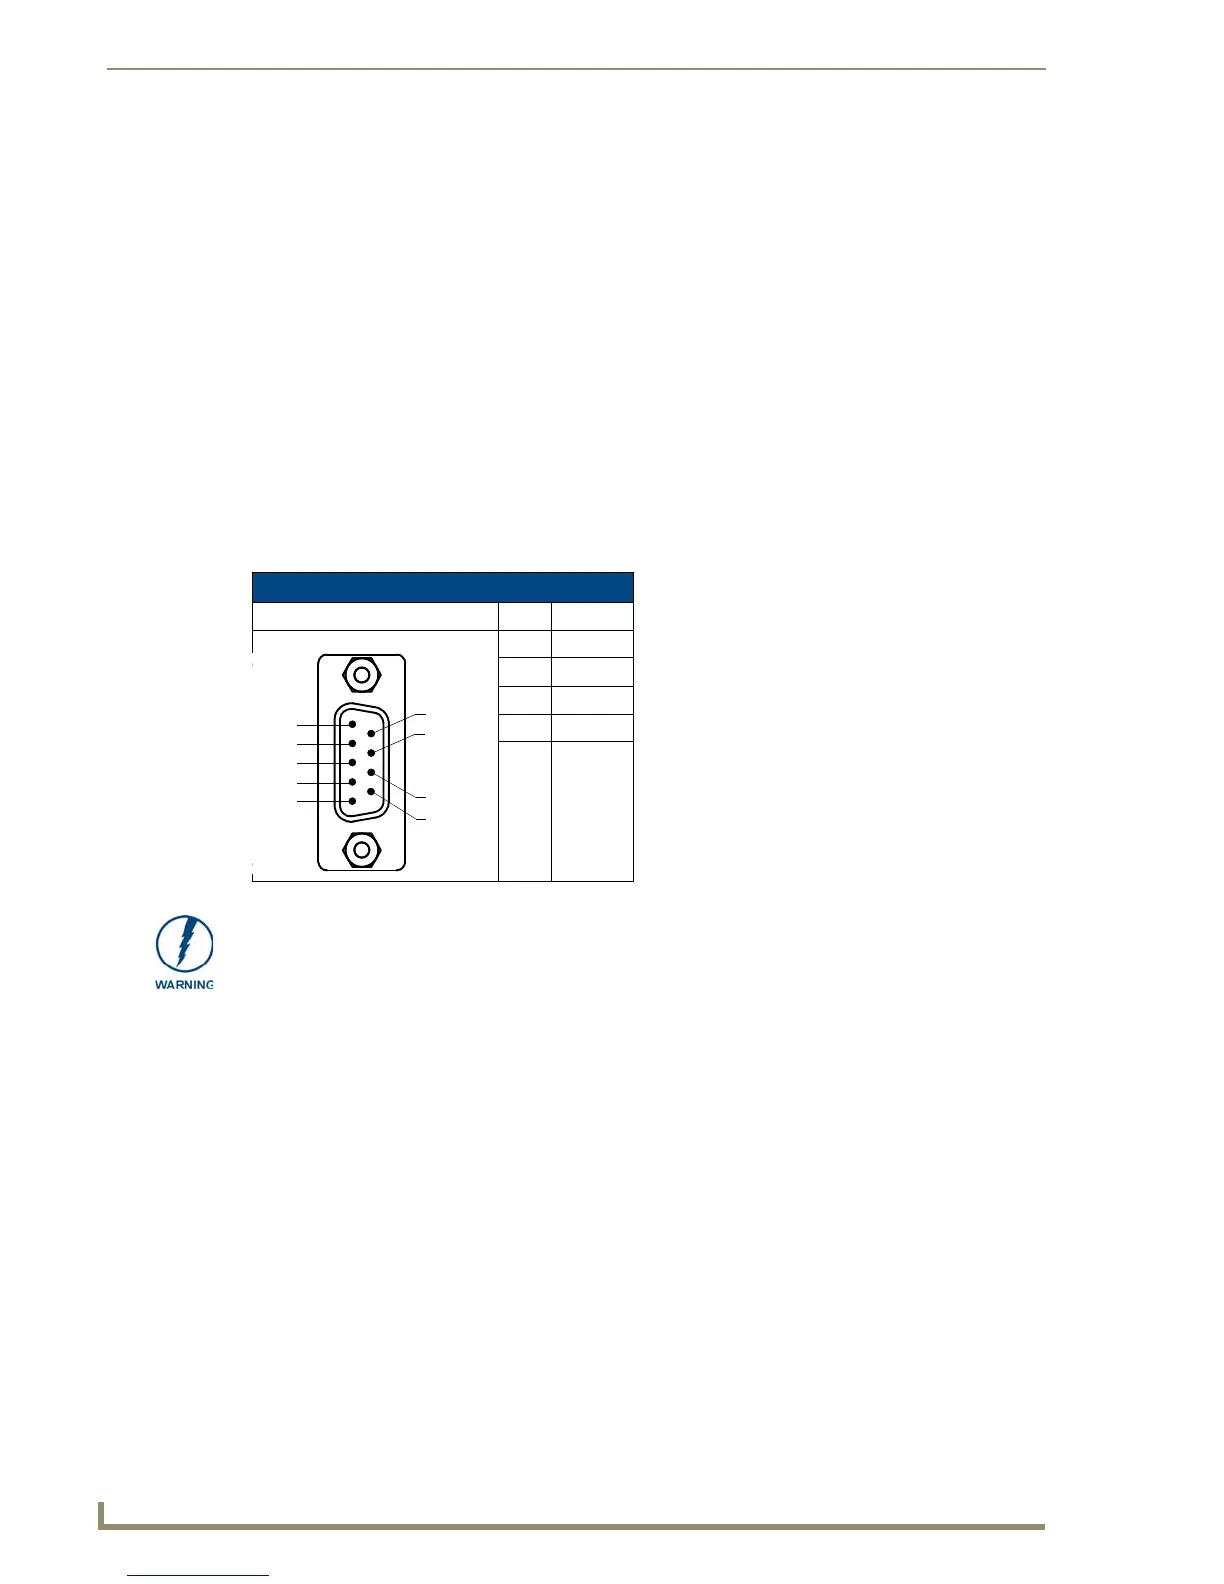
rear panel Program Port connector (male), pinouts, and signals.
Program Port, Pinouts, and Signals
Program Port Connector Pin Signal
2RX
3TX
5GND
7RTS
8CTS
When wiring the 422/485 connections, do NOT use pre-made 9-wire cable or connect
the wire in the cable to any connection that will not be used by the DB9 serial port.
Only use wiring that connects the needed pins.

 Loading...