English - 52 -
Duration: Displays recording duration.
Repeat: You can set a timer to be repeated as Once,
Daily or Weekly.
Playback: This setting defines playback control.
It can be set as Allowed, Disallowed or as “ Use
Parental Settings”. You might be asked to enter your
PIN code.
Change / Delete: permits or prohibits any modifi cations
for other users. You might be asked to enter your PIN
code.
After setting options you prefer, you should press
GREEN button to save a recording timer. Press RED
button to cancel.
Editing a Recording Timer
Select a timer in the Recording Tiners menu by
pressing “ ” or “ ” button. Press GREEN button
on the remote control and Modify Timer OSD will be
displayed on the screen.
You can press RED button to set this recording as
discarded when the disk is full.
You can set desired preferences and when completed,
you can press GREEN button to save your settings.
Deleting a Recording Timer
Select a timer in the Recording Timers menu by
pressing “ ” or “ ” button. Press RED button on the
remote control to delete. A confi rmation screen will be
displayed: “Delete this timer?”.
Select YES to delete the timer or select NO to
cancel.
Program Guide
This section is same with the instructions given in the General
Operations page. Please see Electronic Programme Guide
(EPG) section in the General Operations part.
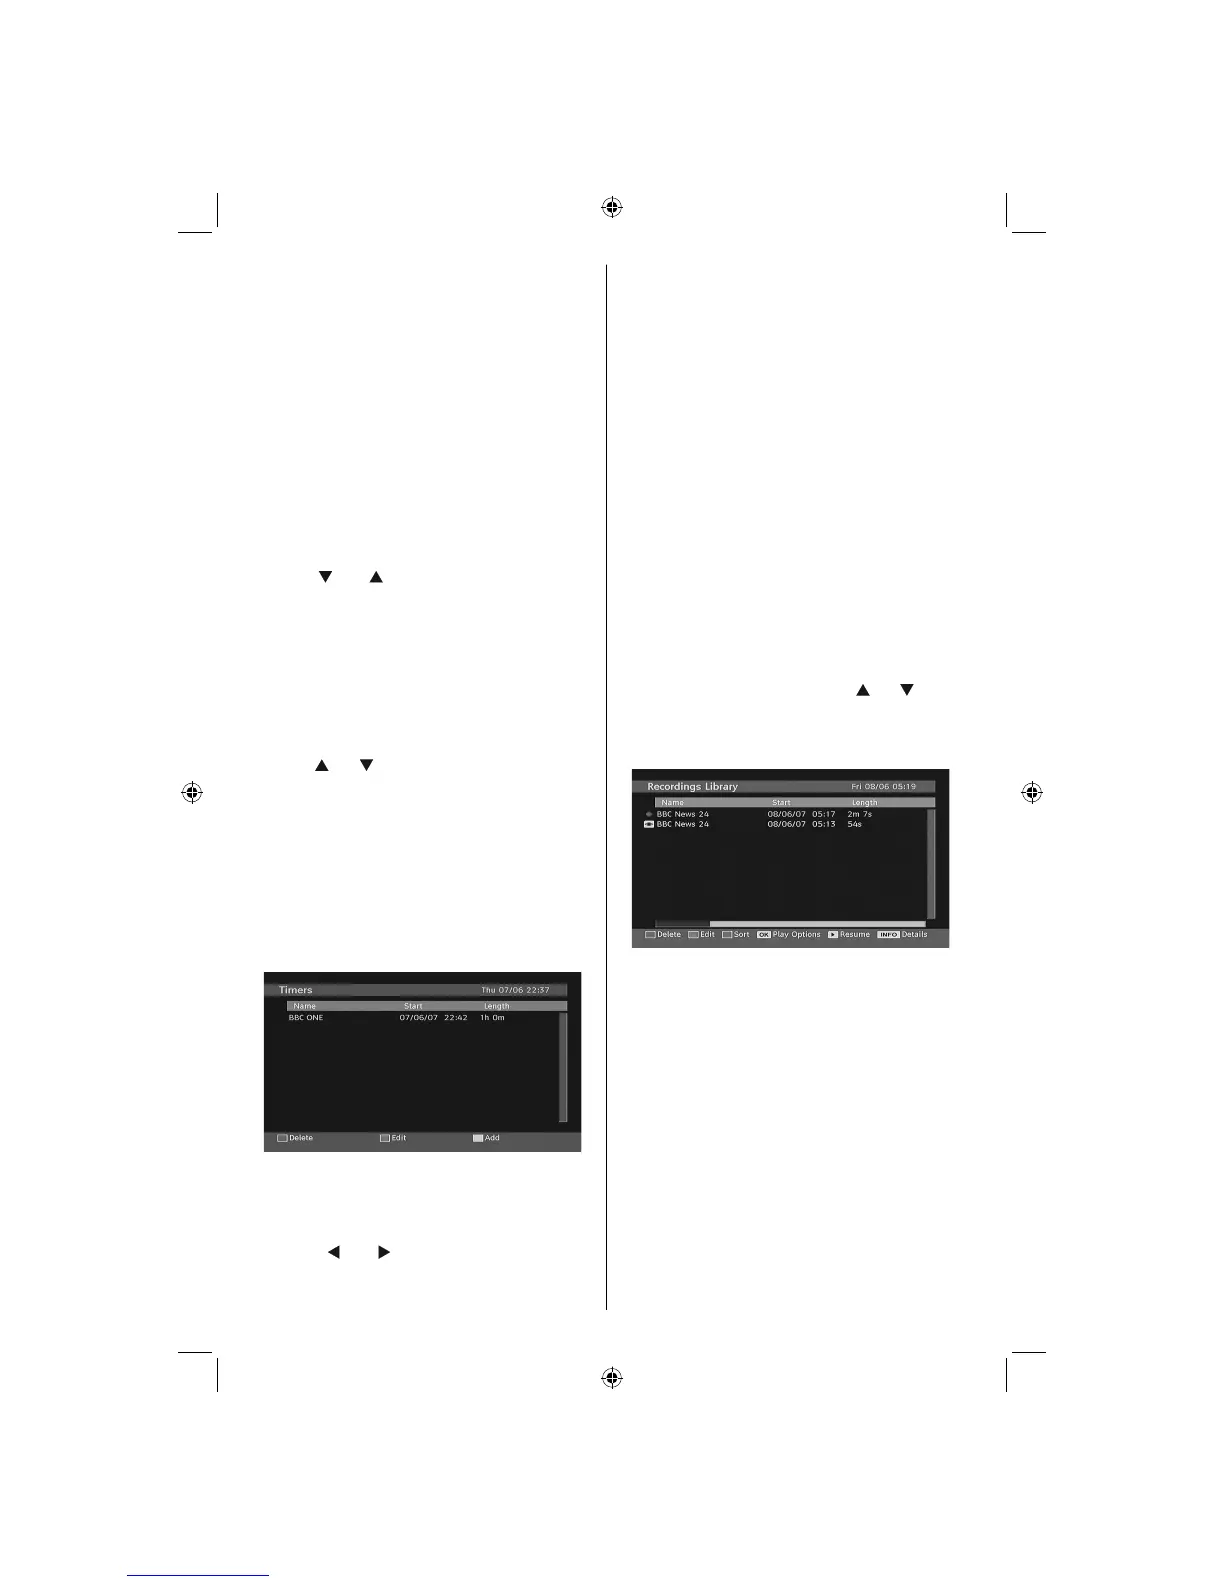
Timers
To display timers window, activate the item from the
main menu. To add a timer, press the YELLOW button
on the remote control. Then “Add Timer” window
appears.
Channel: “
” or “ ” keys will navigate the user
through the TV or Radio list.
Date: Starting date is entered via the Left/Right or the
numeric buttons.
Start: Starting time is entered via the Left/Right or
the numeric buttons.
End: Ending time is entered via the Left/Right or the
numeric buttons.
Change/Delete: permits or prohibits any modifi cations
for other users.
Duration: Duration between Start and End time.
Repeat: You can set a timer to be repeated as Once,
Daily or Weekly.
You can save the adjustments by pressing the GREEN
key or cancel the process by pressing the RED button.
You can edit the list via GREEN key and delete with
the RED button.
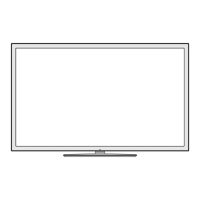
Recordings Library
IMPORTANT: To view recordings library, you should fi rst
connect a USB disk to your TV while the TV is switched off.
You should then switch on the TV to enable recording feature.
Otherwise, recording feature will not be available.
To view the list of recordings, press the M button to
display the main menu and use the “ ” or “ ” button
to highlight the “Recordings Library” line and press the
OK button. Recordings Library will then be displayed
with available recordings.
All the recordings are kept in a list in the recordings
library.
Red bar: Indicates the used space of the recordings
on the hard disk.
Green bar: Shows the free space on the USB disk.
RED button (Delete) :Erases the selected recording.
GREEN button (Edit): Makes changes on the selected
recording.
BLUE button (Sort): Changes the order of the
recordings. You can select from a wide range of
sorting options.
OK button: Activates play options menu:
• Play from start: Plays the recording from the
beginning.
• Resume: Recommences the recordings.
• Play from offset: Specifi es a playing point.
02_MB45M_[GB]_5110UK_PVR_IDTV_SILVER8_(psm)_32843W_10071150_50180023.indd 1702_MB45M_[GB]_5110UK_PVR_IDTV_SILVER8_(psm)_32843W_10071150_50180023.indd 17 25.11.2010 13:11:1025.11.2010 13:11:10