English - 56 -
• Audio: by pressing “ ” or “ ” keys change the
audio language.
• Subtitle: alter the subtitle language with “ ” or “ ” keys.
The chosen language will be seen in subtitles.
Movie Subtitle (Optional)
• In order to display subtitles properly, use this setting
to select a movie subtitle language.
• By pressing “
” or “ ” button, select the desired
language option.
• Guide: By pressing “
” or “ ” buttons change the
guide language.
Current
• Audio: if audio language is supported change the
audio language by pressing “ ” or “ ” buttons
• Subtitle: if subtitle is backed up, alter the subtitle
language with “
” or “ ” buttons. The chosen
language will be seen in subtitles.
Note: If the Country option is set to Denmark, Sweden,
Norway or Finland, the Language Settings menu will function
as described below:
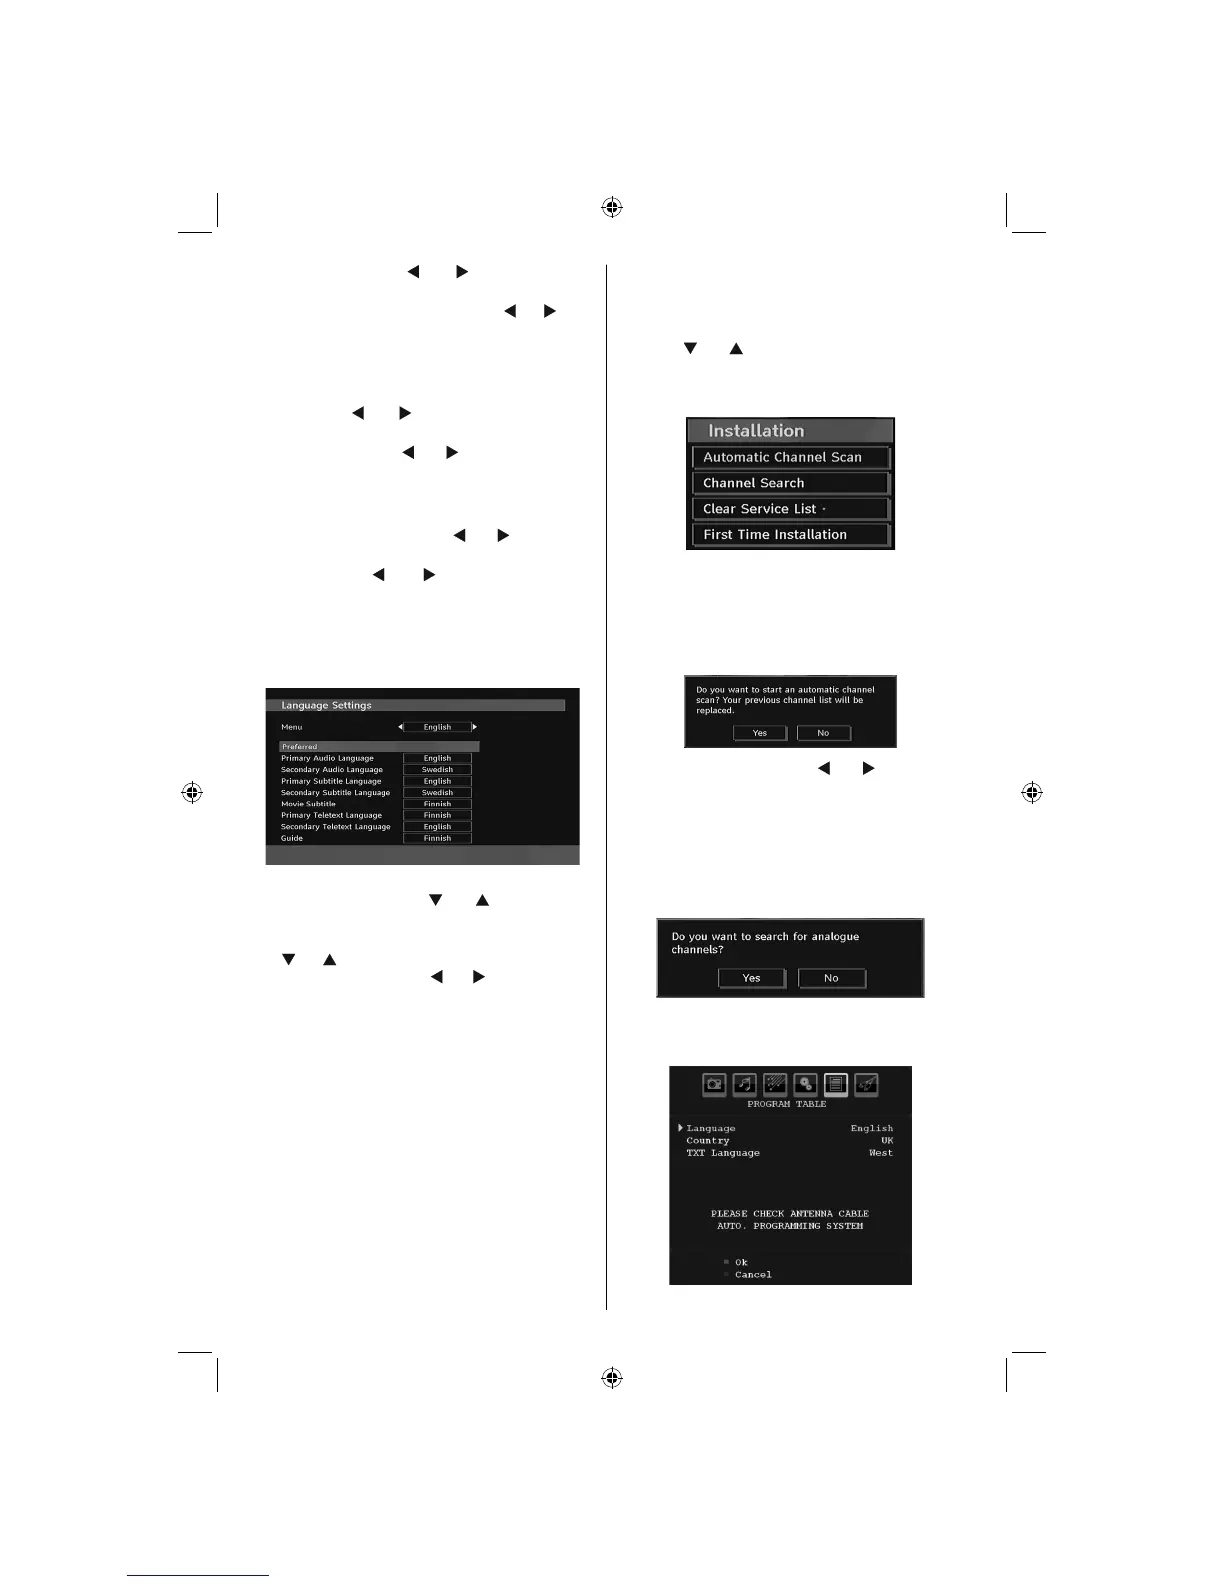
Language Settings
In the confi guration menu, highlight the Language
Settings item by pressing “ ” or “ ” buttons. Press
“OK” and Language Settings submenu will be
displayed on the screen:
Use “ ” or “ ” buttons to highlight the menu item that will
be adjusted and then press “ ” or “ ” button to set.
Notes:
• System Language determines the on-screen menu language.
• Audio Language is used for selecting the soundtrack
of a channels.
• Primary settings are the first priority when multiple
choices are available on a broadcast. Secondary
settings are the alternatives when the first options
are not available.
IMPORTANT!
If you perform fi rst time installation while a USB disk is
connected to the system, you should fi rst switch off the TV
after fi rst time installation has fi nished. You can then switch
on the TV. This process is important for enabling the USB
disk access after fi rst time installation.
Installation
The Installation menu is mainly intended to help you
for creating a Channel Table in the most effi cient way.
Select Installation from the Confi guration menu by
pressing “ ” or “ ” buttons.
This menu includes the following items:
(*) For Denmark, Sweden, Norway or Finland.
Automatic Channel Scan
Automatic channel scan is started by pressing
“OK” button while Automatic channel scan item is
highlighted.
The following message appears on the screen:
Highlight Yes or No by using “ ” or “ ” buttons and
press “OK” button to confi rm.
If Yes is selected, automatic search starts.
Selecting No cancels automatic search.
After search is completed for digital channels, a
message asking whether to search for analogue
channels appears on the screen:
Press the “OK” button to search for analogue
channels. The following menu appears on the screen
for analogue channel search:
02_MB45M_[GB]_5110UK_PVR_IDTV_SILVER8_(psm)_32843W_10071150_50180023.indd 2102_MB45M_[GB]_5110UK_PVR_IDTV_SILVER8_(psm)_32843W_10071150_50180023.indd 21 25.11.2010 13:11:1225.11.2010 13:11:12