5-16 Fan Assembly Replacement Chapter 5 — Component Replacement
5-24 PN: 10410-00730 Rev. D MN469xC Series Multiport Test Set MM
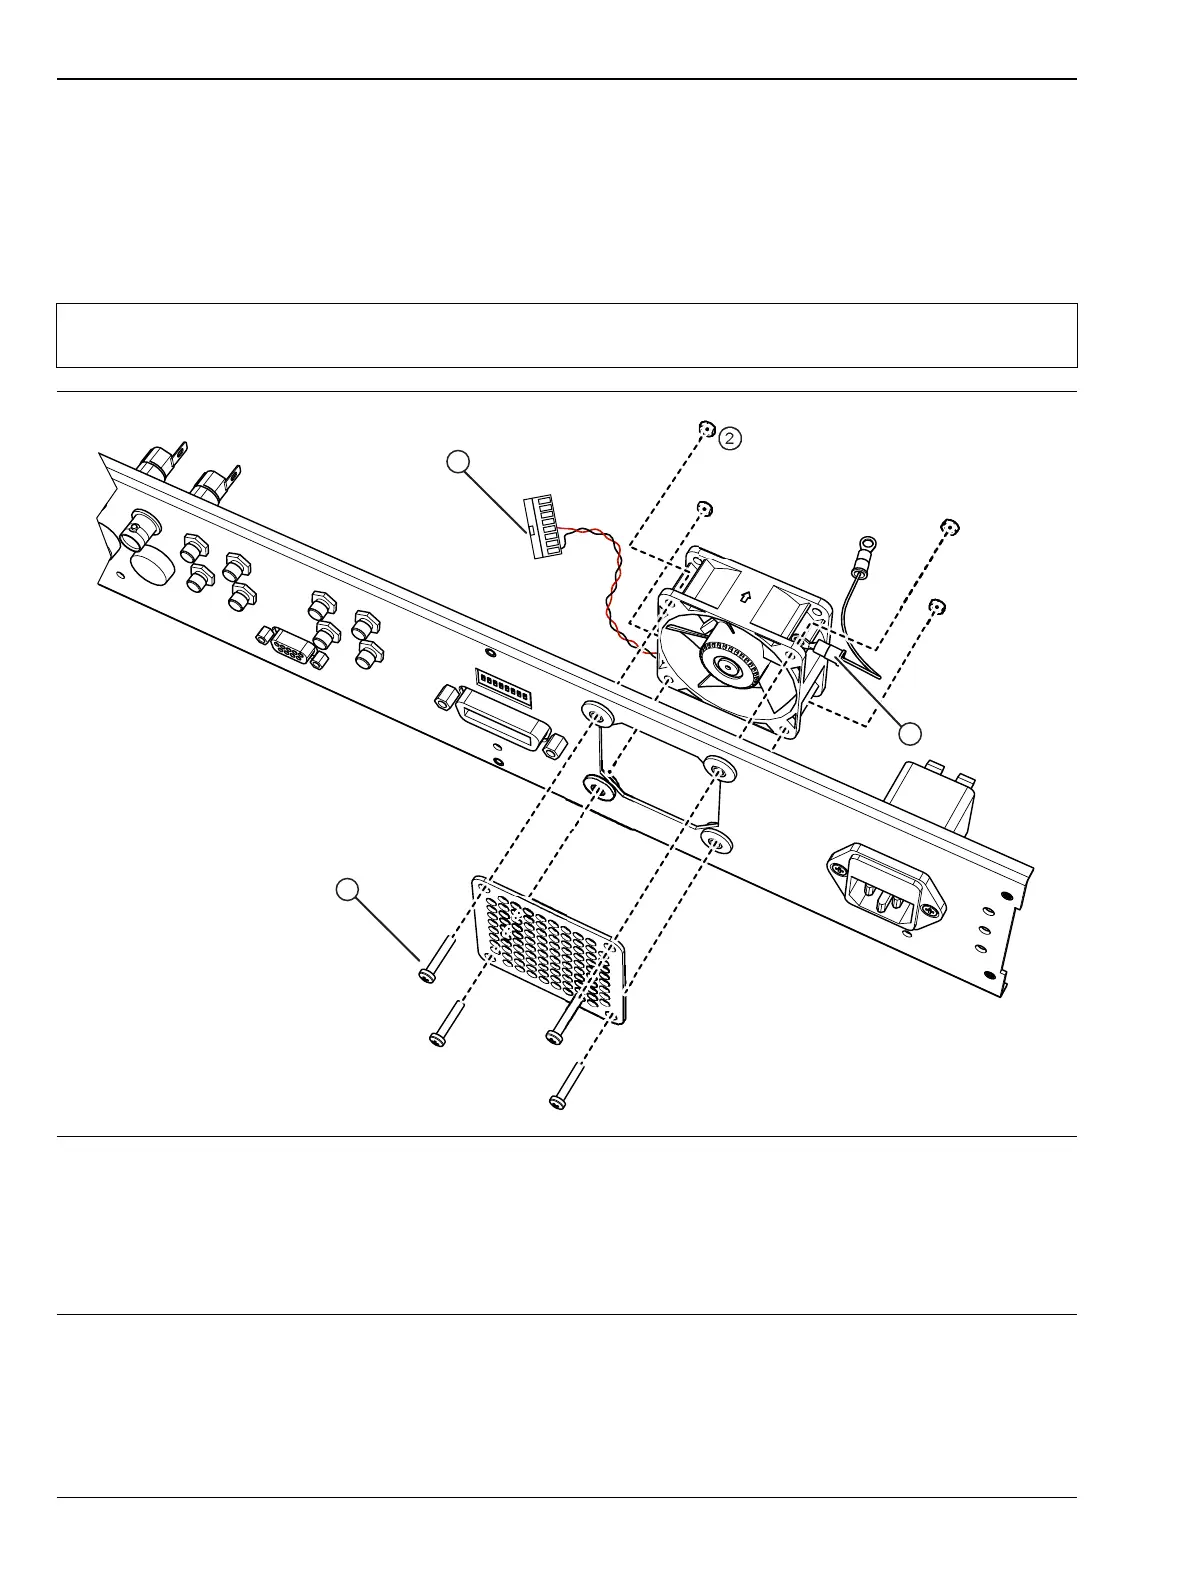
5-16 Fan Assembly Replacement
Assembly: ND71327 or 3-ND83592
This section provides a procedure for removing and replacing the rear panel fan assembly in the test set.
1. Remove the top cover from the test set as instructed in Section 5-3.
2. Replace the Fan Assembly as illustrated in Figure 5-23.
Note
When installing the fan, make sure the arrow mark on the fan is pointing away from the rear panel to
ensure proper airflow direction.
1. Disconnect the fan power cable from the J34 connector of the Test Set Control PCB Assembly
2. Remove the 4 fan guard mounting screws from the rear panel. Hold the fan mounting nuts with an open end
wrench.
3. Remove the grounding wire.
4. Installation is the reverse of removal. Make sure the arrow mark on the fan is pointing away from the rear panel
to ensure proper airflow direction. Ensure the grounding wire is reattached.
Figure 5-23. Cooling Fan Assembly
1
3
2
2

 Loading...