Appendix A: Configuration Examples 30 (36)
A.4 Connecting an Ethernet network to an existing WLAN
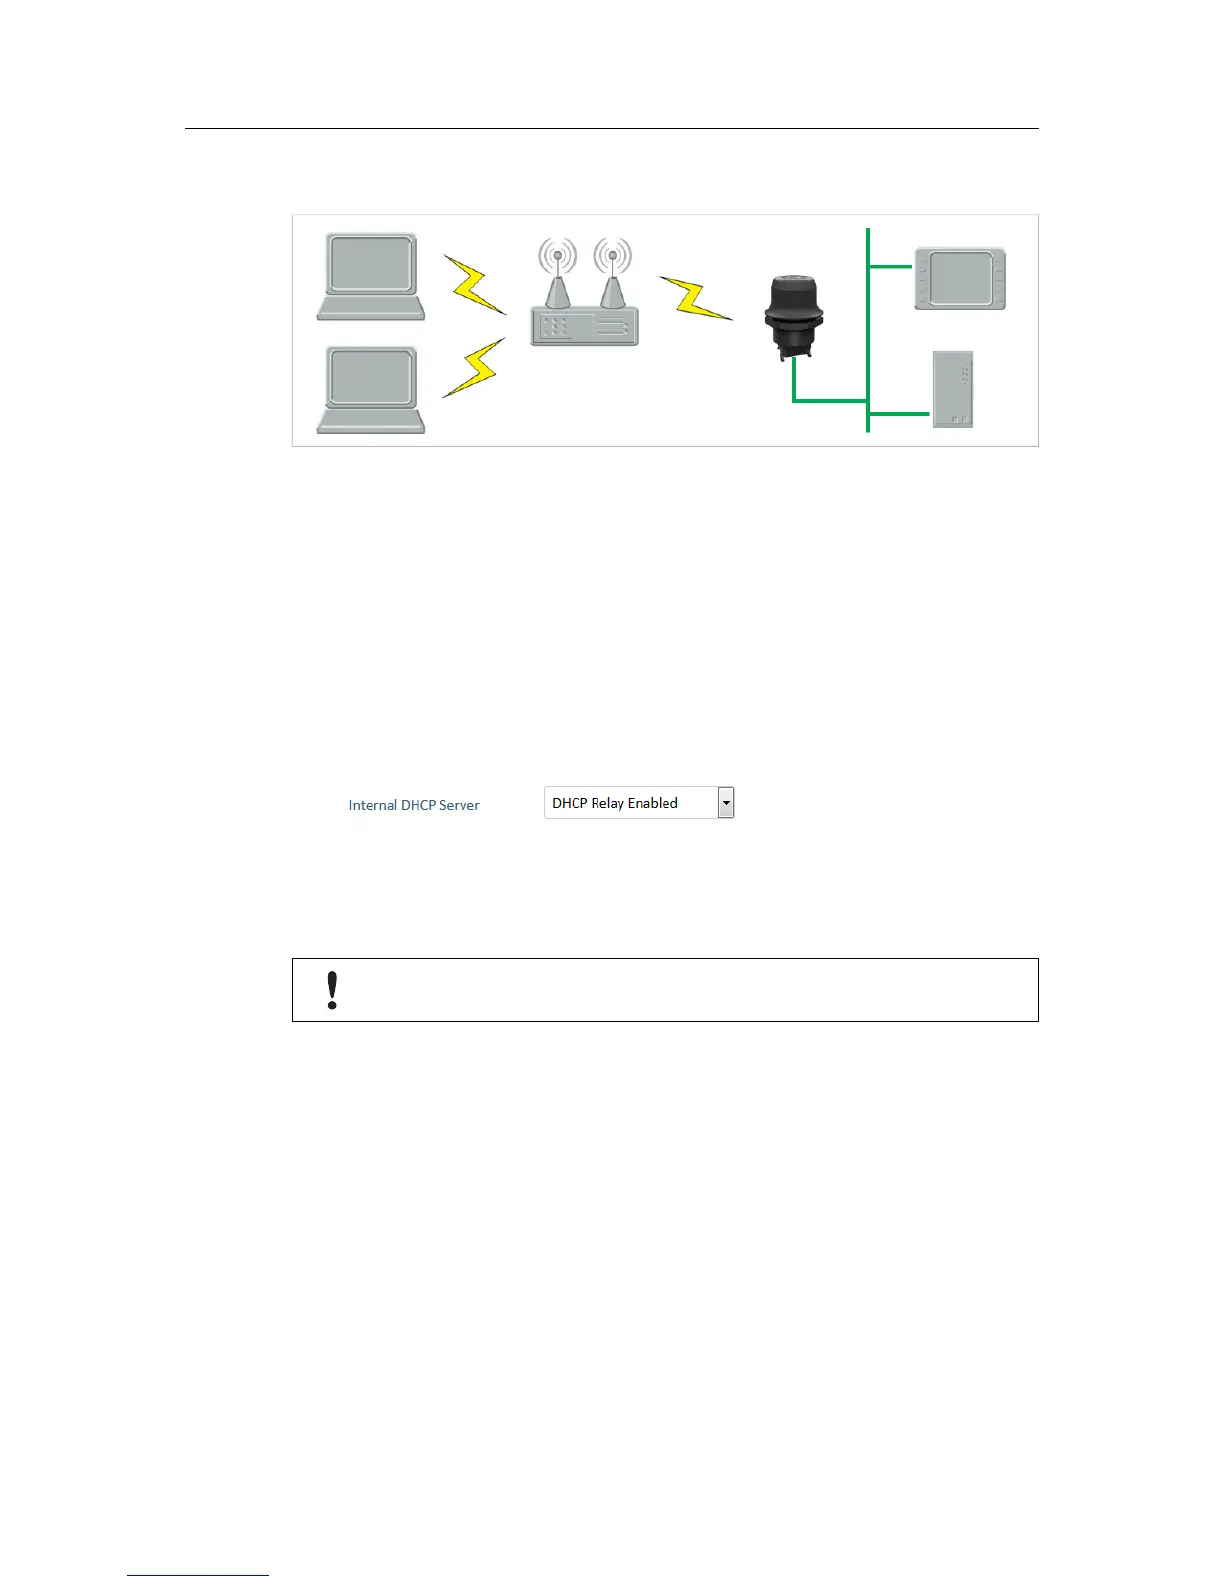
Fig. 23 Connecting to a WLAN
This example describes how to connect a machine with an internal Ethernet network to an
existing WLAN.
This setup allows traffic on network layer 3, but not layer 2. This means that TCP/IP based
protocols such as EtherNet/IP, Modbus TCP and BACnet can be used on the WLAN, but not
protocols that use layer 2 traffic, such as PROFINET.
Configuration
1. Reset the Wireless Bolt to the factory default settings.
2. In Network Settings, configure the IP settings as required by the wireless network.
3. If the network uses DHCP, select DHCP Relay Enabled.
4. In WLAN Settings, click on Scan for Networks.
5. When the scan has completed, select the wireless network from the dropdown list.
6. If required, select the authentication mode and enter the passkey for the wireless network.
WLAN Bridge Mode must be set to Layer 3 IP forward (the default setting).
7. Click on Save and Reboot.
The Ethernet network should now be able to access the WLAN access point.
Anybus
®
Wireless Bolt
™
User Manual SCM-1202-007-EN 2.5