12
Description Picture
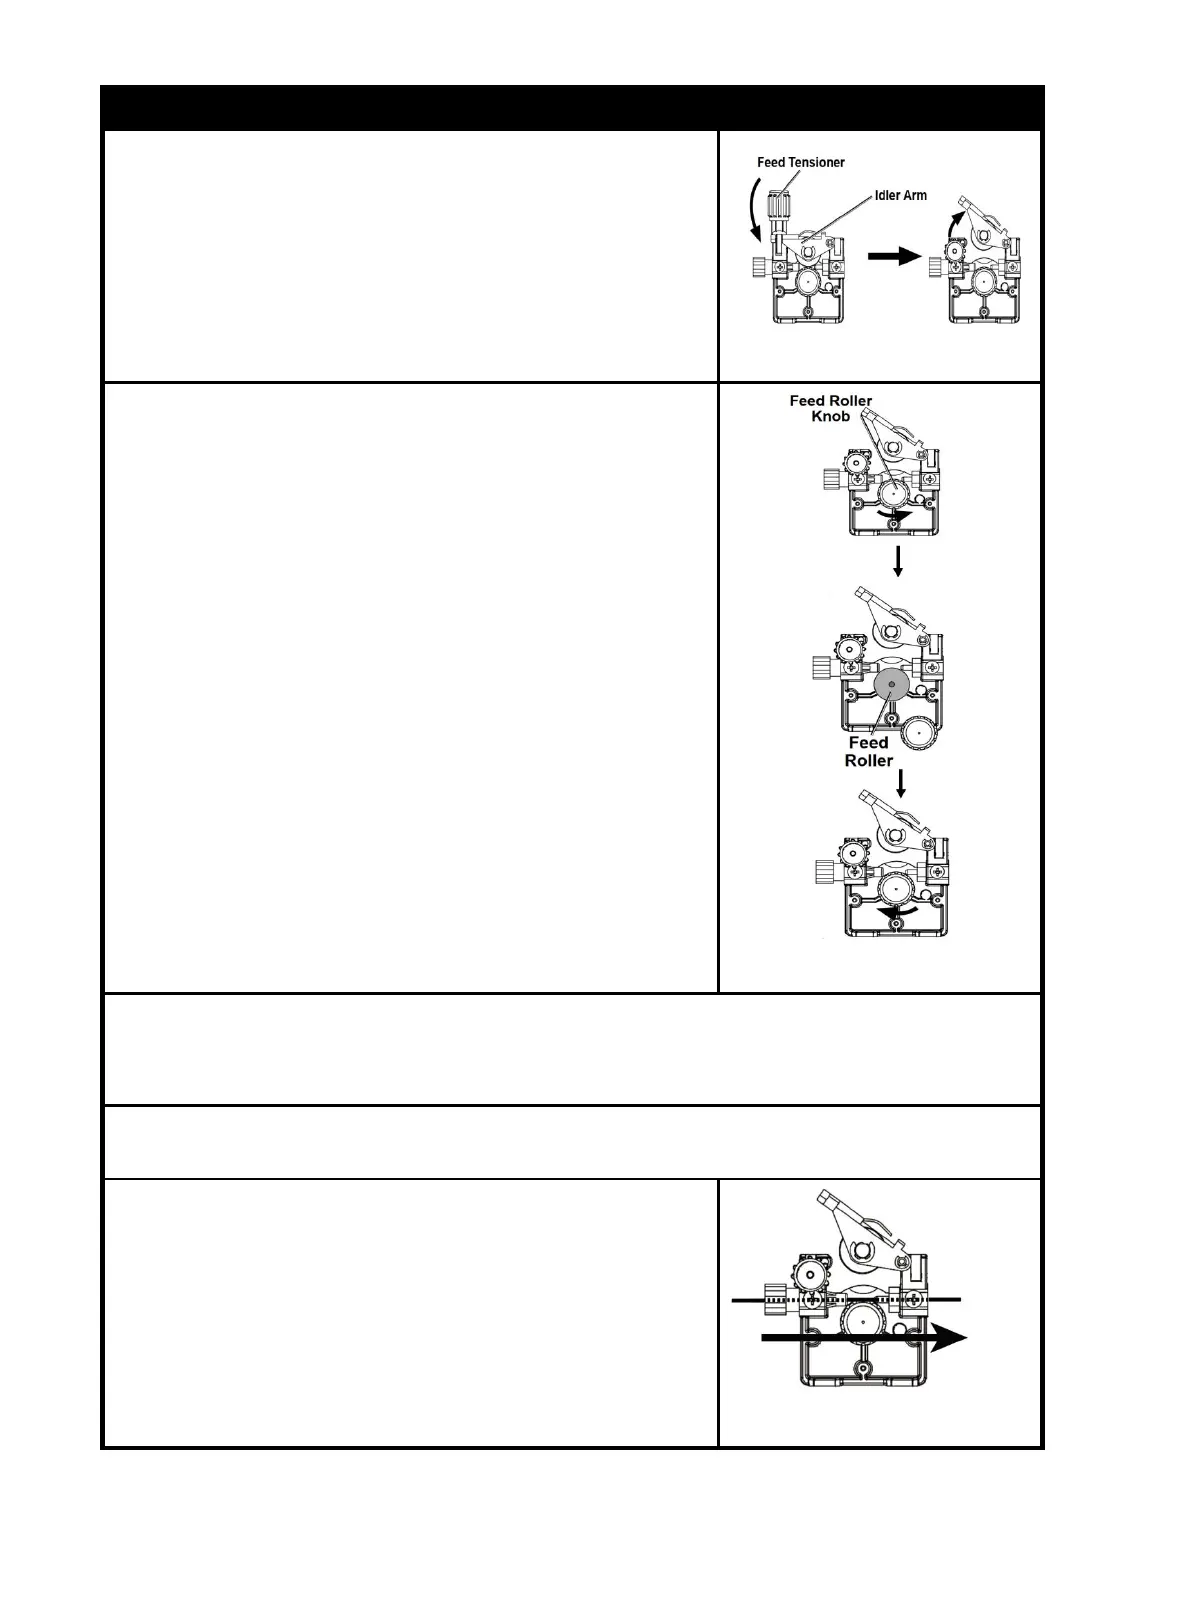
1.Release Feed Tensioner and rotate the Idler Arm away from
the Feed Roller.
NOTICE:
*Feed Tensioner knob could be turn counterclockwise to
loosen it. Then, pull it down to remove tension. The
spring-loaded Idler Arm will move upwards as illustrated.
Fi
ure 15
2.Feed roller instructions.
Ensure that the visible, stenciled size on the drive roll side facing
you matches the wire size being used.
NOTICE:
*The original machine is equipped with a 0.035in knurled
groove feed roller and a 0.035in flux core wire(ONLY for
Flux cored wire).
*If not match, need to change feed roller:
Unscrew the Feed Roller Knob counterclockwise.
Remove the Feed Roller Knob to access the Feed Roller.
Flip or replace the Feed Roller as necessary. Ensure it
matches the wire type and diameter indicated on the Spool.
Figure 16
3.Carefully detach the end of the wire from the spool. Maintain tension on the wire to prevent the
spool from unwinding.
NOTICE: DO NOT release the wire
4.Trim all bent and crimped wire. Ensure the cut end is smooth without any burrs or sharp edges;
re-cut if necessary.
5.Keep tension on the wire and guide at least 12 inches of wire
through the Wire Inlet Liner, over the Feed Roller, and into the
gun liner.
NOTICE: The spool will rotate in a counter-clockwise
fashion.
Figure 17
https://www.arccaptain.com/