25
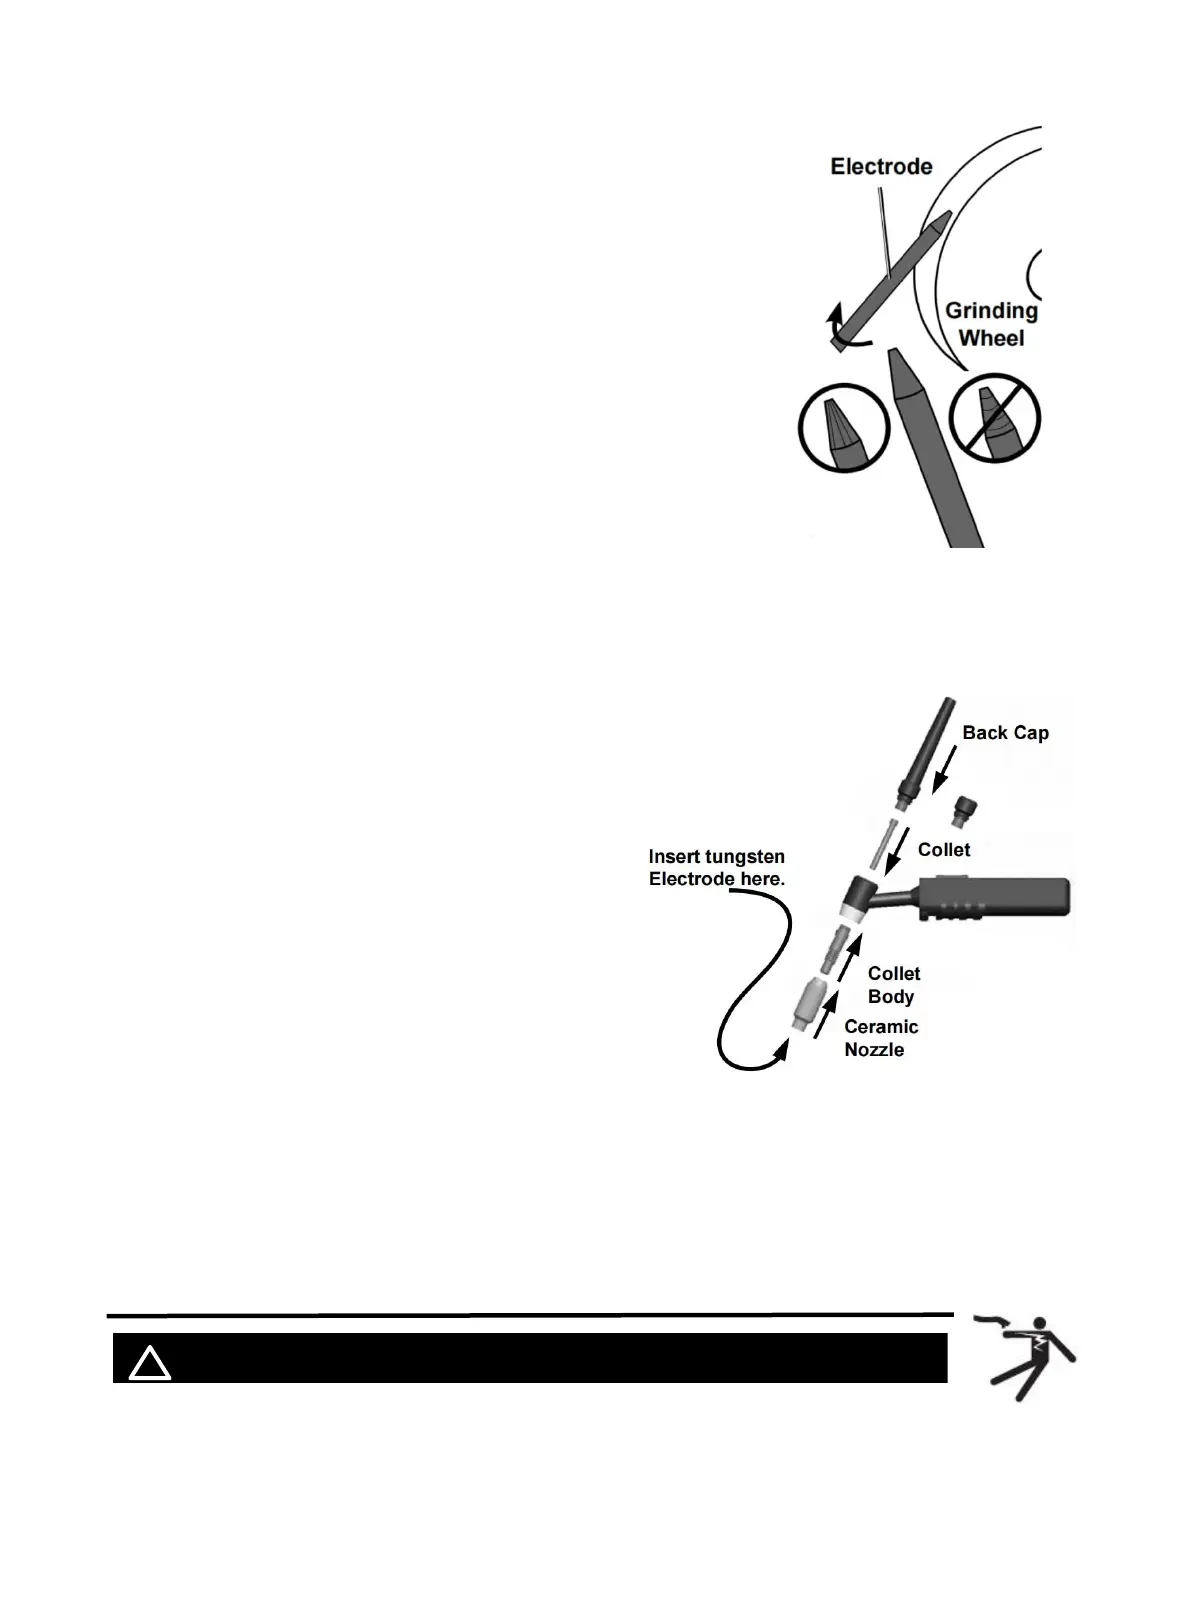
To avoid Electrode contamination, dedicate a fine grit grinding wheel exclusively to Electrode grinding.
1. Shut off the welder and wait until Electrode and Torch have cooled
enough to handle.
2. Remove Back Cap to release Collet’s grip on Electrode.
3. Pull Electrode out from front of Torch. (Pulling it from rear will damage
Collet and create burrs on Electrode).
4. If Electrode has dulled or been otherwise contaminated, use pliers or a
suitable tool to grip the Electrode above the contaminated section and
snap off the end of the Electrode.
5. Lightly press Electrode tip against the surface of the grinding wheel at an
angle. Rotate Electrode tip until a blunt point is formed.
NOTE: Grinding direction must be parallel to length of Electrode.
6. The conical portion of the ideal tip will be 2-1/2 times as long as the
Electrode diameter.
7. Re-insert Electrode into Collet with tip protruding 1/8"-1/4" beyond the
Ceramic Nozzle, then re-tighten the Back Cap to secure the Electrode in
place.
Assemble tig torch
1. Consult Settings Chart, on top of Welder, to determine
proper Tungsten Electrode size to be used with thickness
of material to be welded.
2. Match Collet and Collet Body sizes to Tungsten
Electrode size.
3. Thread Collet Body into the front of the Torch.
4. Make sure Ceramic Nozzle size is appropriate for
application.
5. Thread Ceramic Nozzle onto Collet Body.
6. Insert Collet into back of Torch and into Collet Body.
7. Insert Tungsten Electrode into Collet on front of Torch.
8. Lock Electrode in place with Back Cap. Electrode
should protrude 1/8" to 1/4" beyond the Ceramic Nozzle.
NOTE: The tig torch and tungsten electrode are not included in the machine. If you need to
purchase, please log in to the official website: WWW.ARCCAPTAIN.COM
7.5 Lift tig Welder Operation
! WARINING BEWARE OF ELECTRIC SHOCK!
Figure 37
Figure 38
https://www.arccaptain.com/