Operation Guide P341/EN O/B11
Commissioning and CHAPTER 3
Maintenance Page 31/80
MiCOM P341
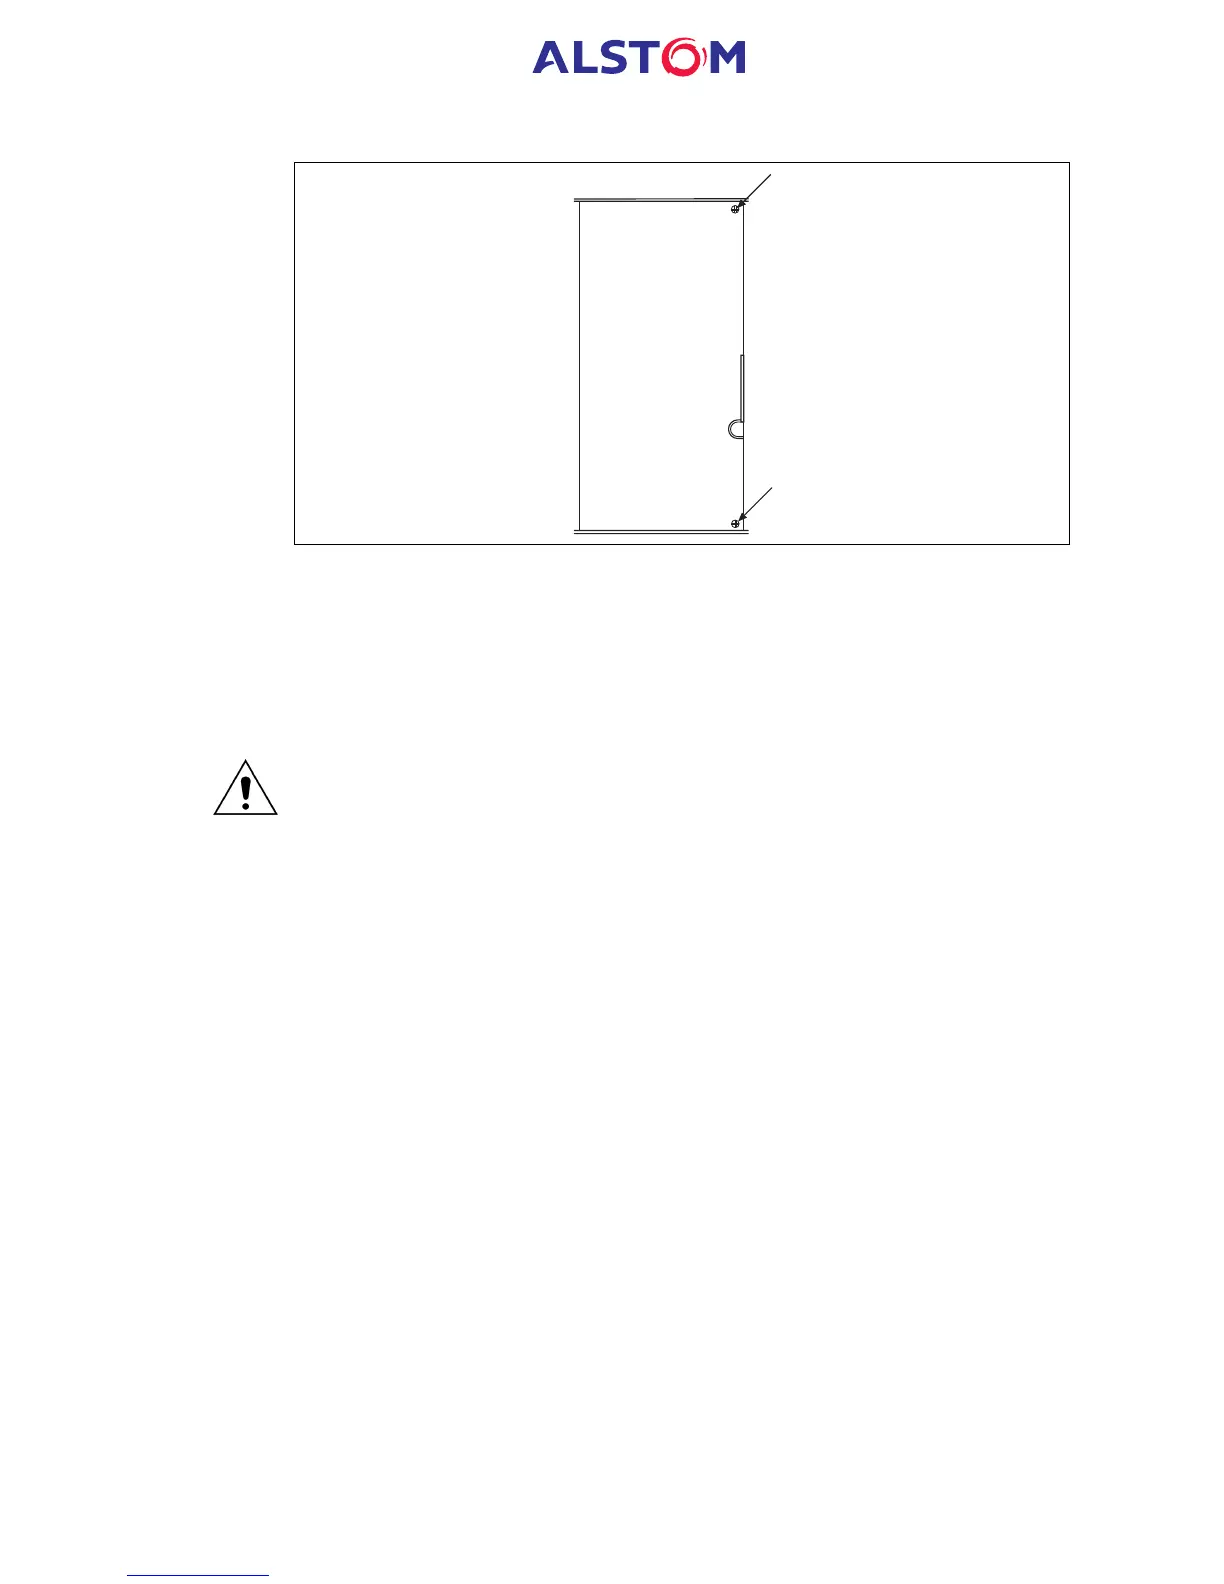
Input module
Handle
Figure 8: Location of securing screws for input module
On the right-hand side of the analogue input module in P341 relays there is a small
metal tab which brings out a handle. Grasping the handle or handles firmly, pull the
module forward, away from the rear terminal blocks. A reasonable amount of force
will be required to achieve this due to the friction between the contacts of the terminal
blocks; one medium duty and one heavy duty in P341 relays.
Note: Care should be taken when withdrawing the input module as it will suddenly
come loose once the friction of the terminal blocks has been overcome. This
is particularly important with unmounted relays as the metal case will need
to be held firmly whilst the module is withdrawn.
Remove the module from the case, taking care as it is heavy because it contains all
the relay’s input voltage and current transformers.
Before fitting the replacement module check that the number on the round label
adjacent to the front edge of the PCB matches the slot number into which it will be
fitted. If the slot number is missing or incorrect write the correct slot number on the
label.
The replacement module can be slotted in using the reverse procedure, ensuring that
it is pushed fully back on to the rear terminal blocks. To help confirm that the
module has been inserted fully there is a V-shaped cut-out in the bottom plate of the
case that should be fully visible. Re-fit the securing screws.
Note: The transformer and input boards within the module are calibrated together
with the calibration data being stored on the input board. Therefore it is
recommended that the complete module is replaced to avoid on-site
recalibration having to be performed.
Refit the front panel using the reverse procedure to that given in section 8.3.2. After
refitting and closing the access covers on size 60TE cases, press at the location of the
hinge-assistance T-pieces so that they click back into the front panel moulding.
Once the relay has been reassembled after repair, it should be recommissioned in
accordance with the instructions in sections 1 to 7 inclusive of this chapter.



 To Next Page