58
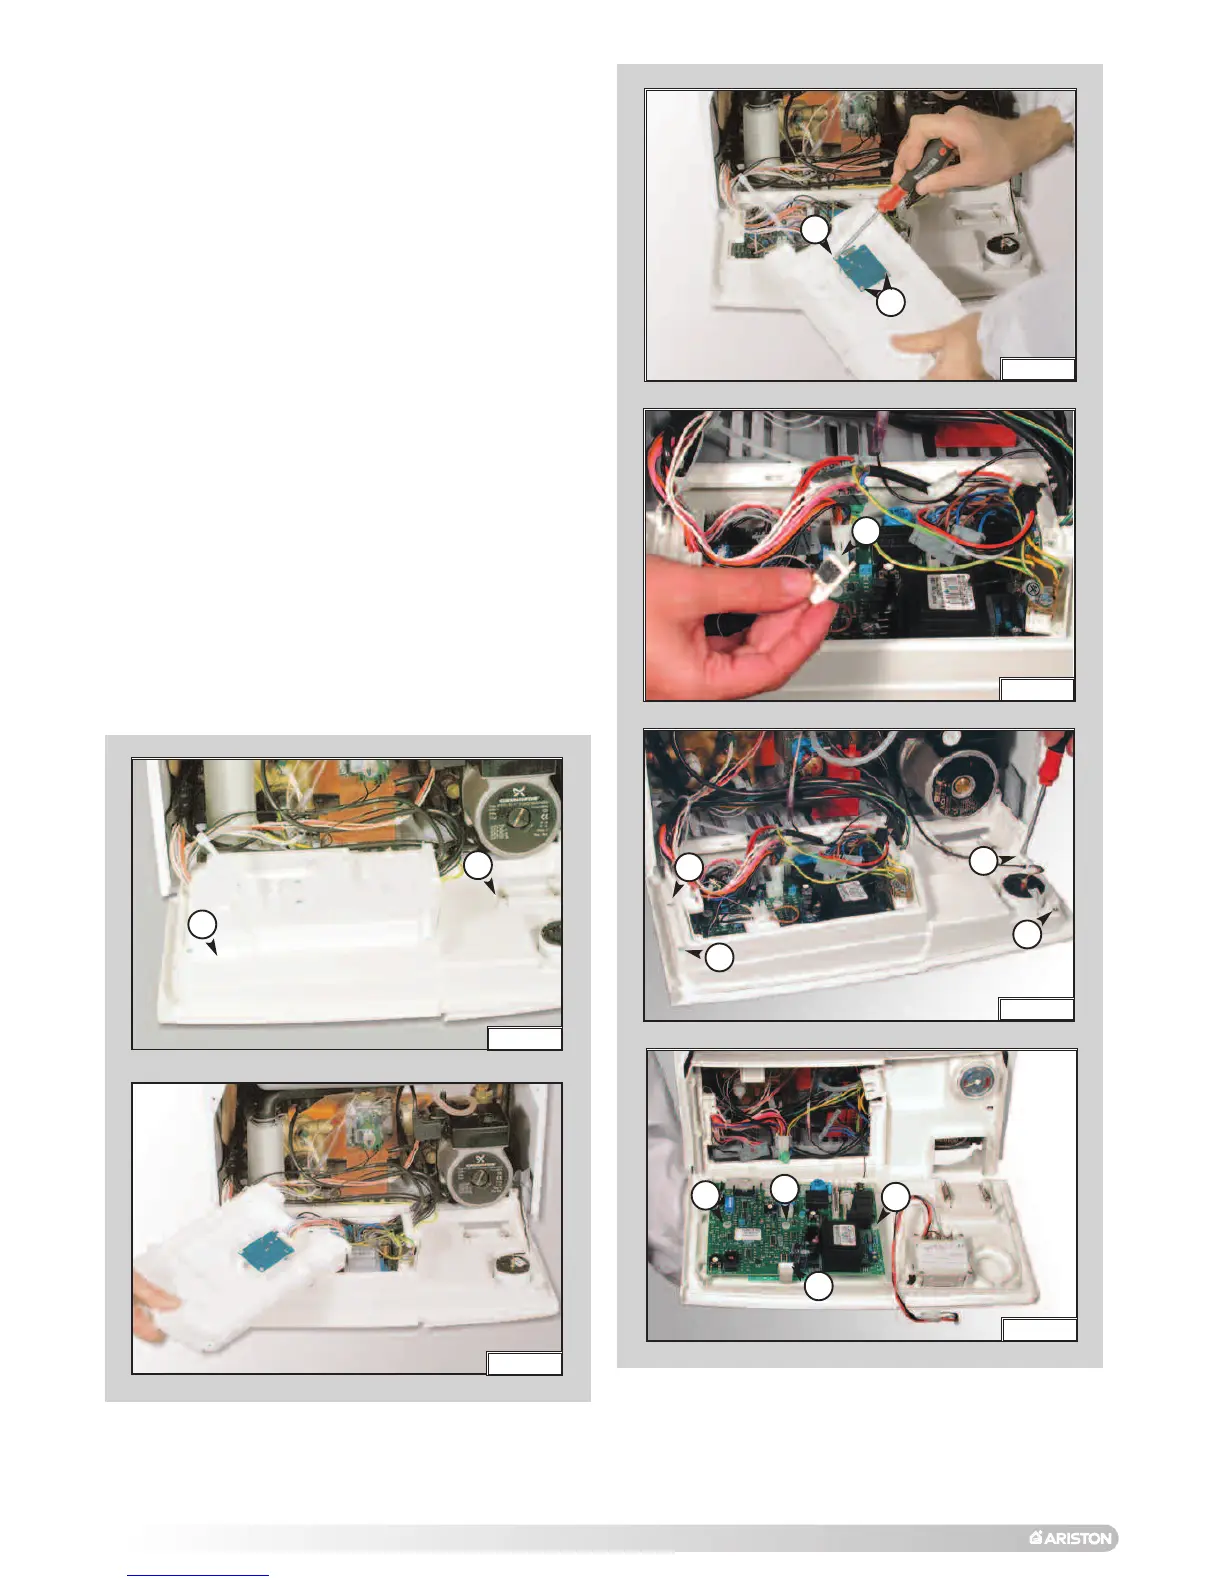
6.6.2 Removing the P.C.B.
1. Isolate electricity;
2
.
R
emove the inspection cover from the reverse of the
control panel, unscrew the screws “C7” (FIG. 6.85);
3. Unplug all electrical connections from the recuperator
P.C.B on the reverse of inspection cover (FIG. 6.86);
4
.
U
nscrew the recuperator P.C.B mounting screws “C8”
(
F
IG.
6.87);
5. Unplug the electrical connection from the P.C.B.;
6. Unplug carefully the EEPROM “C9” (FI
G
. 6.88);
7. Remove the screws “D1” (FIG. 6.89);
8. Separate the facia panel from the rear of the control
panel ;
9. Remove the main P.C.B., unscrew the screws “D2”,
and disconnect the P.C.B. connection cable “D3” (FI
G
.
6.90)
10. Unscew the display P.C.B. mounting screws “D4”
(FIG. 6.91);
11. Remove the display P.C.B. (FIG. 6.92);
12. Replace either P.C.B. in reverse order;
13. Use the correct EEPROM key “C9” supplied with the
new spare part.
FIG. 6.85
C7
C7
FIG. 6.86
FIG.
6.87
FIG. 6.89
FIG. 6.90
D1
D1
D1
D1
C8
C8
FIG. 6.88
C9
D2
D2
D2
D3
 Loading...