EasyManuals Logo

Aritech 2X Series User Manual

Aritech 2X Series
140 pages
To Next Page IconTo Next Page
To Previous Page IconTo Previous Page
Page #74 background imageLoading...
Page #74 background image
Chapter 3: Configuration and commissioning
68 2X Series Installation Manual
To update the firmware:
1. Select Panel setup from the Main menu, and then select Firmware update.
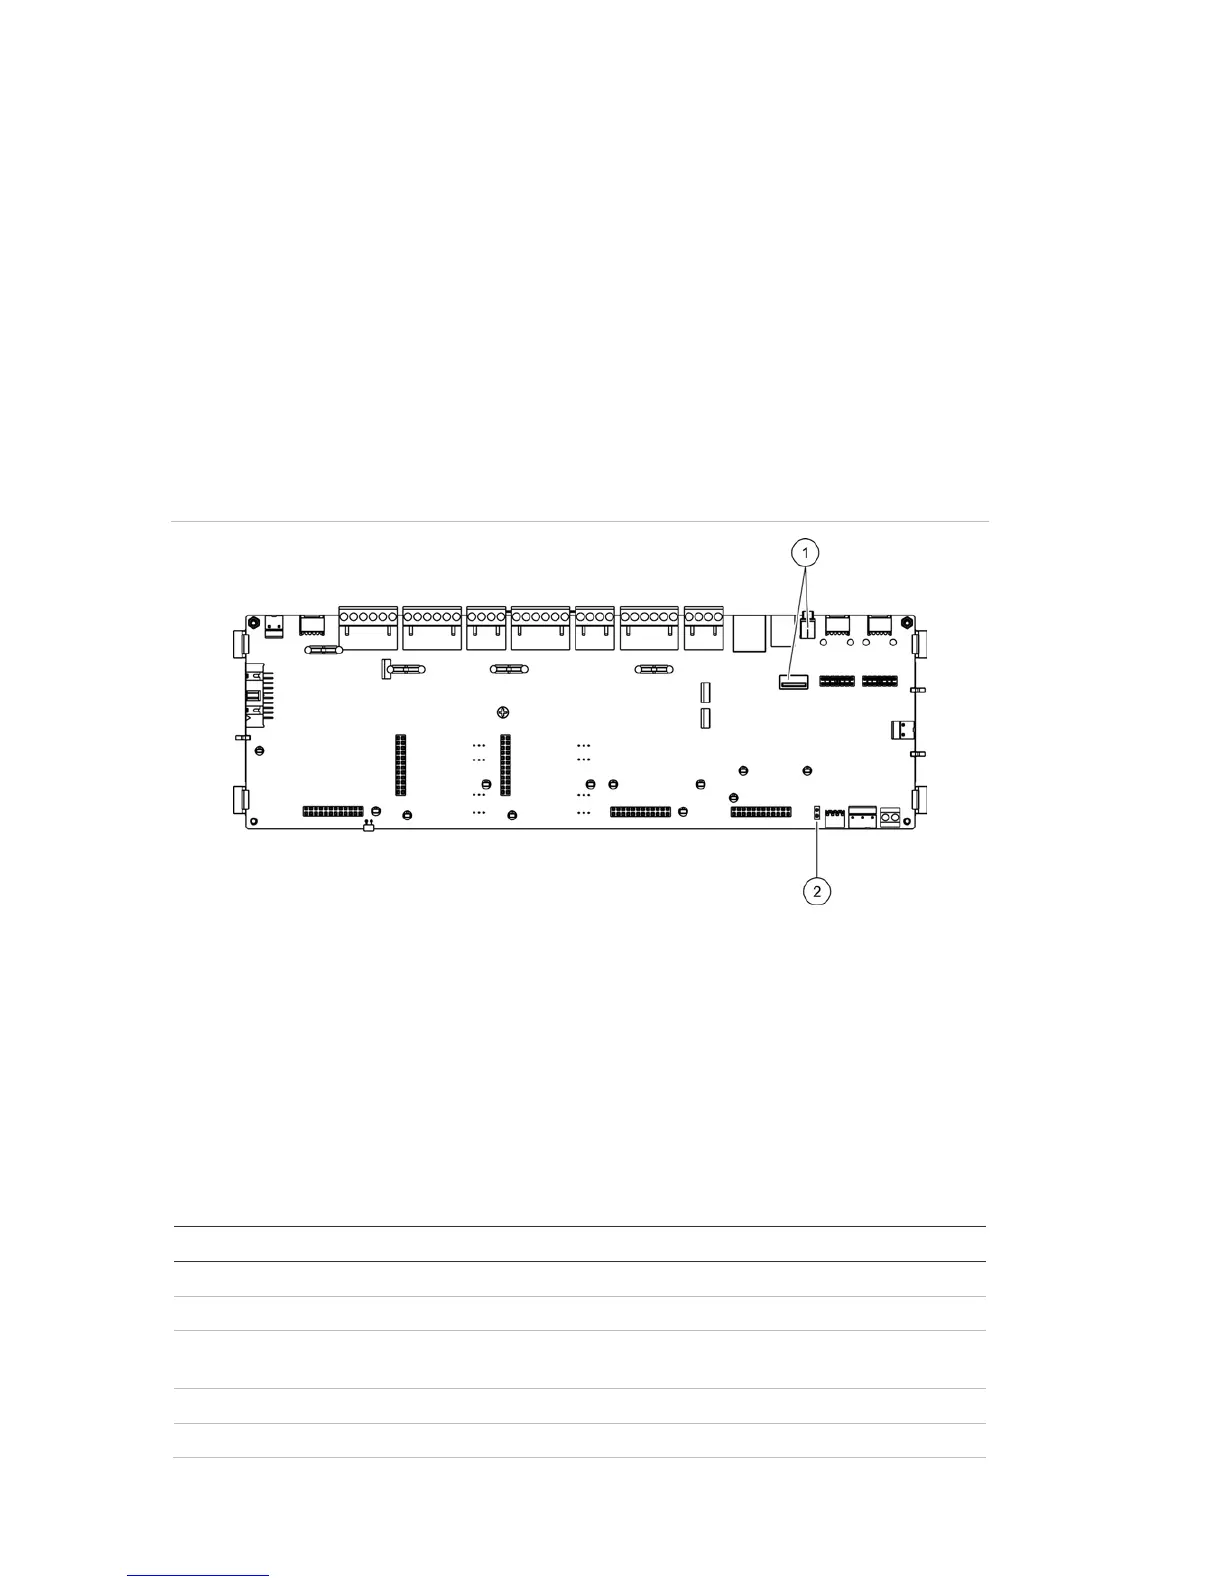
2. When prompted, open the control panel door and install a jumper onto JP4 on
the control panel PCB (see Figure 23 on page 68), and then press F3
(Reboot).
The control panel reboots. Follow the on-screen instructions.
3. When prompted, insert the USB flash drive with the firmware update into
either of the USB type A connectors, and then press F3 (Continue).
4. When prompted, remove the USB flash drive as described in “Removing a
USB deviceon page 44.
Figure 23: USB and JP4 connectors on the control panel PCB
1. USB connectors
2. JP4
Printer configuration
Select the Printer configuration option to configure external or internal printers,
where available. Configuration options are shown in the table below. By default,
all printer configuration options are disabled.
Table 28: Printer configuration options
Option
Description
Used
Configures the printer status (used or not used)
RportMd [1]
Configures the external printer for report printing
NWEvent
[2] Configures the printing of system events for all control panels in the
network
Alarm
[2] Configures the printing of alarm events
Fault
[2] Configures the printing of fault events

Table of Contents

Other manuals for Aritech 2X Series

Questions and Answers:

Question and Answer IconNeed help?

Do you have a question about the Aritech 2X Series and is the answer not in the manual?

Aritech 2X Series Specifications

General IconGeneral
CertificationsEN54-2, EN54-4
Power Supply230V AC, 50Hz
Battery Capacity7Ah
Current ConsumptionStandby: 50mA
Humidity RangeUp to 95% RH, non-condensing

Related product manuals