109
Exercise M - Manual control of Heater
Objective
To control the temperature in a process vessel manually by controlling power to a
heating element.
Overview
The temperature within the process vessel is monitored using a thermocouple type
sensor. By manually switching the power to a heating element on or off, the
temperature within the vessel is regulated to maintain the required set point.
Equipment Required
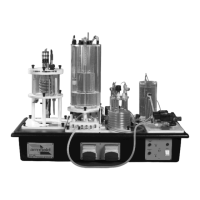
PCT40 bench with small process vessel containing a heating coil.
Equipment set up
Ensure that the apparatus has been set up according to the Installation section. The
lid with heating coil should be in position on the small process vessel, with the coil
surrounding the heating element. The apparatus should be connected to a suitable
PC with the PCT40 software installed, using the grey USB cable supplied.
Switch on mains power to the console and run the PCT40 software. Select ‘Section
5: Temperature Control (direct batch heating)’.
Select ‘Configure’ from the Sample menu, and set sampling to Automatic at intervals
of 30 seconds, with duration as Continuous.
Fill the small process vessel with water:
Using a length of tubing with a quick release fitting at both ends, connect the PSV to
one of the fittings on the side of the small process vessel. Ensure that the other fitting
on the side of the process vessel is not connected.
Close the drain valve on the process vessel.
In the software, set the PSV to 100% and watch as the small process vessel fills with
water.
Wait until the coil inside the vessel is fully covered with water and the level has
reached the level sensor mounted in the lid, then set the PSV to 0%.
Disconnect the tube from the small process vessel, and then disconnect the other
end from the PSV.
Take a length of tube with a quick release fitting at one end and a Guest push fitting
at the other. Connect one end to the PSV and the other end to the coil inside the
small process vessel (via the push fitting mounted on the lid).
Take a second length of tube with a quick-release fitting at one end and a drain valve
at the other. Connect this end to the other side of the coil, and direct the opposite end
of the tube to a suitable drain. Open the drain valve at the end of the tube.
Check that the drain valve on the end of the plinth is open and that it is connected to
a suitable drain.