1508685 Rev D CHP Max Element Management Modules CHP-CMM, CMM-1, SMM, and SMM-1 6-19
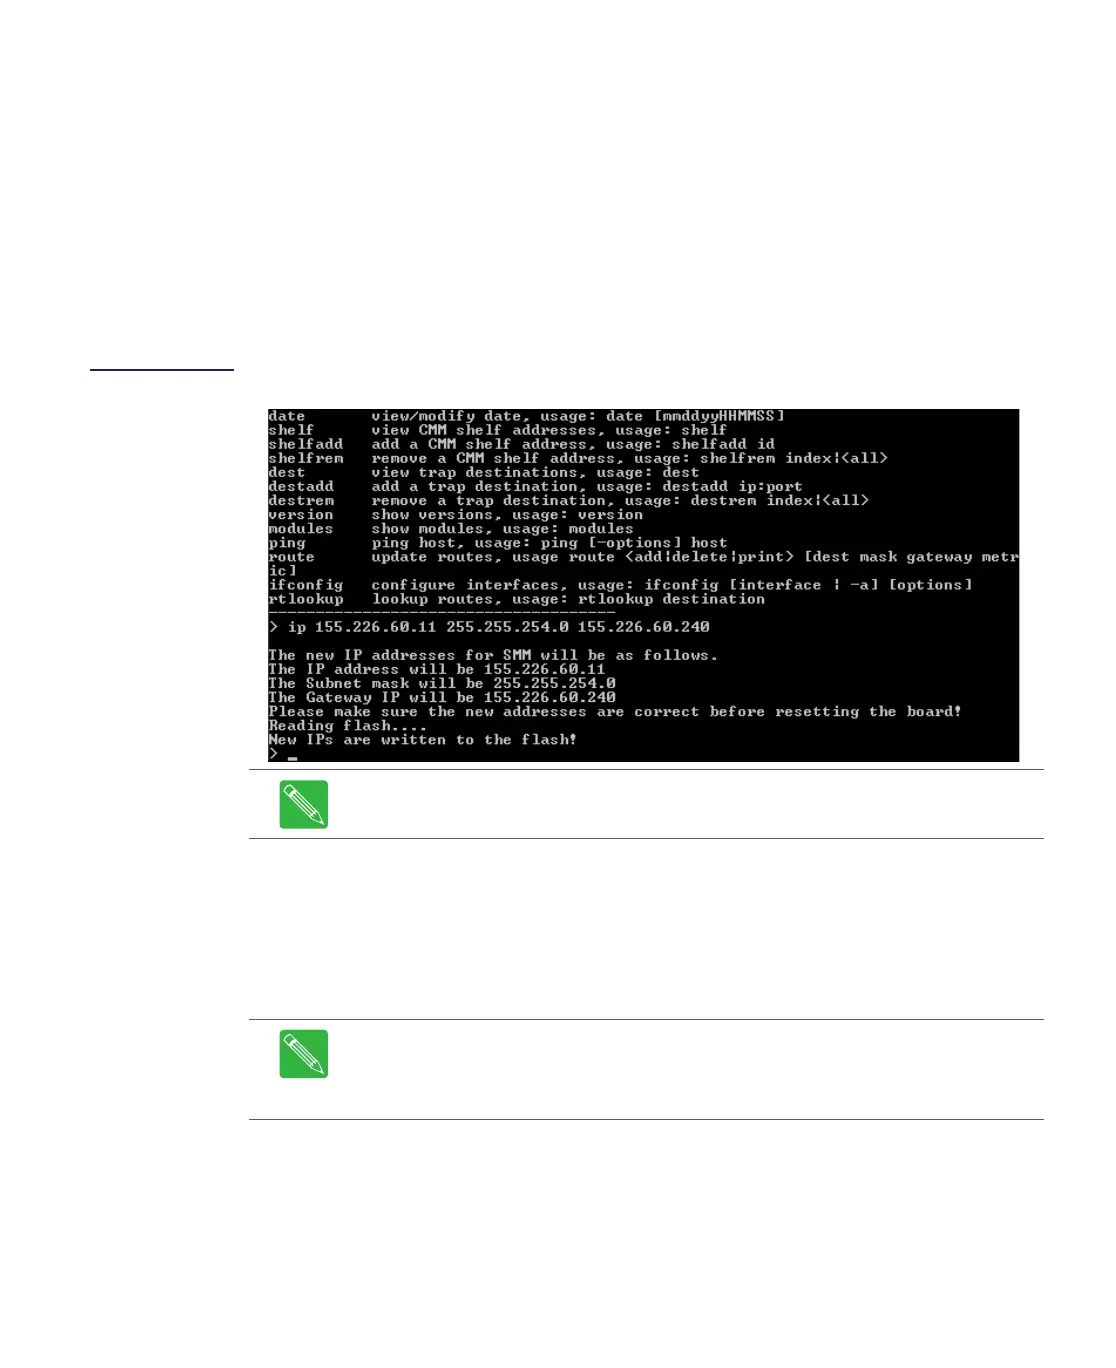
For your PC to communicate with the new SMM IP address, change the PC’s IP address
so that the first three segments of the PC’s IP address are identical to the new SMM IP
address and the last segment is different than the new SMM IP address. The subnet
mask of the PC needs to be changed to match the subnet mask of the SMM. For
example, set the PC’s IP address as follows:
Figure 6.12
Example of
Changing IP, Subnet
Mask, and Gateway
Addresses
9. Enter the current date for this SMM by typing date <mmddyyHHMMSS>.
For example, type date 070403134515 and press the Enter key to enter a date of July
4, 2003 and time of 1:45:15 PM.
➤ To add/remove a CMM or SMM shelf to the network
10. Enter the five digits on the CMM Address label (manufactured on or after 7-1-2005)
or the last five digits of the CMM or SMM serial number (manufactured before
7-1-2005) installed in the CHP chassis. These five digits are the CMM address, even
if you are using a SMM. Refer to Figure 6.5 on page 6-11 for the location of the serial
number on the CMM or SMM.
PC’s IP address = 155.226.60.xx
PC’s subnet mask = 255.255.254.0
where xx = 00 to 10 or 12 to 254
Note Step 9 is only required for SMM modules and to timestamp CHP traps.
Note Using the shelfadd command to configure shelves that are not physically
connected to the CHP network may slow down the polling, since the SMM will try to
communicate with a nonexisting shelf. Only use the shelfadd command to
configure shelves that are connected to the CHP network.