Rev D System Management Module 2 (SMM-2) 7-35
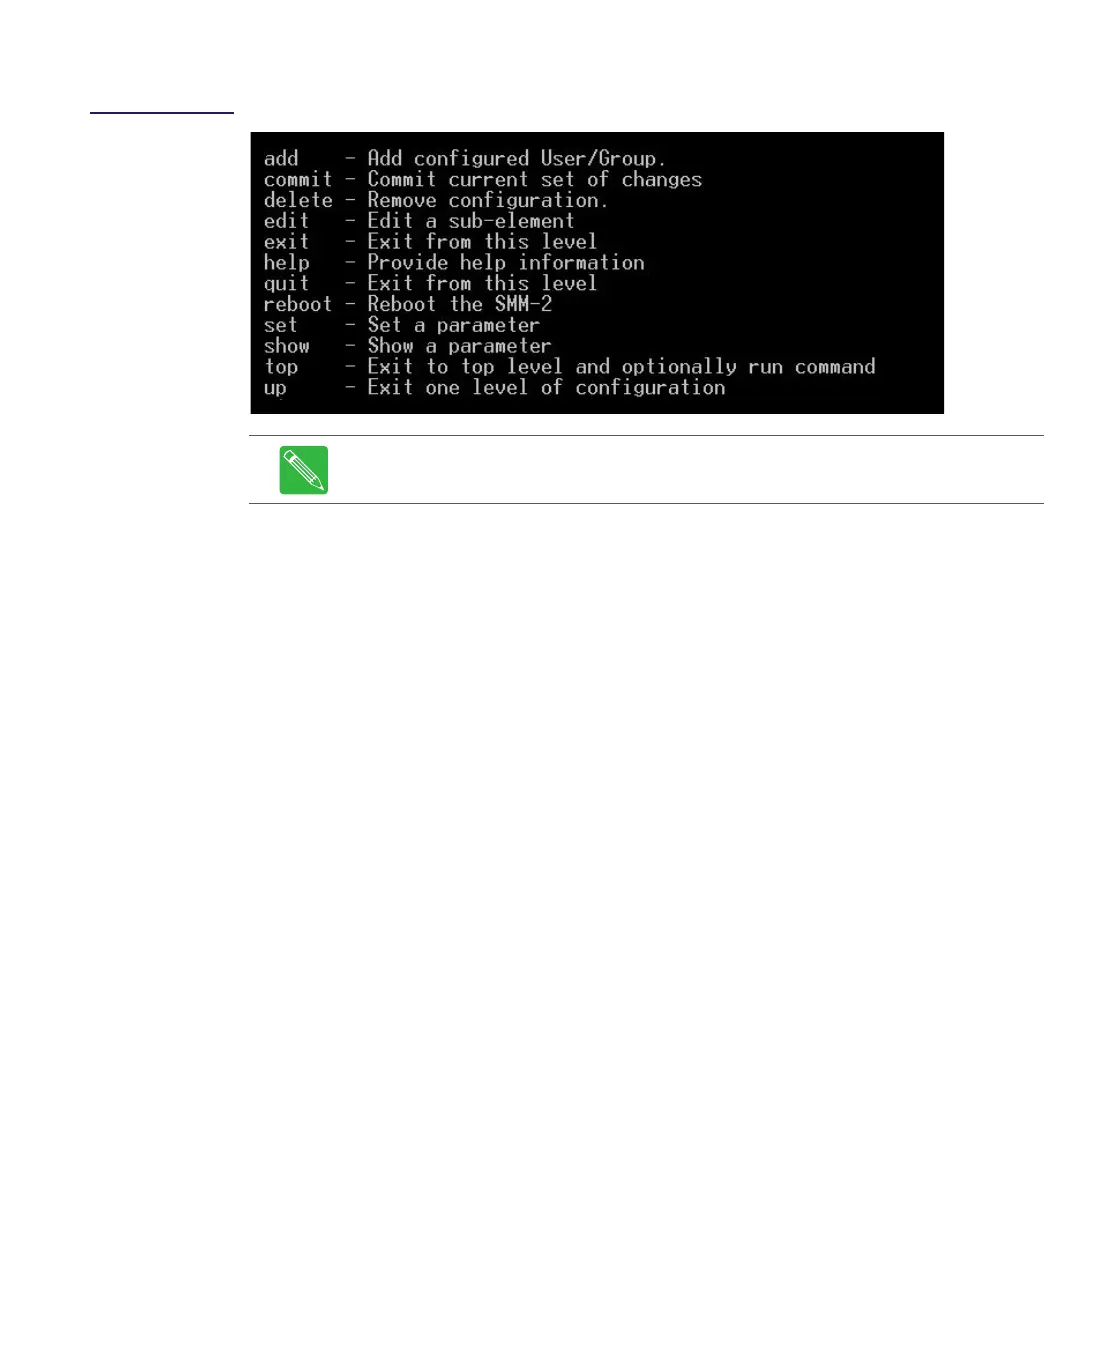
Figure 7.30
Configuration Level
CLI Commands (%)
IP Address
To set the IP address, proceed as follows:
1. After login, at the admin@192.168.1.1> prompt, type configure and press the Enter
key.
2. At the admin@192.168.1.1% prompt, type set interfaces and press the <TAB> or
<SPACE>? to view all the parts of the IP Address command:
– eth0 <string>sets the IP address to the value contained in the <string>
– mask <string>sets the IP mask to the value contained in the <string>
– gateway <string>sets the gateway to the value contained in the <string>
3. Press the Enter key after the IP Address command string is complete with all of its
parts, not just one or two parts. For example, set interfaces eth0 10.113.130.110
mask 255.255.255.0 gateway 10.113.130.254 and not just set interfaces eth0
10.113.130.110.
4. At the admin@192.168.1.1% prompt, type commit and press the Enter key.
The SMM-2 will log you off the system. When you log back on, the
admin@10.113.130.110 prompt will reflect the new IP address of the SMM-2.
SNMP
To set SNMP (Simple Network Management Protocol), proceed as follows:
1. After login, at the admin@192.168.1.1> prompt, type configure and press the Enter
key.
2. At the admin@192.168.1.1% prompt, type set snmp and press the <TAB> or
<SPACE>? key to view the available SNMP command options:
– community to change the SNMP Community Strings
Note The following commands are administrator group command, except for the
Help command, which may be used by all users.