■ For Beaver Die-Head 1/2"-2"
[Removal]
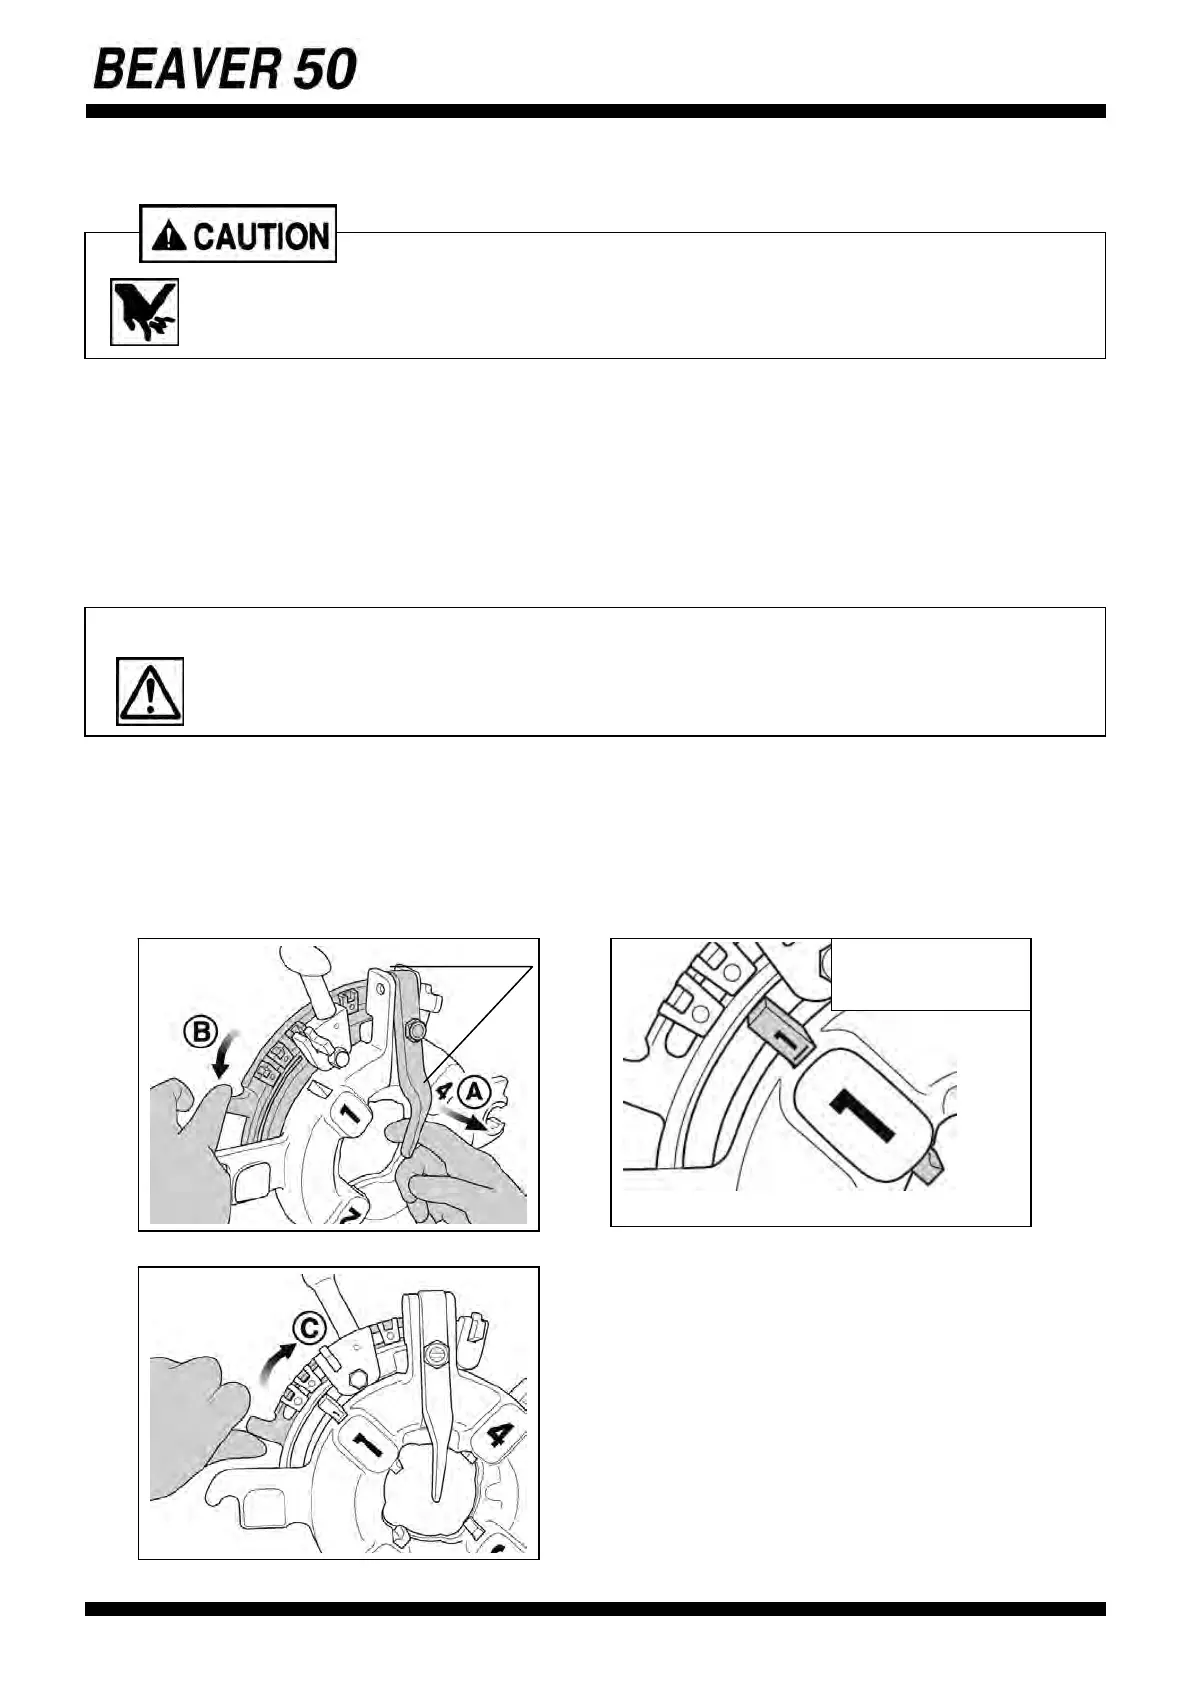
(1) Remove the Location Plate. Pull locking lever toward “A” to open dies. Slide cam plate fully
toward ”B” .(fig17)
(2) When the Die-Head is lowered, pull out Dies Nos. 1 and 4 from above.
(3) Lift and remove the Die-Head and pull Dies Nos. 2 and 3 downward.
[Installation]
(1) Remove the Location Plate. Pull locking lever toward “A” to open dies. Slide cam plate fully
toward ”B” . (fig.17)
(2) Insert Dies with the same number as that of Die-Head until click sound is heard. Make sure the
numbers of Die-Head and Dies show on same side.(fig.18)
(3) Side cam plate toward “C” until a click sound is heard form locking lever. (fig.19)
19
・Wear gloves to avoid cutting hands by the Dies.
・Proper threading cannot be achieved unless the number on the Die-Head slot
matches that of the Dies.
Locking Lever
Number shown on
the same side.
〈17〉
〈18〉
〈19〉