NETWORK-SWITCH-LP01 – Configuration Guide
U-0641-3675.docx – Issue: 01 complete, approved
Page 24 of 28
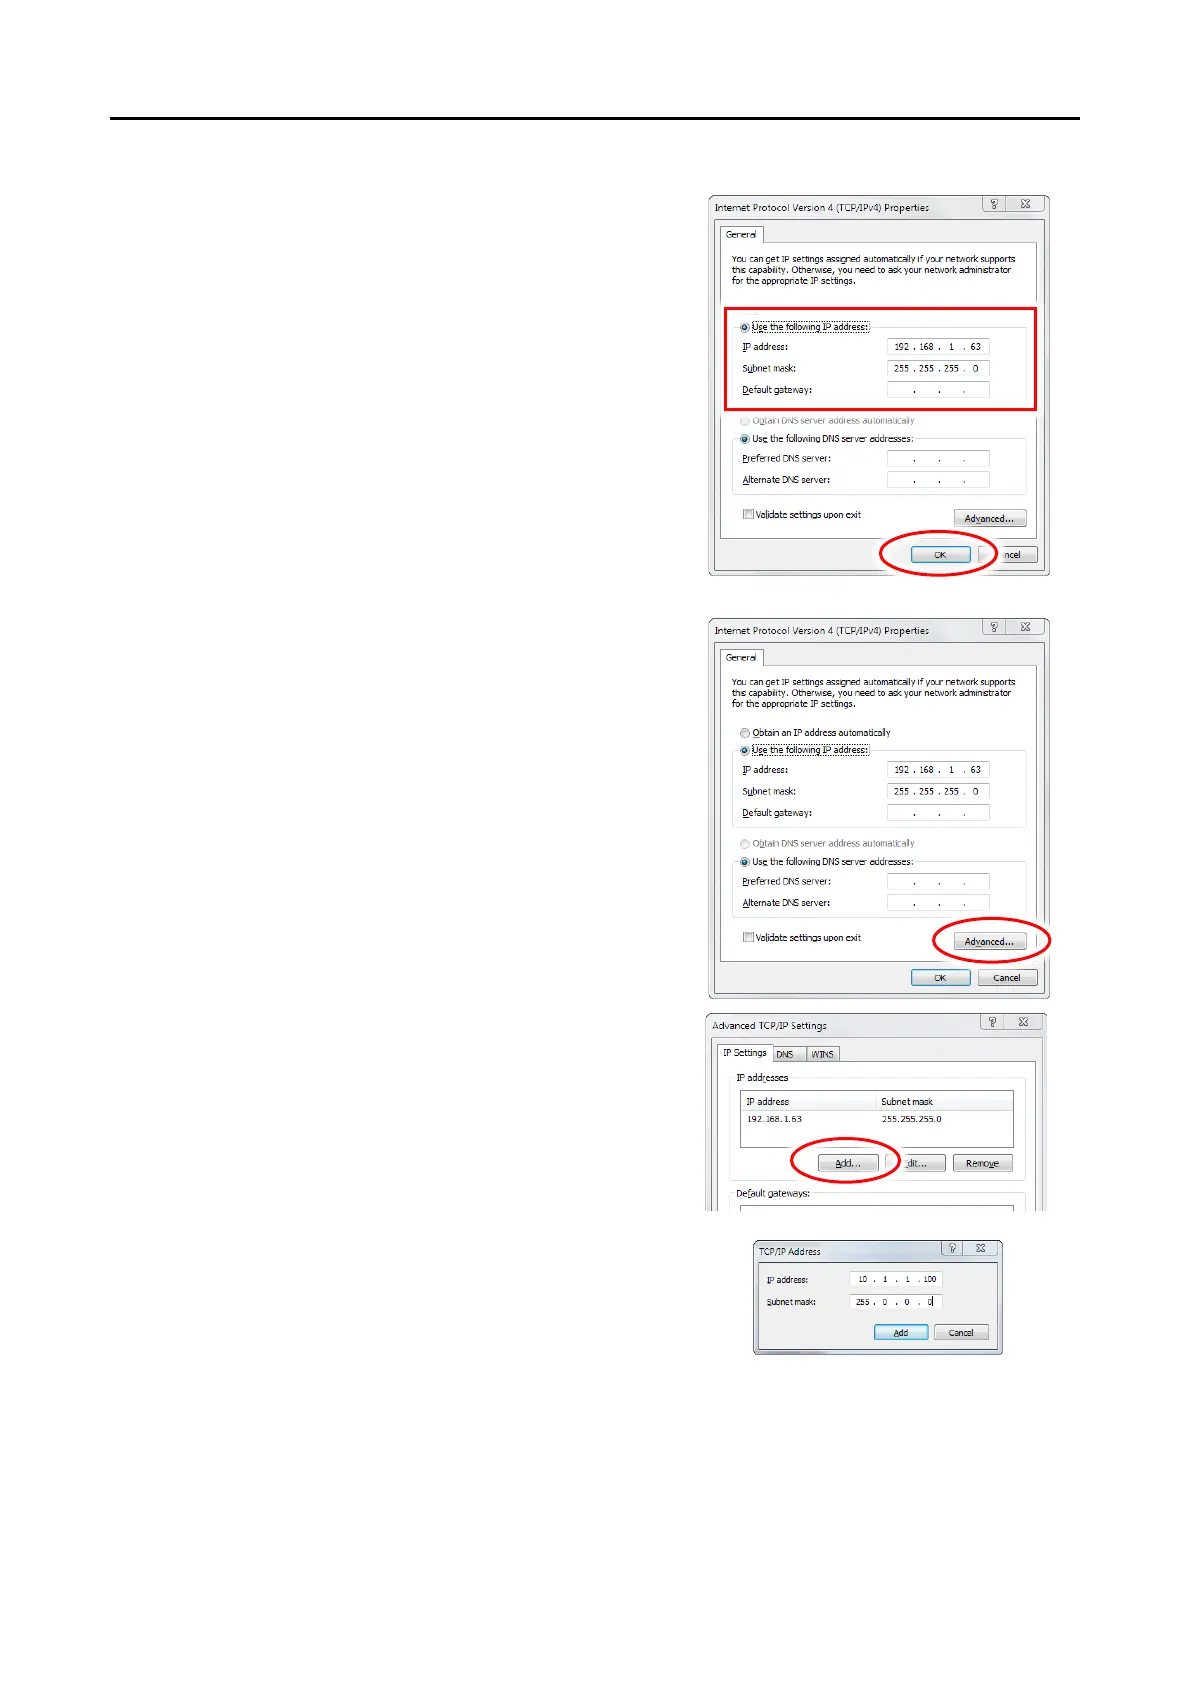
h. The Internet Protocol Version 4 (TCP/IPv4)
Properties window will be displayed.
i. Click the Use the following IP Address option and
enter the configuration PC’s IP address.
Ensure the PC’s IP address is in the same subnet as
the target unit.
In the example on the right:
• Target units in a 192.168.1.0/24 network.
• Configuration PC on a free address in the same
subnet (e.g. 192.168.1.63).
j. Enter the required Subnet mask or press the TAB key
on the keyboard (Windows will set the default subnet
mask).
k. Click the OK button to apply the changes.
Multiple IP addresses can be assigned to a single network
interface.
To assign multiple IP addresses to a network interface:
a. Re-load the Internet Protocol Version 4 (TCP/IPv4)
Properties window.
b. Click the Advanced button.
c. Click the Add button on the Advanced TCP/IP
Settings window.
d. Enter the configuration PC’s IP address in the new
subnet.
In the example on the right:
• Target units in a 10.1.1.0/24 network.
• Configuration PC on a free address in the same
subnet (e.g. 10.1.1.100).
e. Enter the required Subnet mask or press the TAB key
on the keyboard (Windows will set the default subnet
mask).
f. Click the Add button.
g. Repeat the procedure for all required subnets.