Chapter 2: Hardware Setup
2-12
1. Remove the drive tray.
Refer to section
2.4.1
Installing the 3.5-inch SATA HDD/SAS HDD
for the steps on
removing the drive tray.
4. Replace the drive tray.
Refer to section
2.4.1
Installing the 3.5-inch SATA HDD/SAS HDD
for the steps on
replacing the drive tray.
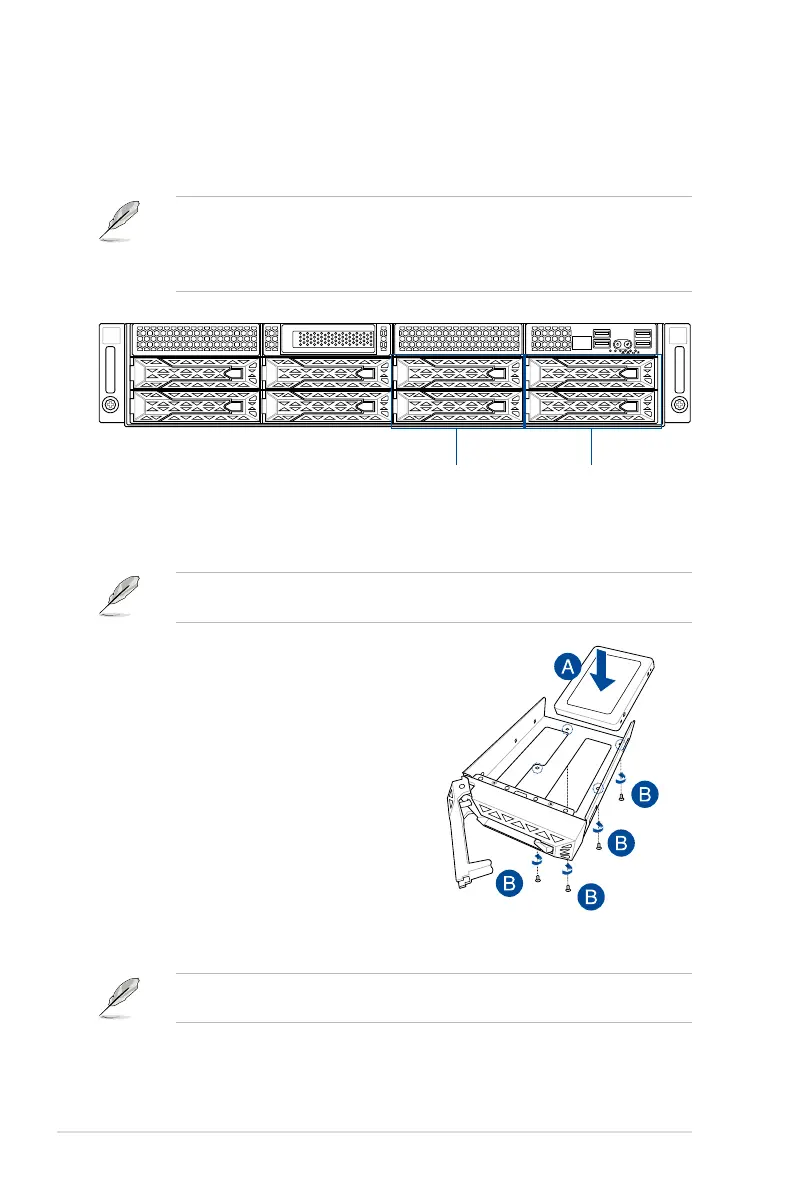
2. Prepare the SSD/SATA HDD/SAS HDD/
NVMe and the bundled set of screws.
3. Place the SSD/SATA HDD/SAS HDD/
NVMe into the tray (A) then secure it
with four screws (B).
2.4.2 Installing the 2.5-inch SSD/SATA HDD/SAS HDD/NVMe
1
2
Storage device bay 7 and 8
(default NVMe)
Storage device bay 5 and 6
The NVMe drives may be installed in storage device bays 5, 6, 7, and 8 as shown in the
illustration below:
• The default storage device bays to install NVMe drives are storage device bays 7 and 8.
• Support for NVMe drives for storage device bays 5 and 6 is optional, please refer to
section
2.8.3 U.2 drives (optional)
before installing a NVMe drive to storage device
bays 5 and 6.
5. Repeat steps 1 to 4 to install additional SSD/SATA HDD/SAS HDD/NVMe.