2-14
Chapter 2: Hardware information
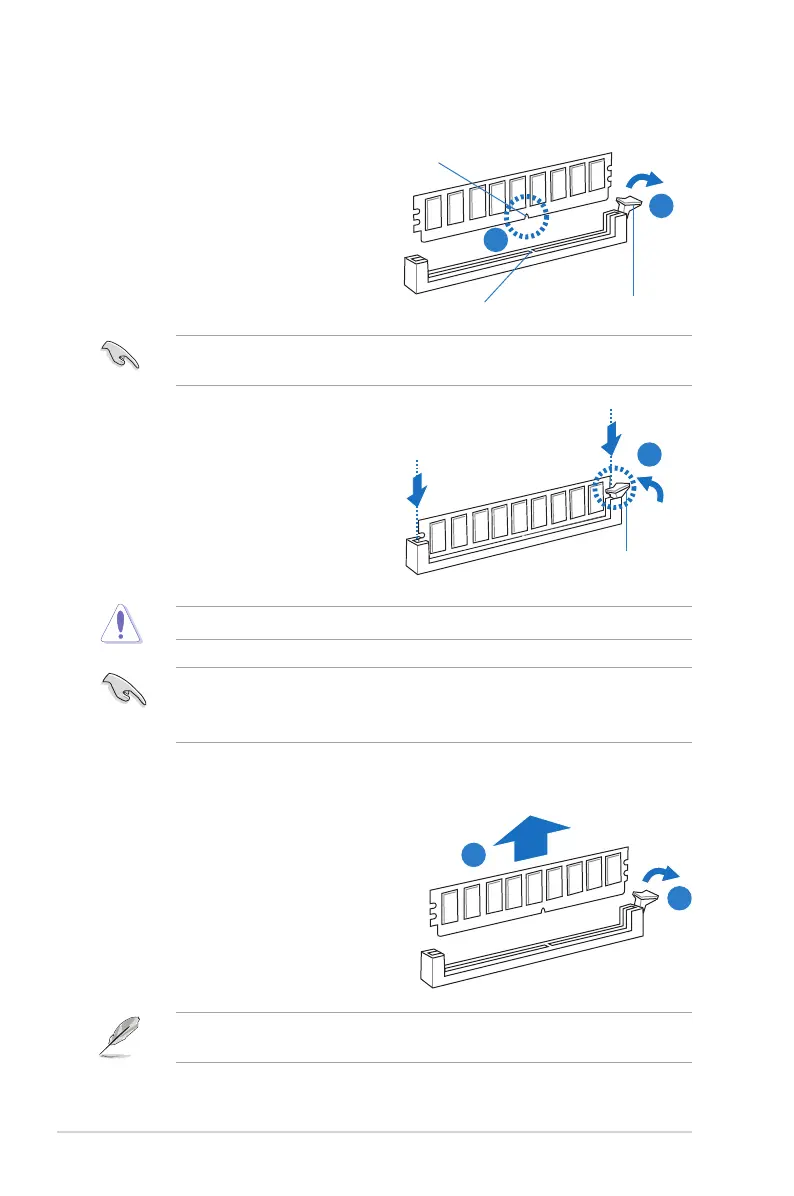
2.4.3 Installing a DIMM on a single clip DIMM socket
3. HoldtheDIMMbybothofitsends,
theninserttheDIMMverticallyintothe
socket.Applyforcetobothendsofthe
DIMMsimultaneouslyuntiltheretaining
clipsnapsbackintoplace,andthe
DIMMcannotbepushedinanyfurther
toensurepropersittingoftheDIMM.
Locked Retaining Clip
3
1. UnlockaDIMMsocketbypressingthe
retaining clip outward.
2. AlignaDIMMonthesocketsuchthat
thenotchontheDIMMmatchesthe
DIMMslotkeyonthesocket.
Unlocked retaining clip
DIMM notch
2
1
DIMM slot key
1. Press the retaining clip outward to
unlocktheDIMM.
2. RemovetheDIMMfromthesocket.
1
2
Removing a DIMM from a single clip DIMM socket
• ToinstalltwoormoreDIMMs,refertotheuserguidebundledinthemotherboard
package.
• Refertotheuserguideforqualiedvendorlistsofthememorymodules.
SupporttheDIMMlightlywithyourngerswhenpressingtheretainingclips.TheDIMM
mightgetdamagedwhenitipsoutwithextraforce.
AlwaysinserttheDIMMintothesocketVERTICALLYtopreventDIMMnotchdamage.
ADIMMiskeyedwithanotchsothatittsinonlyonedirection.DONOTforceaDIMM
intoasocketinthewrongdirectiontoavoiddamagingtheDIMM.