21
Installation
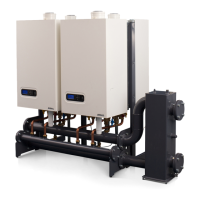
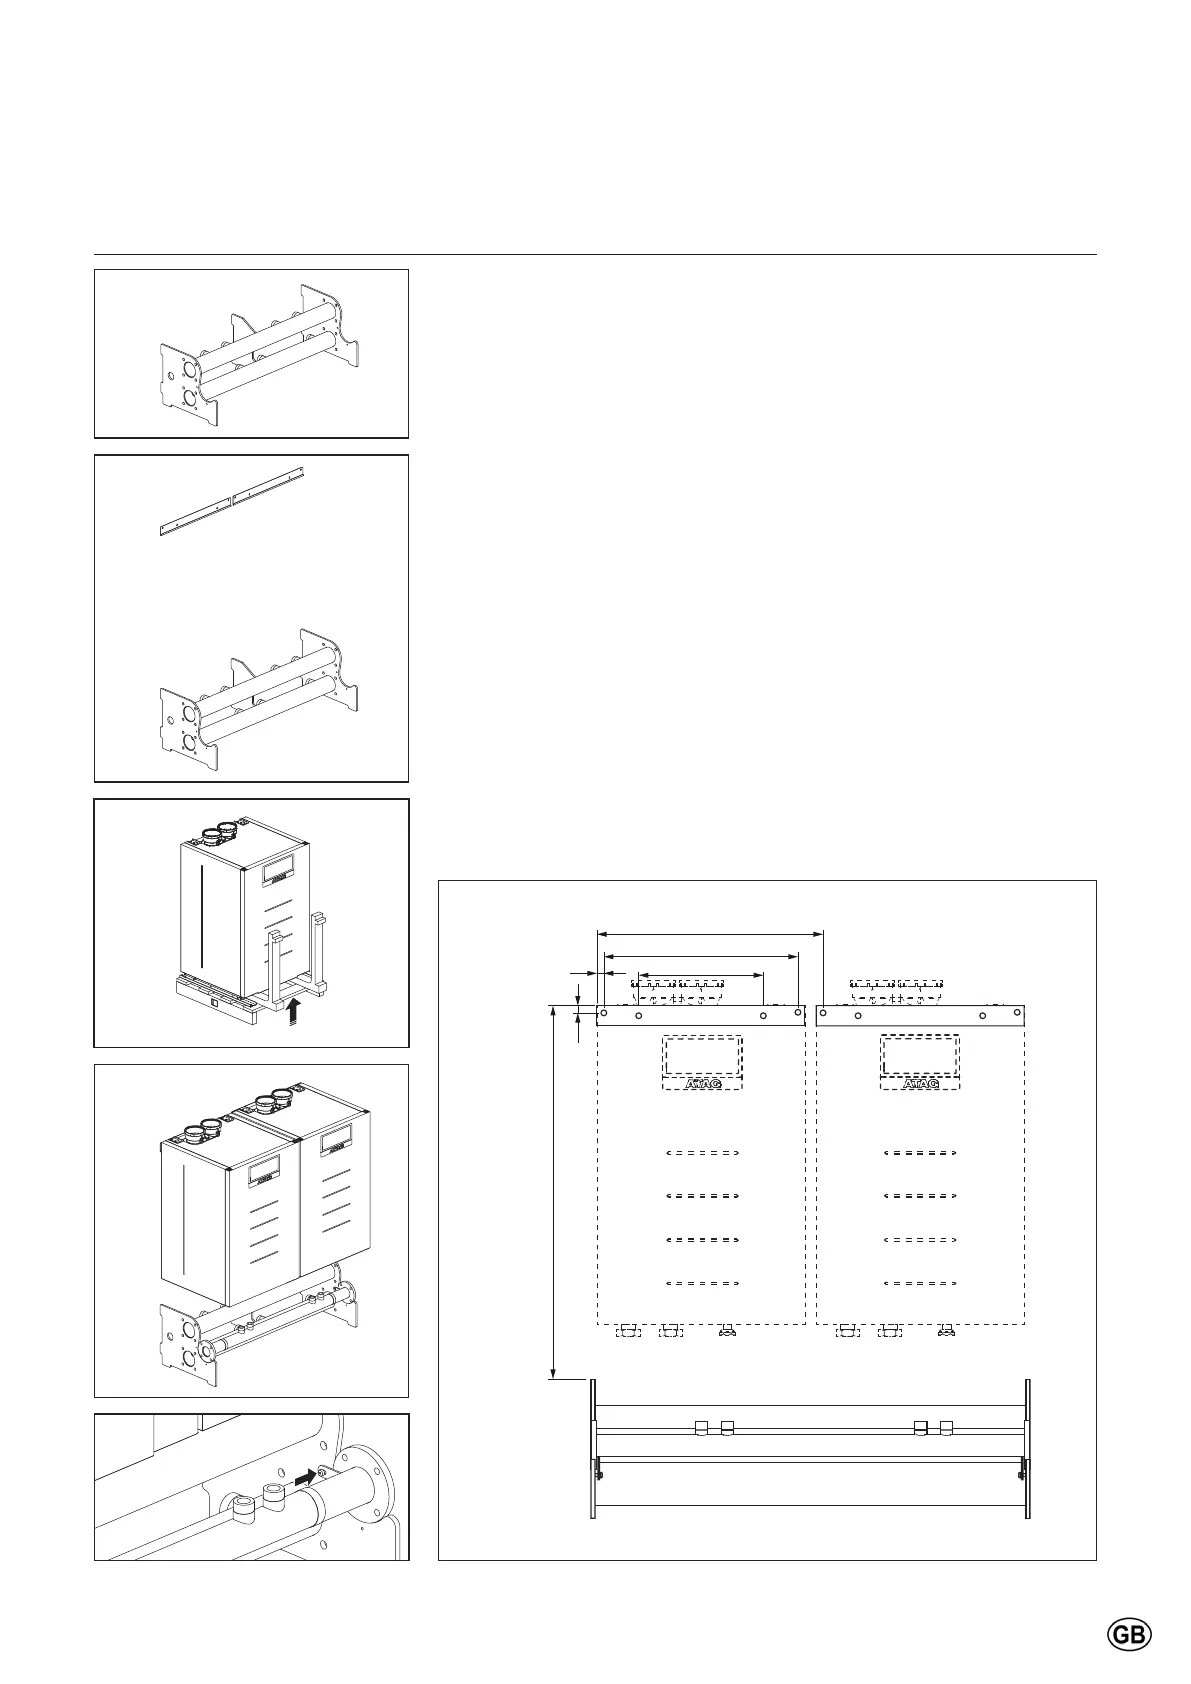
Cascade wall mounted in line
3RVLWLRQWKHÀRZDQGUHWXUQKHDGHU
against the wall. When using
VHYHUDOÀRZDQGUHWXUQKHDGHUV
FRQQHFWWKHÀRZDQGUHWXUQKHDGHUV
and supplied gaskets, M12 (DN65)
or M16 (DN100) bolts, spring
washers
DQGQXWV$OLJQWKHÀRZDQGUHWXUQ
header(s) horizontally using the
adjustable feet.
2. Determine the position of the
suspension brackets based on
¿JXUHE7KHERLOHUVFDQEH¿WWHG
on the wall using the supplied
suspension brackets and mounting
material (minimum of 4 screws for
each boiler). The wall has to be
ÀDWDQGVWURQJHQRXJKWRFDUU\WKH
weight of all boilers including their
water contents.
3. Hang the boilers on the back
suspension Brackets.
For the lifting refer to “Lifting
and carrying precautions”
on page 18.
1250
15
700
20
650
430
4. Place the gas line in its intended
VSDFH:KHQXVLQJVHYHUDOÀRZ
and return headers: connect the
gas lines using the supplied DN65
gaskets, M12 bolts, spring washers
and nuts.
5. Fasten the gas line with the 2
special close tolerance bolts
0[[RQHDFKÀDQJHRIWKH
ÀRZDQGUHWXUQKHDGHUV
Continue with page 24.
2b
1
2
3
4
5
A
 Loading...