Syn248 Installation and Configuration Guide Back to Contents
Installation 18
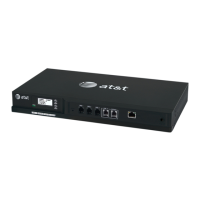
Connect the Gateway to the network:
1. Connect the supplied Cat.-5 LAN cable (or a comparable substitute) from your office
LAN to the Gateway LAN port.
Figure 7. Gateway Power and LAN Connections
2. Plug the AC plug into an electrical outlet not controlled by a wall switch and the DC
plug into the DC Power jack on the Gateway, as shown in Figure 7. Wait up to one
minute until the screen lights up.
The Gateway takes about a minute to power up. The Line LEDs blink for up to 15
seconds during initialization, then turn off.
After another Syn248 device is installed, and after the Gateway has found the
network and the other Syn248 device, Synchronized appears on the third line of
the display as shown in Figure 8. This is the Idle screen.
Figure 8. Gateway Idle Screen, Synchronized
An IP address beginning with 169.xxx indicates there is no DHCP server on the
network. Without a DHCP auto-assigned IP address (usually beginning with 192.xxx),
the Syn248 devices may not show the correct time and date and you may not be
able to access the WebUI to configure the system. You may have to set the time and
date manually from a Deskset. See “Set Time and Date” on page 95.
 Loading...