Centipede
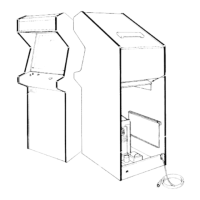
Reach
through the
coin-door
opening
and open
the
luggage-style
latches,
located at
each end
on
the
underside
of the
control panel.
Close the
coin
door.
Lift
up
on
the control
panel at the
topmost
edge
and tilt
it toward you.
The
control
panel edge
next
to
the
monitor shield
has
foam tape
applied to
it.
This
tape
acts as a
cushion
for the glass
and
prevents
spilled liquids
from
entering
the cabinet
interior.
Always
make
sure
this tape
is in good
condition.
1.
LED Switch
Replacement
The
light-emitting
diode
(LED)
switches
on the
control
panel
have
a
very
low failure
rate. In case a
switch
should
ever be
suspect,
first test
it per the
description
that
follows.
To replace
the switch,
refer
to
Figure
10.
1.
Remove the
wires from
the
suspected
switch.
2. Set
multimeter to
ohms
scale. Set
ohms
scale
to
R
x
1,
then
zero the
meter.
3. Connect
multimeter
leads to
appropriate
LED
switch contacts
(see
Figure
10 for
designation
of switch
contacts).
4.
Check contacts
(push and
release the
switch
button)
for closed
and open
continuity.
5.
If the
contacts do
not operate
sharply or always
remain closed
or open,
then replace
the LED
switch as
outlined
in
the
figure.
2.
Leaf-Switch
Replacement
The leaf switch on this game operates on
5
volts
at a
very low current.
Therefore,
pitting of
the switch
would be extremely rare. Probably the only
reason
TM
that pitting would
occur is that the game is in very
high-humidity
locations.
Don’t burnish the switch
contacts.
To clean
them,
use electrical contact cleaner.
To replace
the switch, remove
both of its
screws
with
a Phillips-head
screwdriver.
If
the white
button itself needs
to be replaced,
turn the
stamped nut with
a wrench in
a counter-
clockwise direction,
as seen from
the inside of
the
control panel.
The white
ring on the
outside of the
control panel
should not spin,
due
to
its design.
NOTE
Adjust switch
for a narrow
gap. When
a
switch
button is
depressed, the resulting
wiping action
of the
contacts provides
a
self-cleaning
feature.
3.
Mini-Trak Ball™
Maintenance
and
Repair
To maintain this control, lubricate the
bearings
approximately
every
3
months or every
6,000
credits.
The number of credits can be read off the
coin
counter, located
on the coin door.
Use only
2
drops
of 3-in-One®
oil in each of the ball bearings.
(Each
Mini-Trak Ball™ control has six bearings.)
For further
instructions
on
how
to replace the
ball, either coupler PCB or either encoding wheel,
see
Figure 11.