LL
co
.....
N
"
N
.....
0
N
>
co
defroster on to reduce any voltage peaks that
may occur when disconnecting the jumper
cables. The headlights must be switched
off.
14. While the engines are running , remove the
cables in
reverse order from the way they
were installed, as described in ¢
page 3 76 .
Make sure the cables do not get caught in
moving engine components .
15. Fold the cover back on the battery correct ly.
16. Switch the heater fan and rear window de-
froster
off.
Read and fo llow: ¢ .&. in Preparation on
page 375
and ¢ (j) in Preparation on page 375.
(D Note
Do not use the negat ive termina l on the veh i-
cle battery for jump star t ing. A malfunction
could occur in the vehicle electrical system.
@ Tips
- Make sure that the connected positive ter-
mina l clamps have sufficient contact with
metal.
- The vehicle battery in your vehicle vents to
the outs ide so t he battery gases drain out of
the veh icle.
RS model s: starting the engine
Both jump start cables must be connected in the
correct order!
Fig. 301 Engine compartment : connector s for a charger
and j ump star t cables
Em e rge nc y s it ua ti o n s
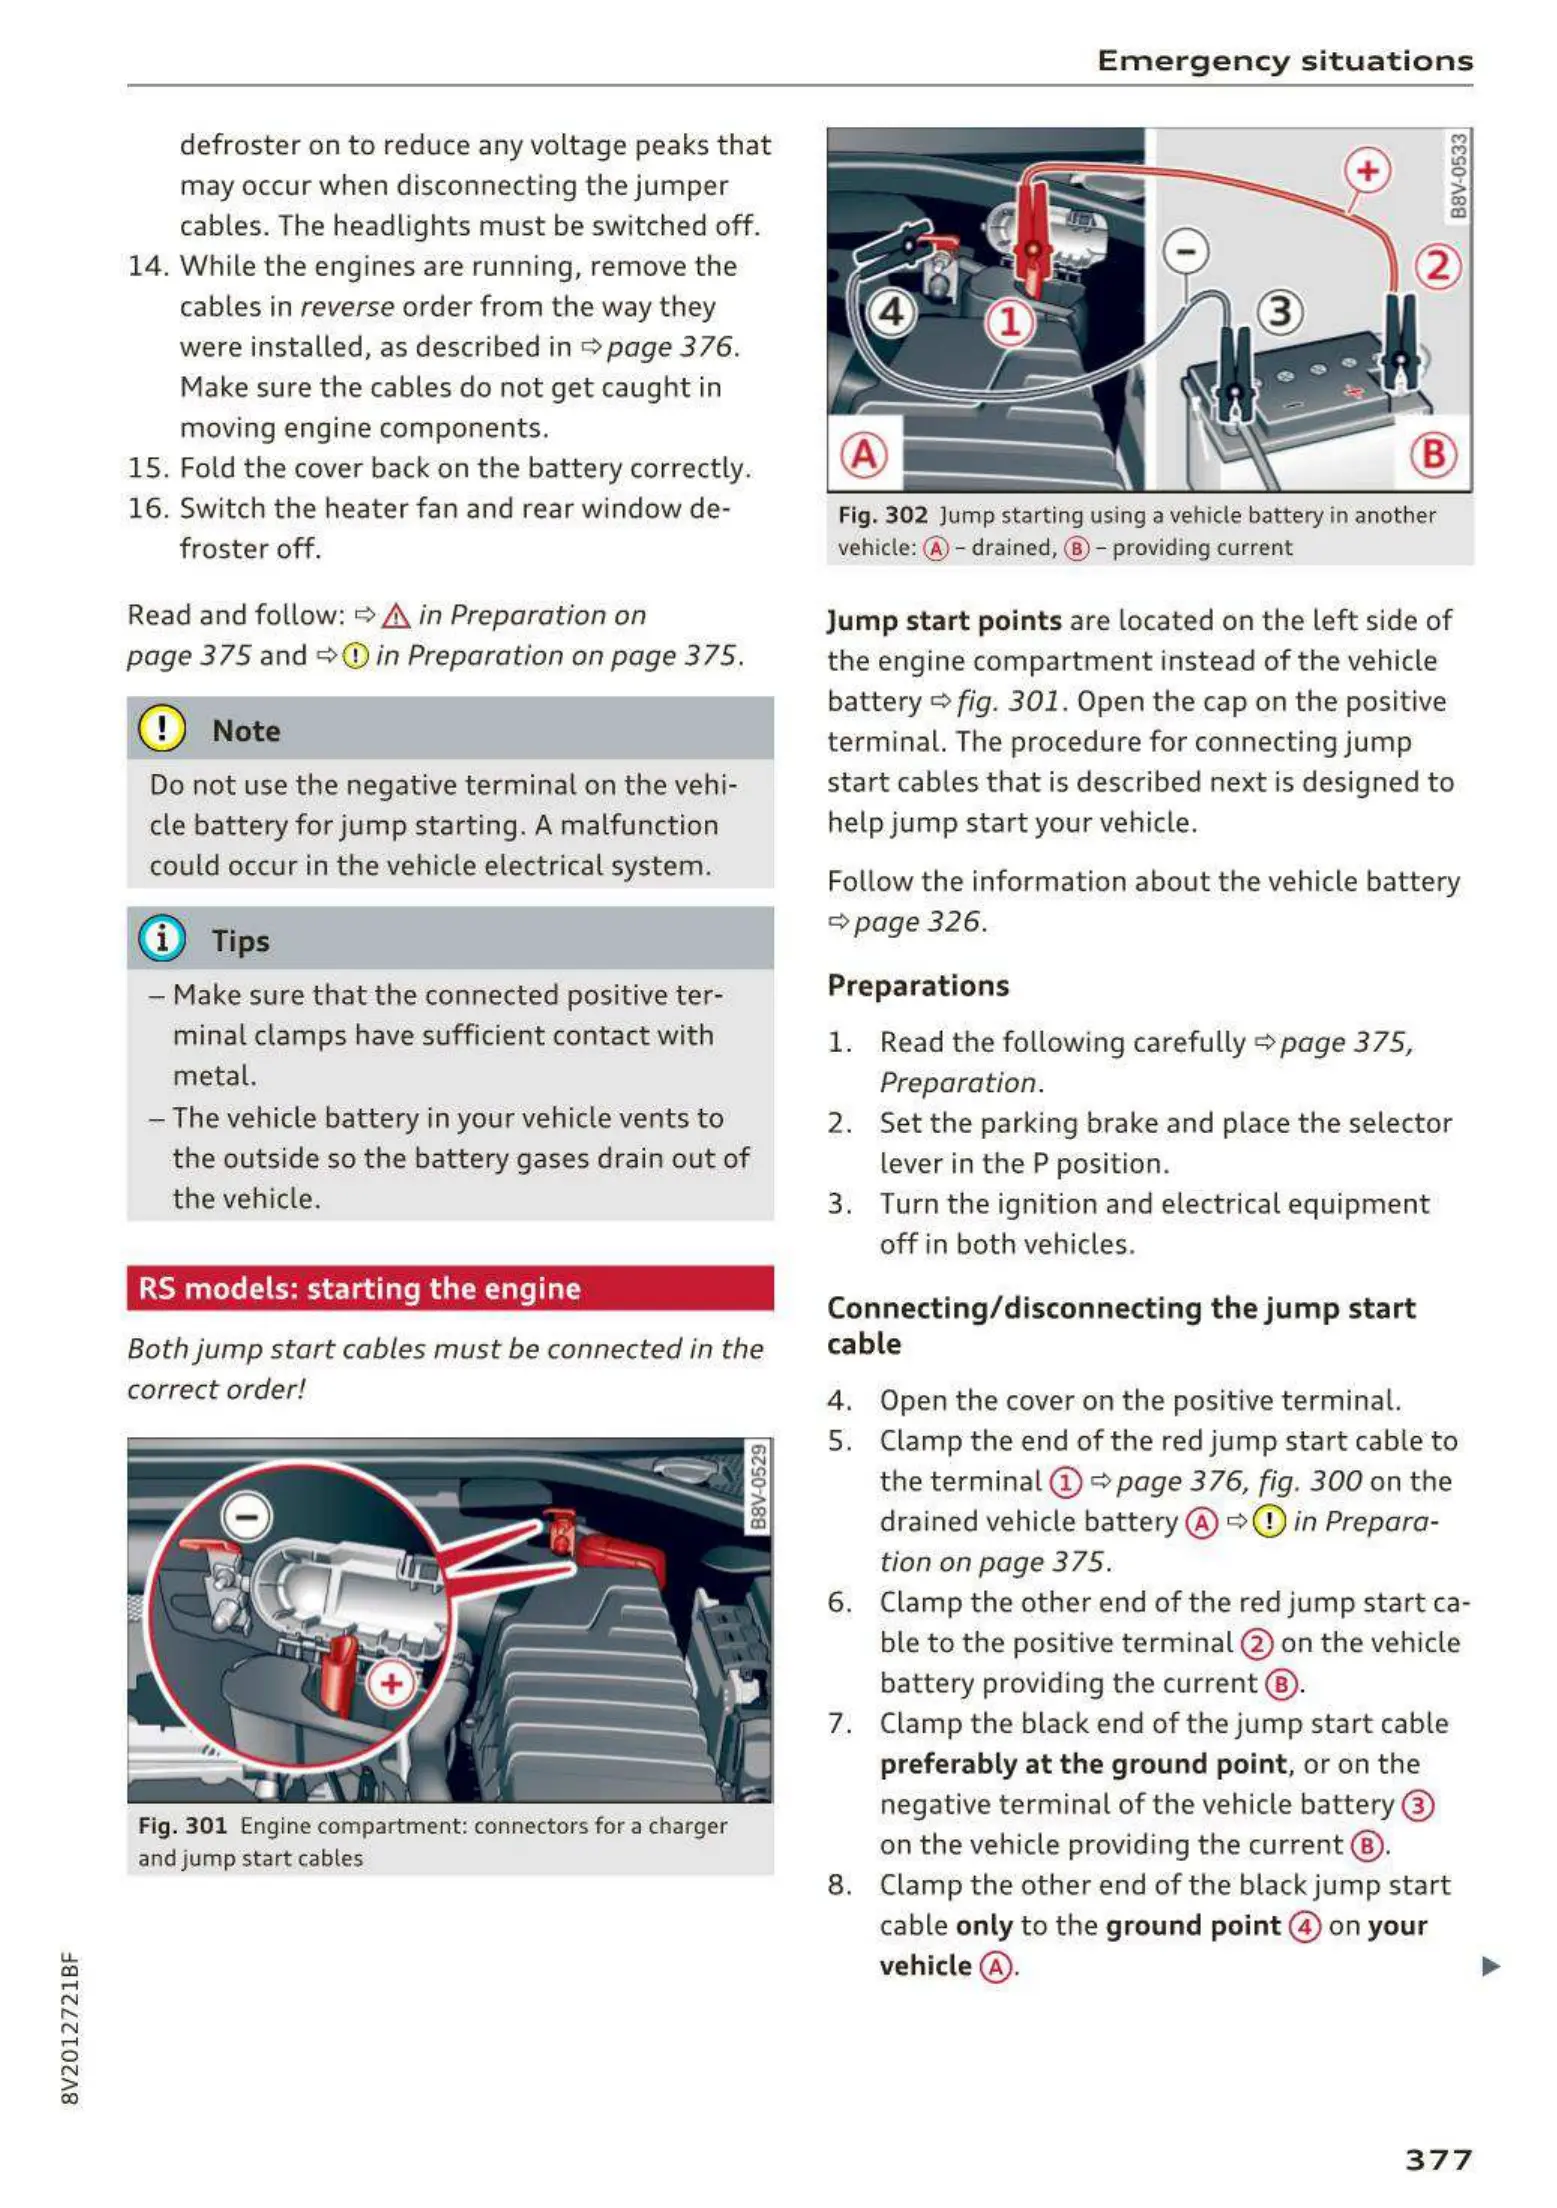
Fig. 302 Jump start ing using a vehicle batt ery in anothe r
vehicl e: @ - drained, @ - providing current
M
lri
0
>
(X)
m
Jump sta rt points are located on the left side of
the engine compartment instead of the vehicle
battery ¢
fig. 301. Open the cap on the positive
terminal. The procedure for connecting jump
start cables that is described next is designed to
help jump start your vehicle .
Follow the information about the vehicle battery
¢ page 326.
Preparation s
1. Read the follow ing carefully ¢ page 375,
Preparation .
2. Set the parking brake and place the selector
lever in the P position.
3. Turn the ign ition and electrical equipment
off in both vehicles .
Connecting/ disconnecting the jum p st art
cable
4. Open the cover on the posit ive terminal.
5. Clamp the end of the red jump start cable to
the termina l (!) ¢
page 3 76, fig. 300 on the
drained vehicle battery @ c:;>(Q)
in Prepara-
tion on page 375.
6. Clamp the other end of the red jump sta rt ca-
ble to the positive terminal @ on the veh icle
battery providing the current @ .
7. Clamp the black end of the jump start cab le
prefer ably at the ground point , or on the
negative terminal of the vehicle battery @
on the vehicle providing the current @ .
8. Clamp the other end of the black jump start
cable only to the ground point @ on your
vehicle @ . .,..
377