47
USER'S MANUAL
bit One HD /
Example of time delay setting (Fig.4):
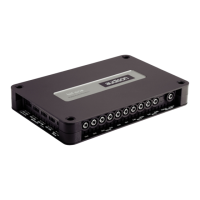
1. choose the system listening point.
To identify the listening point, choose an ideal point located
at the center of the listener’s (driver or passenger) head.
For the front central and rear central points choose an
intermediate point between the two listeners.
2. measure the distance between each loudspeaker or group
of loudspeakers and the listening point in a straight line
(“as the crow flies”)
(Fig. 4).
For each loudspeaker choose the center of the mobile
membrane as the emission point.
For the groups of loudspeakers choose an intermediate
point between them. Afterwards, ne-tuning can be
performed by selecting the Fine Set function.
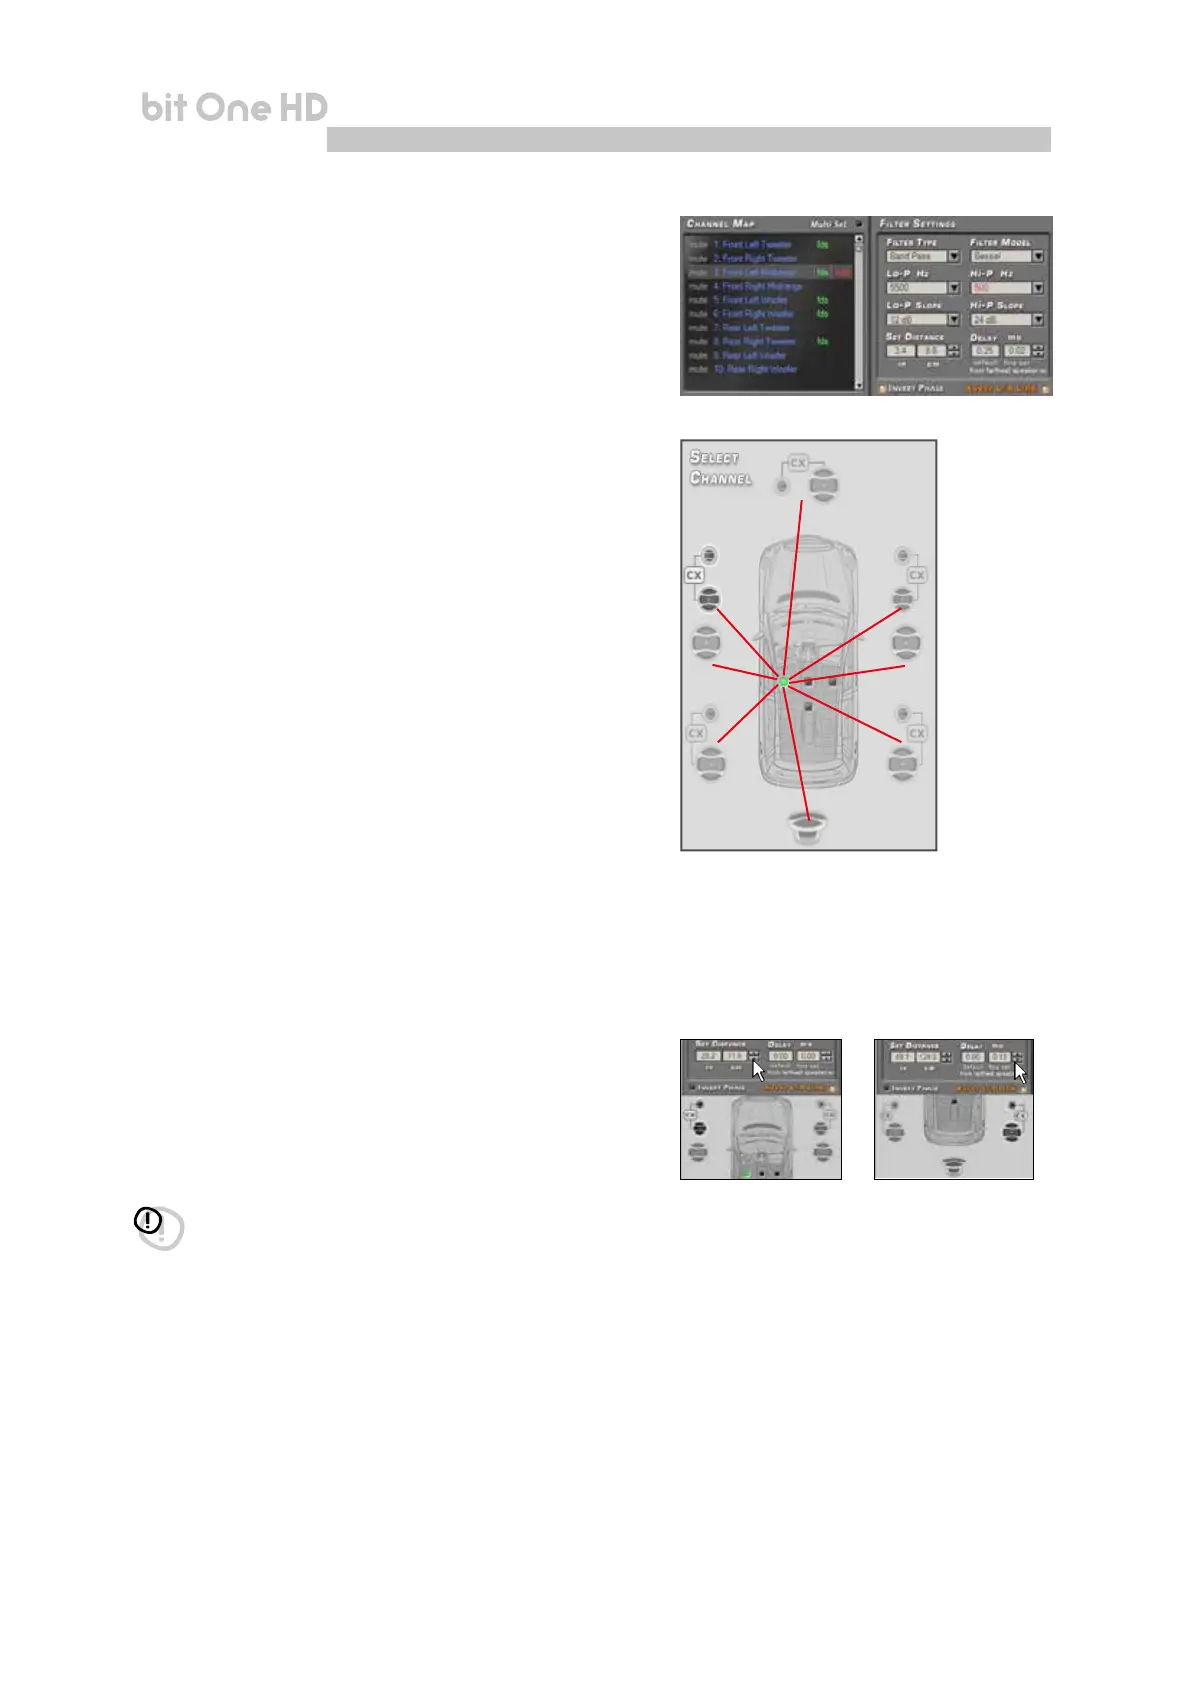
3. select the channel related to the loudspeaker under exam
on the Channel Map and enter the respective distance
value on the
Set Distance
box from the
Filter Settings
menu
(Fig. 5).
4. repeat step 3 for each channel.
5. perform all the time delays settings, start the music
reproduction and select the Fine Set box.
If you move the values to positive or negative (except
for the subwoofer in Fig.6 as it is the farthest speaker),
you can nd the best time alignment that will ensure a
correct acoustic scene.
The ne set tuning can be managed through the multiple
selection of the audio system emission front (Ie. Front
Left Tweeter + Front Left Midrange + Front Left Woofer).
Select the front (Left or Right) channels keeping the CTRL
key pressed with the mouse pointer, then proceed to the
ne set tuning.
It is advisable to listen to different types of musical
tracks (percussions, melodic etc.) for a much more
correct evaluation of the different musical instruments
coherency (space stability).
6. once the time alignment procedure is completed, you can
operate on the output equalizer (Master).
You can refer to optimize the system
response in accordance with the level alignment to the
different frequencies.
WARNING: if, once you have set the distances according to the
“driver” listening point you click on the “passenger”
listening point, the bit One HD will not re-calculate the
delays according to the new reference point because the
buttons available in the SELECT A CHANNEL diagram are
merely descriptive and their only purpose is to remind you
that you have set the delays for that listening point!
Remark: the measurements for the above operations can
also be taken by using a spectrum analyzer featuring an
appropriate microphone. The result must be assessed with
nal rening listening tests.
83 cm
127 cm
132 cm
116 cm
164 cm
78 cm
90 cm
105 cm
Real distances
measured
from the
listening point.
Fig.5
Fig.4
Fig.6
8
Fig.3