52
USER'S MANUAL
bit One HD /
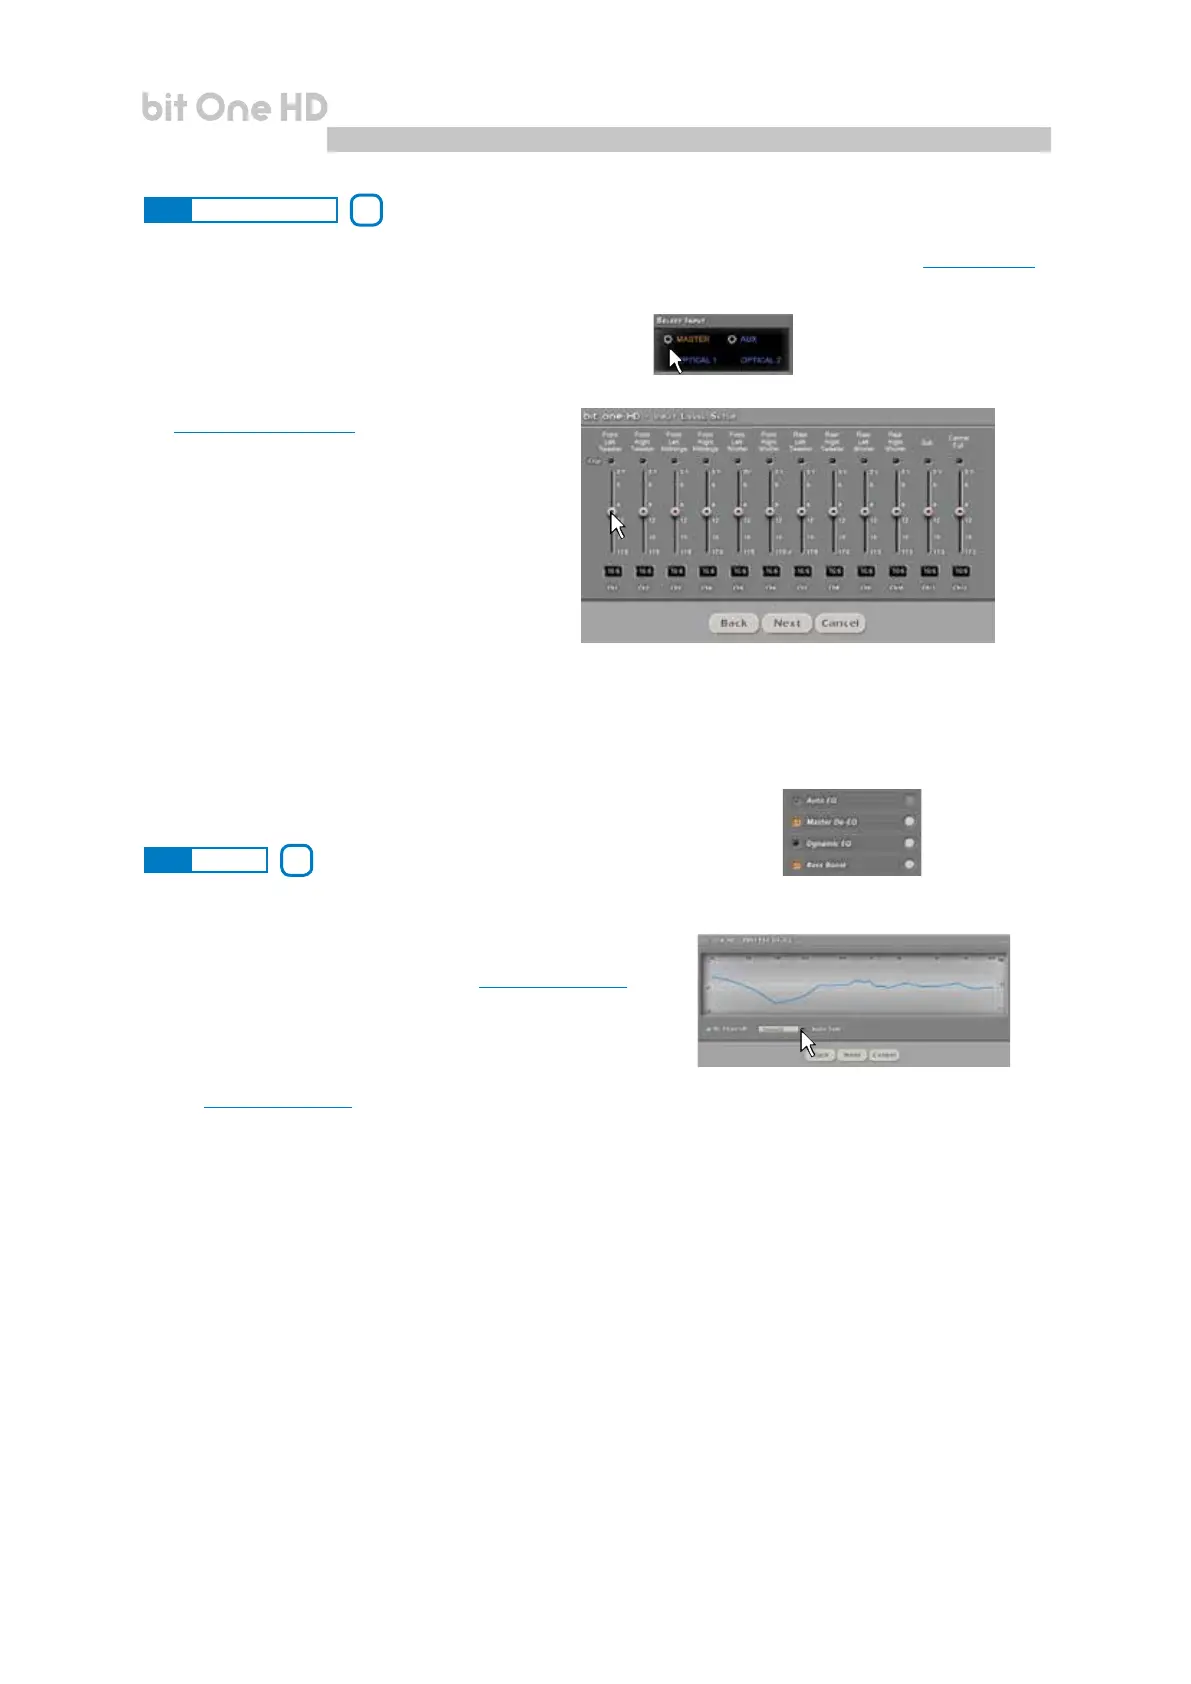
The “Selected Input” window will display the active source during the connection with the PC. Auxiliary sources can
be added or removed entering the Cong->Auxiliary Inputs menu and selecting the desired source
(see section 8.3.3).
Once you will have disconnected from the PC, the bit One H D input source can be selected via DRC MP
1. Auto EQ: function unavailable for this Software version.
2. Master De-EQ: by entering this section the Head Unit specic
equalization curve evolution is displayed
(see section 7.3.6, 7.4.6).
- The selection of De-Eq on/off enables the activation/de-activation
of the de-equalization applied to the Head Unit connected to the
bit One HD.
- The selection of Wizard provides the ability to perform a new
conguration session to set up the source sensitivity levels and verify whether the source has been equalized or
not
(see section 7.3.6, 7.4.6).
3. Dynamic EQ: the sound of an audio system may very according to the reproduction volume. At low volume, the
noises coming from outside the vehicle and the especially insulated acoustic within the car compartment
contribute to limit (especially in low frequency) the system’s performance. Generally during calibration you need
to consider that the adjustments performed with low level volume may change relentlessly when the volume will
be increased.
The Dynamic Equalization improves the listening actively operating on the variation of the frequency response as
a consequence to the volume change.
The Wizard will suggest a series of windows to set up the equalization to be applied to the general frequency response.
The bit One HD will automatically perform a gradual data interpolation, following the signal level and therefore
acting according to the system volume. Two operating modes are available.
To use this function click on the button to the left of the menu until the orange led lights up. To disable the function
click again on the button until the orange led turns off.
8.11 SELECT INPUT
8.12 SETUP
10
11
Sensitivity: to perform the setting/display of the analog
inputs. Click on the icon for the input setup.
To perform the sensitivity adjustment, refer to
section 8 of this user manual.
1
2
3
4
8