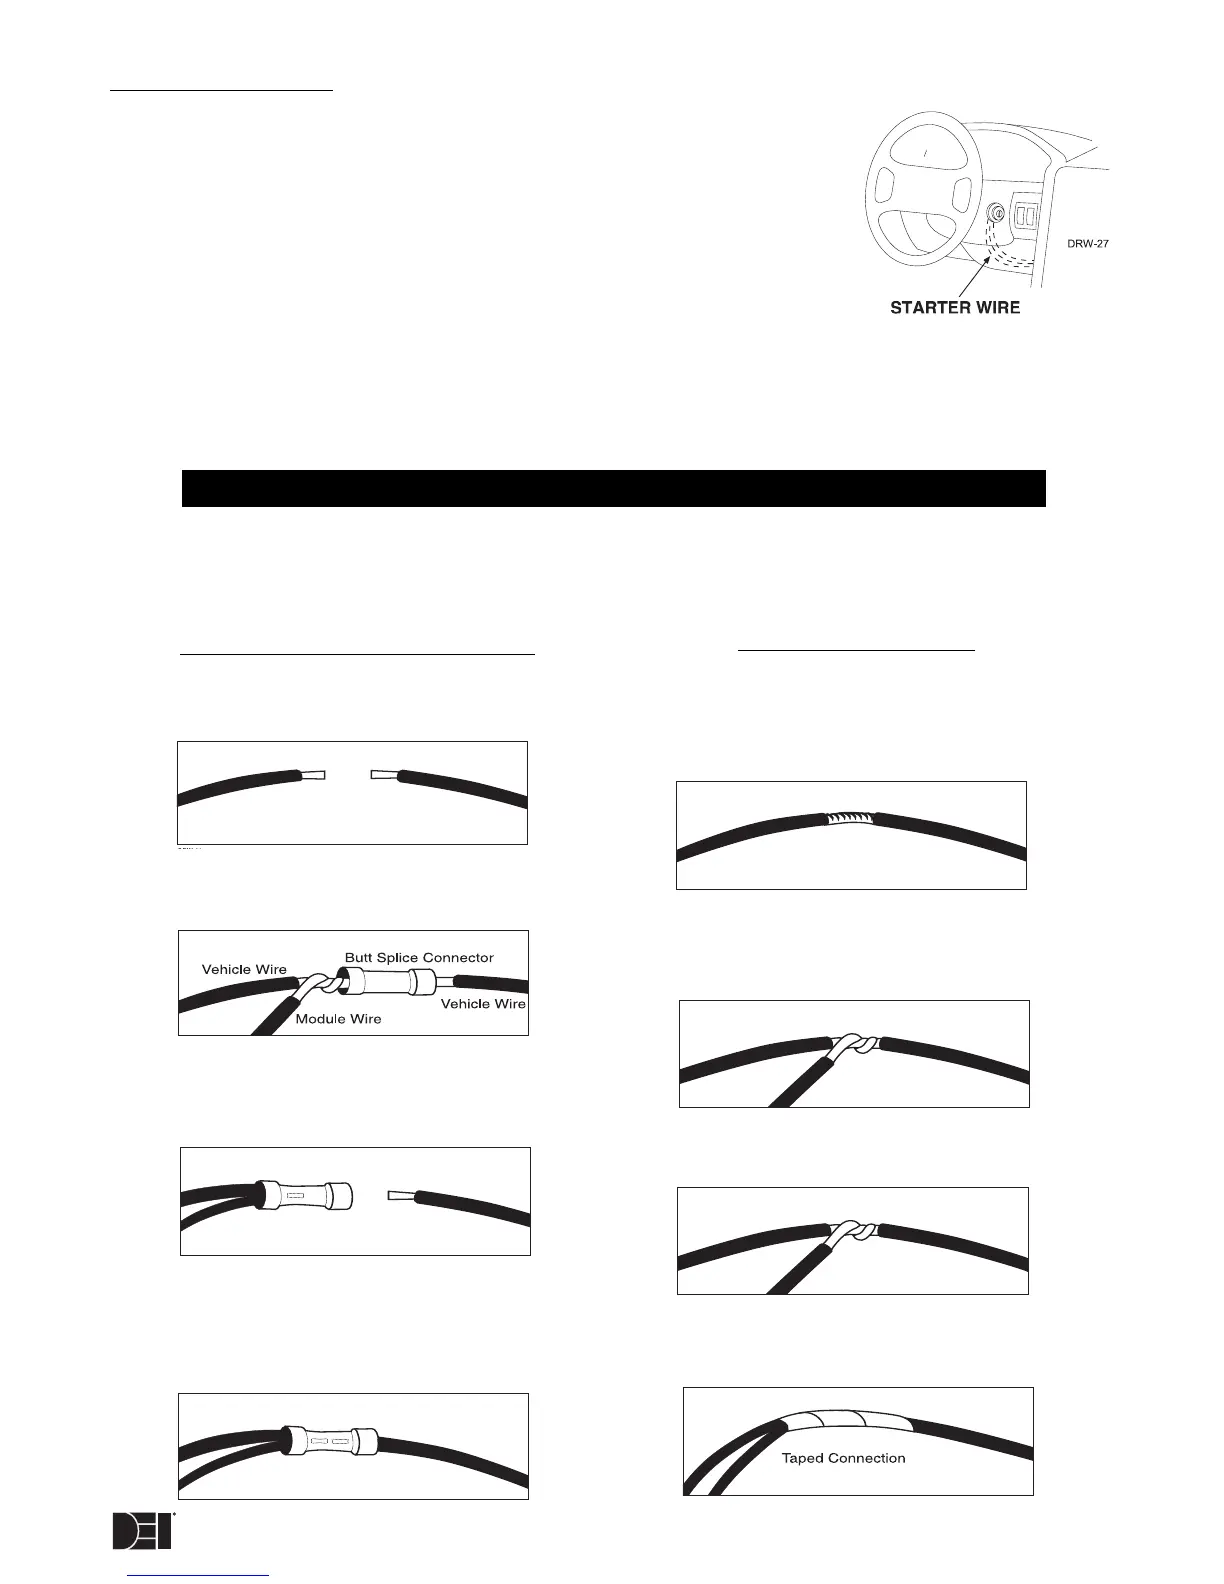
Finding the starter wire
How to find the (+)12V starter wire with your multimeter:
1. Set to DCV or DC voltage (12V or 20V is fine).
2. Attach the (-) probe of the meter to chassis ground.
3. Probe the wire you suspect of being the starter wire. The steering col-
umn is an excellent place to find this wire. Remember you do not need
to interrupt the starter at the same point you test it. Hiding your starter
kill relay and connections is always recommended.
4. Turn the ignition key switch to the start position. Make sure the car is not
in gear! If your meter reads (+)12V, go to the next step. If it doesn’t, probe
another wire.
5. Cut the wire you suspect of being the starter wire.
6. Attempt to start the car. If the starter engages, reconnect it and go back to step 3. If the starter does
not turn over, you have the right wire.
When connecting the security system’s wires to the wires in the vehicle it is important that the connections are
tight and no bare wire is exposed. Shown below are two types of connections that may be used to connect the
wires from the security system into the vehicle’s wiring. Both types of connections are electrically acceptable if
made correctly. Other types of “tap-in” connections, such as T-Taps are not acceptable.
SOLDER CONNECTIONS
1. Using your wire strippers and razor
knife, strip about 1/2” of insulation off
the wire to be connected to, without cut-
ting the wire.
2. Twist the security module’s wire
around the bare section of the vehicle’s
wire.
3. Solder the bare connection thorough-
ly using rosin core solder.
4. Completely insulate the connection
with electrical tape.
MAKING YOUR CONNECTIONS
SOLDERLESS BUTT CONNECTIONS
1. Cut the wire and strip back about 1/4”
of insulation on each end of the wire.
2. Twist one end of the vehicle’s wire
with the security module’s wire.
3.Insert the twisted pair of wires into
one end of the butt connector and crimp
securely.
4. Insert the other end of the vehicle’s
wire into the other end of the butt con-
nector and crimp securely.