35146AJ
28
Note Imports / exports can be performed on both locally and Web
Interface. Local exports will require an attached USB storage
device.
Export Signing Certificate
Videos and images exported from ProConnect have an embedded
digital signature. This is used to validate that these items have not been
tampered with.
To validate the files have not been tampered with, you will need the
following:
• The image or video file you wish to validate
• The AvertX Digital Signature Verifier (DSV)
• The Certificate Thumbprint from the ProConnect recorder
Note The DSV is a small utility that allows you to validate that the
file has not been tampered with. This utility can be
downloaded from avertx.com.
Note The thumbprint is a value derived from the certificate that
uniquely identifies it; specifically, it is a SHA-1 hash of the
certificate.
The DSV utility will attempt to verify the exported file, and then present
one of two findings:
• Digital Signature Validated: the thumbnail for the ProConnect
recorder will match the thumbnail displayed for the validated
file.
• Digital Signature Invalid: this indicates that the file does not
contain a valid certificate.
Encrypt Relayed Video
This option encrypts video sent using relay.
Legacy Flash Player
This option will enable the Adobe Flash Player instead of the HTML 5
Player for all Users connecting to the recorder.
Storage
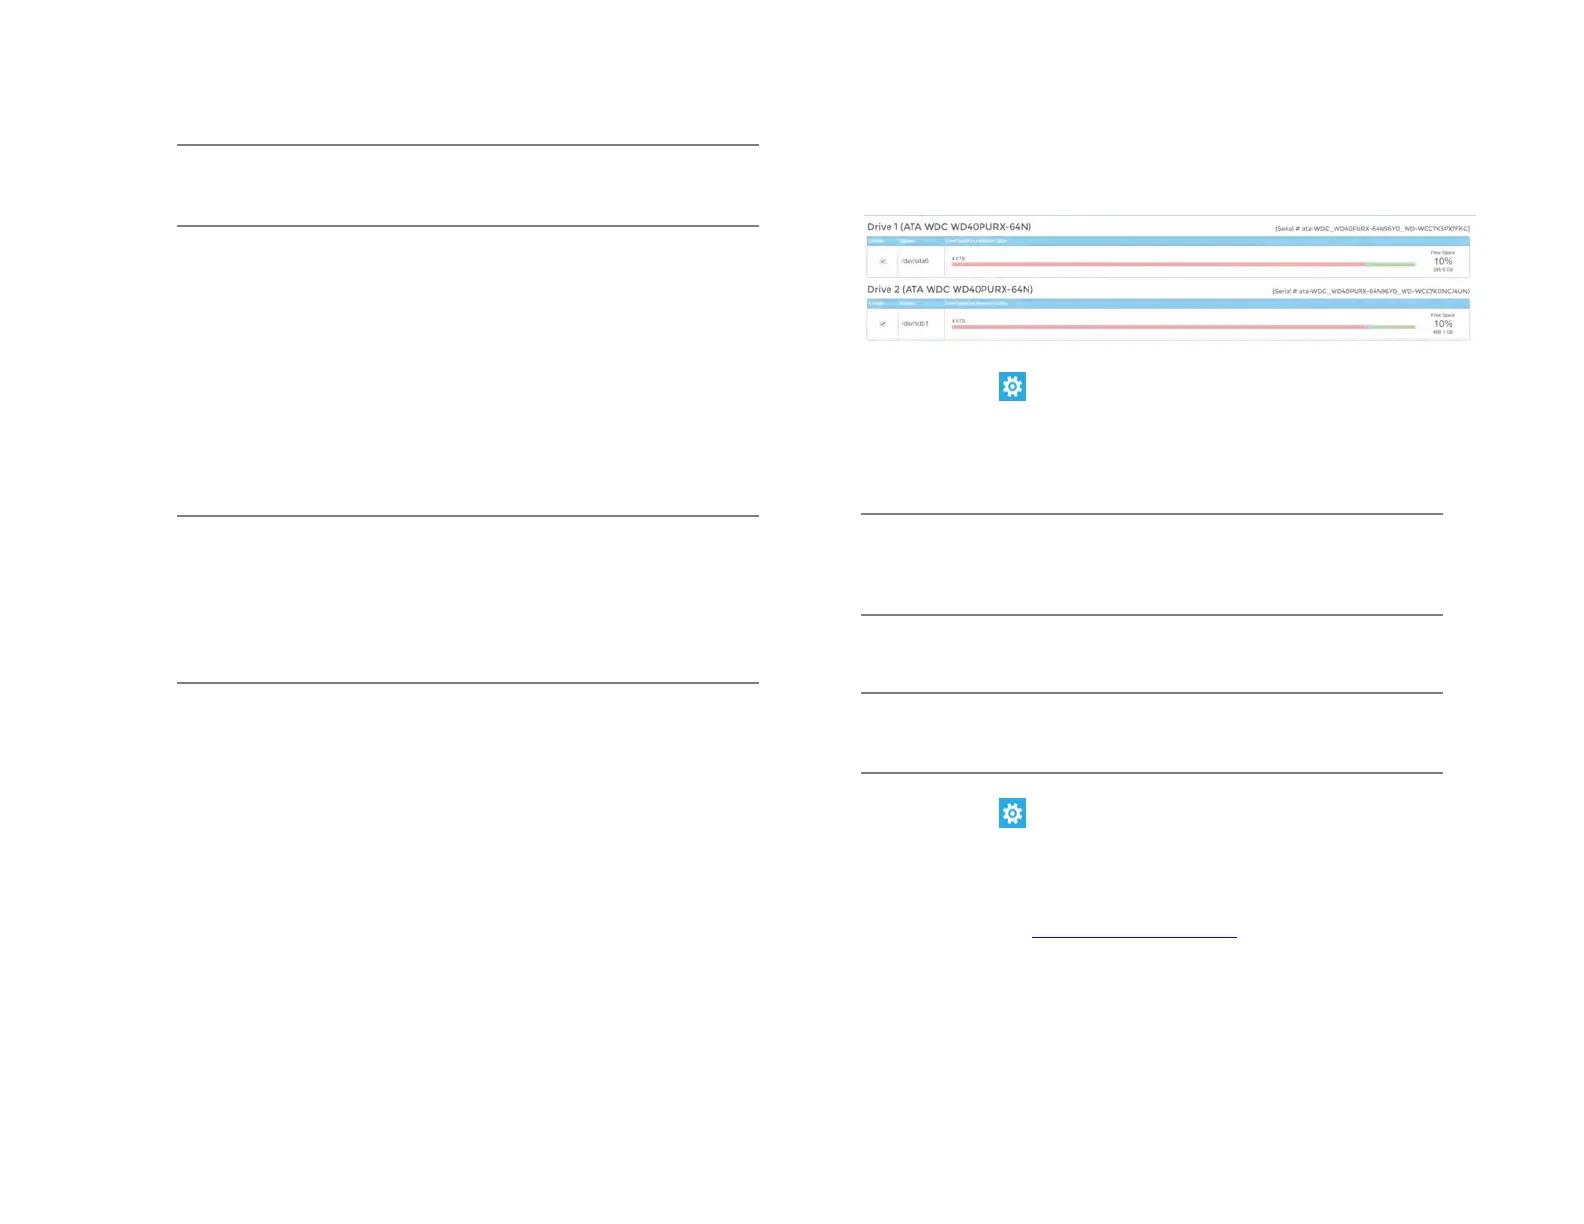
The Storage tab displays all partitions or drives available for recording.
Enable / Disable Recording Drives
1. Click Setup .
2. Click Settings under System Settings, and then click the Storage
tab.
3. Check or uncheck the Enable checkbox to disable the Drive.
4. Click Save.
Note Your ProConnect recorder will leave 10% free space on a
drive by default; it is not recommended to lower this setting
below 10% as this space is used for managing recorded
data’s FIFO (First In, First Out) process.
Licensing
Note Your ProConnect software will be preregistered in the factory
and can pull licenses from the cloud if connected to AvertX
Connect.
1. Click Setup , and then Settings under System Settings.
2. Click the Licensing tab.
3. Click Add New License, and then follow the on-screen instructions
to acquire the Unlock Code.
a. Navigate to http://activate.avertx.com/
.
b. In the Licensing tab, enter the Product Serial, and then click
Next.
c. The Unlock Code will be displayed. Write or copy the code.