5. Re-attach the PoE module with the camera back to the housing and tighten the previously loosened
screws.
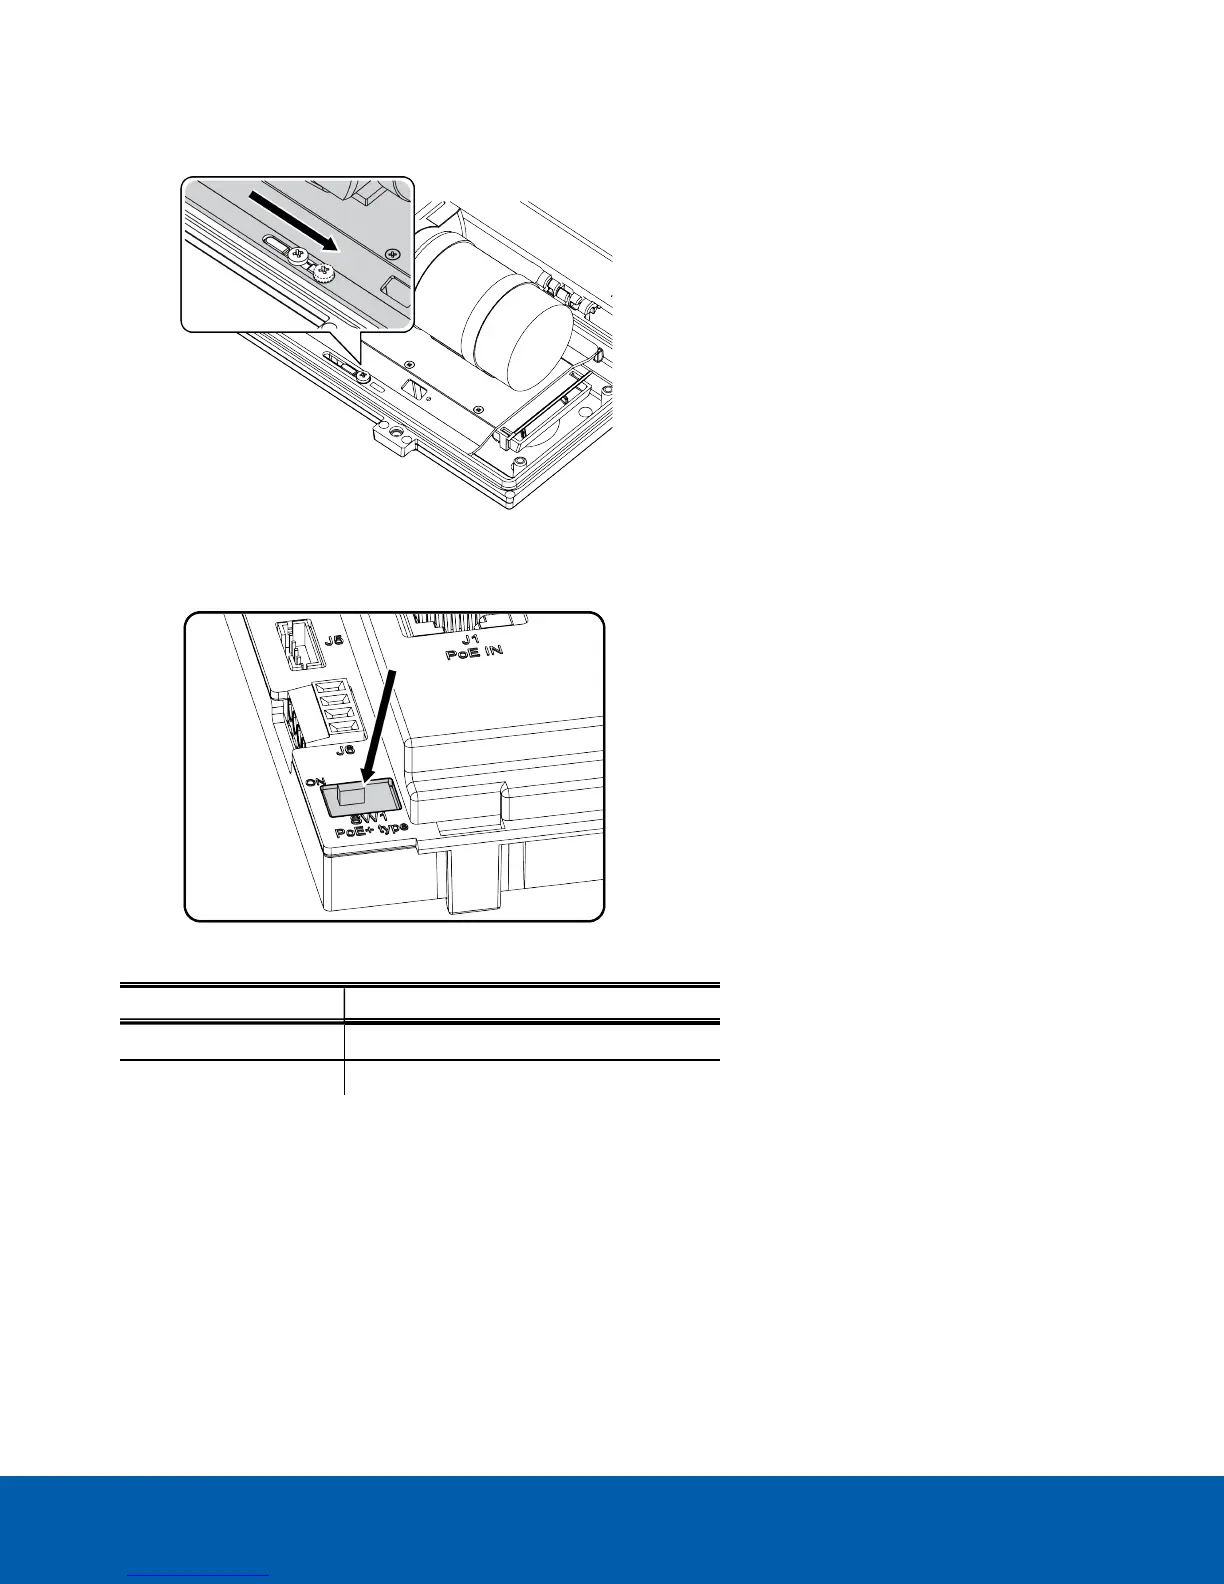
6. Make sure to set the dip switch SW1 to the ON position. Remove the protective lens film from the camera
before closing the housing.
Absorbed Power Configuration
SW1 Maximum Power
OFF PoE Class 3 (13W max)
ON Hi-PoE Class 4 (25W max)
Powering Up
NOTE: The automatic pre-heating (de-icing) process could be started whenever the device is switched on and
the air temperature is below 0°C (32°F). This process ensures that the device works properly even at low
temperatures. The pre-heating duration ranges depending on environmental conditions (from 60 minutes up to
120 minutes).
During the powering phase, the device reads the status of the dip switch and automatically detects all of the
connected options for the correct energy management of the housing.
Powering Up 18

 Loading...