11
3.1 AUTO PAN SETUP
Step1: In the live view, right click to show the main menu.
Select ADVANCED CONFIG DCCS. Then, select the channel which connects this camera,
and click SETUP to enter the menu of camera parameters.
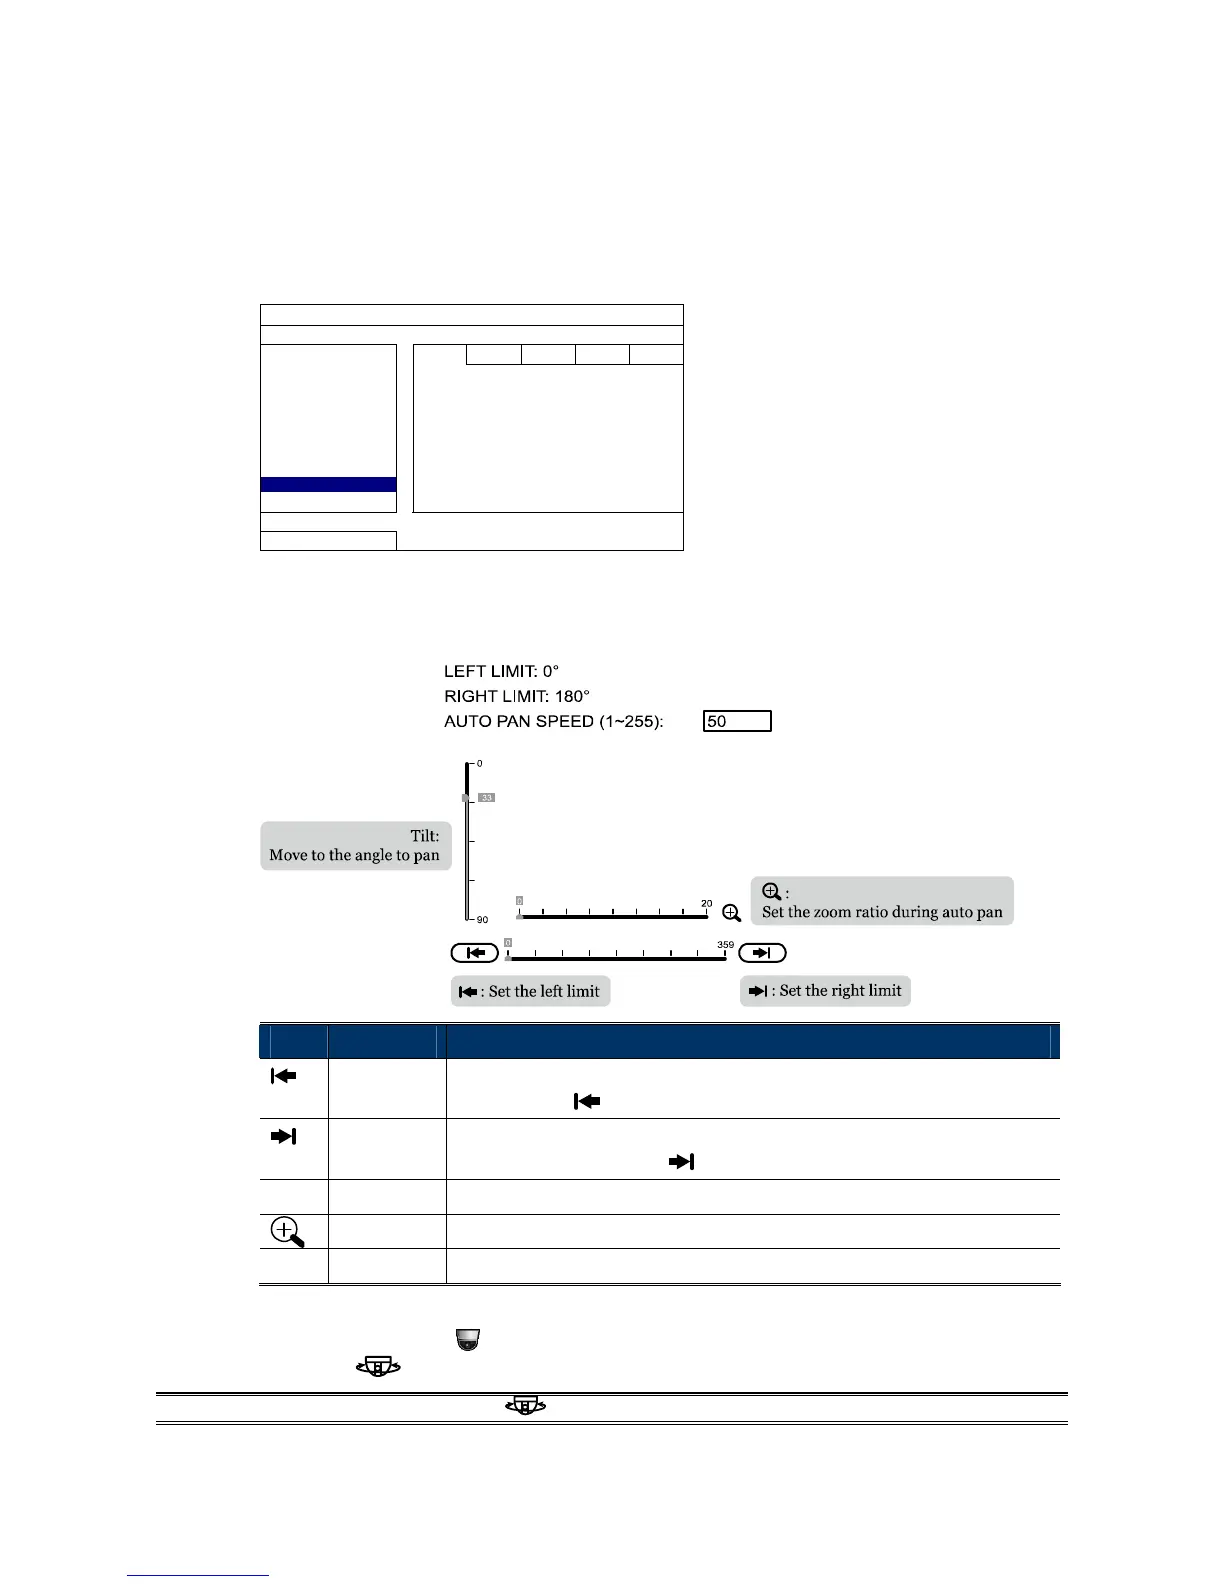
ADVANCED CONFIG
C A M E R A CH1 CH2 CH3 CH4
DETECTION MENU SETUP
ALERT
NETWORK
DISPLAY
RECORD
DEVICES F.W. 1016
DCCS DEVICE AVTXXX
NOTIFY CONNECTION OK
EXIT
Step2: Select CRUISE MODE, and choose AUTO PAN. Then, go to CRUISE CONFIG to select
SETUP.
Step3: You’ll see the setting panel on the bottom left side of the screen:
Icon Function Description
Left limit Move the slider to where you want to set as the most left side of the surveillance
area, and click
to set.
Right limit Move the slider to where you want to set as the most right side of the
surveillance area, and click to set.
--
Tilt angle Move the slider to the height you want.
Zoom ratio Move the slider to confirm the zoom ratio you need for the current area.
--
Pan speed Set the speed to pan.
Step4: Right-click to return to the live view, and click the channel with this speed dome camera
connected. Then, click
on the bottom left side of the screen to show the PTZ control panel,
and select
to start.
NOTE: To stop camera panning, click
again to escape.