EasyManuals Logo

Axel Oxygen 5 User Manual

Axel Oxygen 5
64 pages
To Next Page IconTo Next Page
To Previous Page IconTo Previous Page
Page #33 background imageLoading...
Page #33 background image
STEREO MODULE
ENG
Axel Technology srl www.axeltechnology.com STEREO MODULE
33
JUMPER NAME
DESCRIPTION
J 1, J2, J3, J4, J5, J6
(PHONO / LINE)
They configure the INPUT B
as LINE or as PHONO (see
picture)
J 7
TIMER 2
Timer 2 is activated when the
START key is pressed **
J8
RELAY 2
Relay 2 is activated when the
START key is pressed **
J9
RELAY 1
Relay 1 is activated when the
START key is pressed **
J16
LATCH
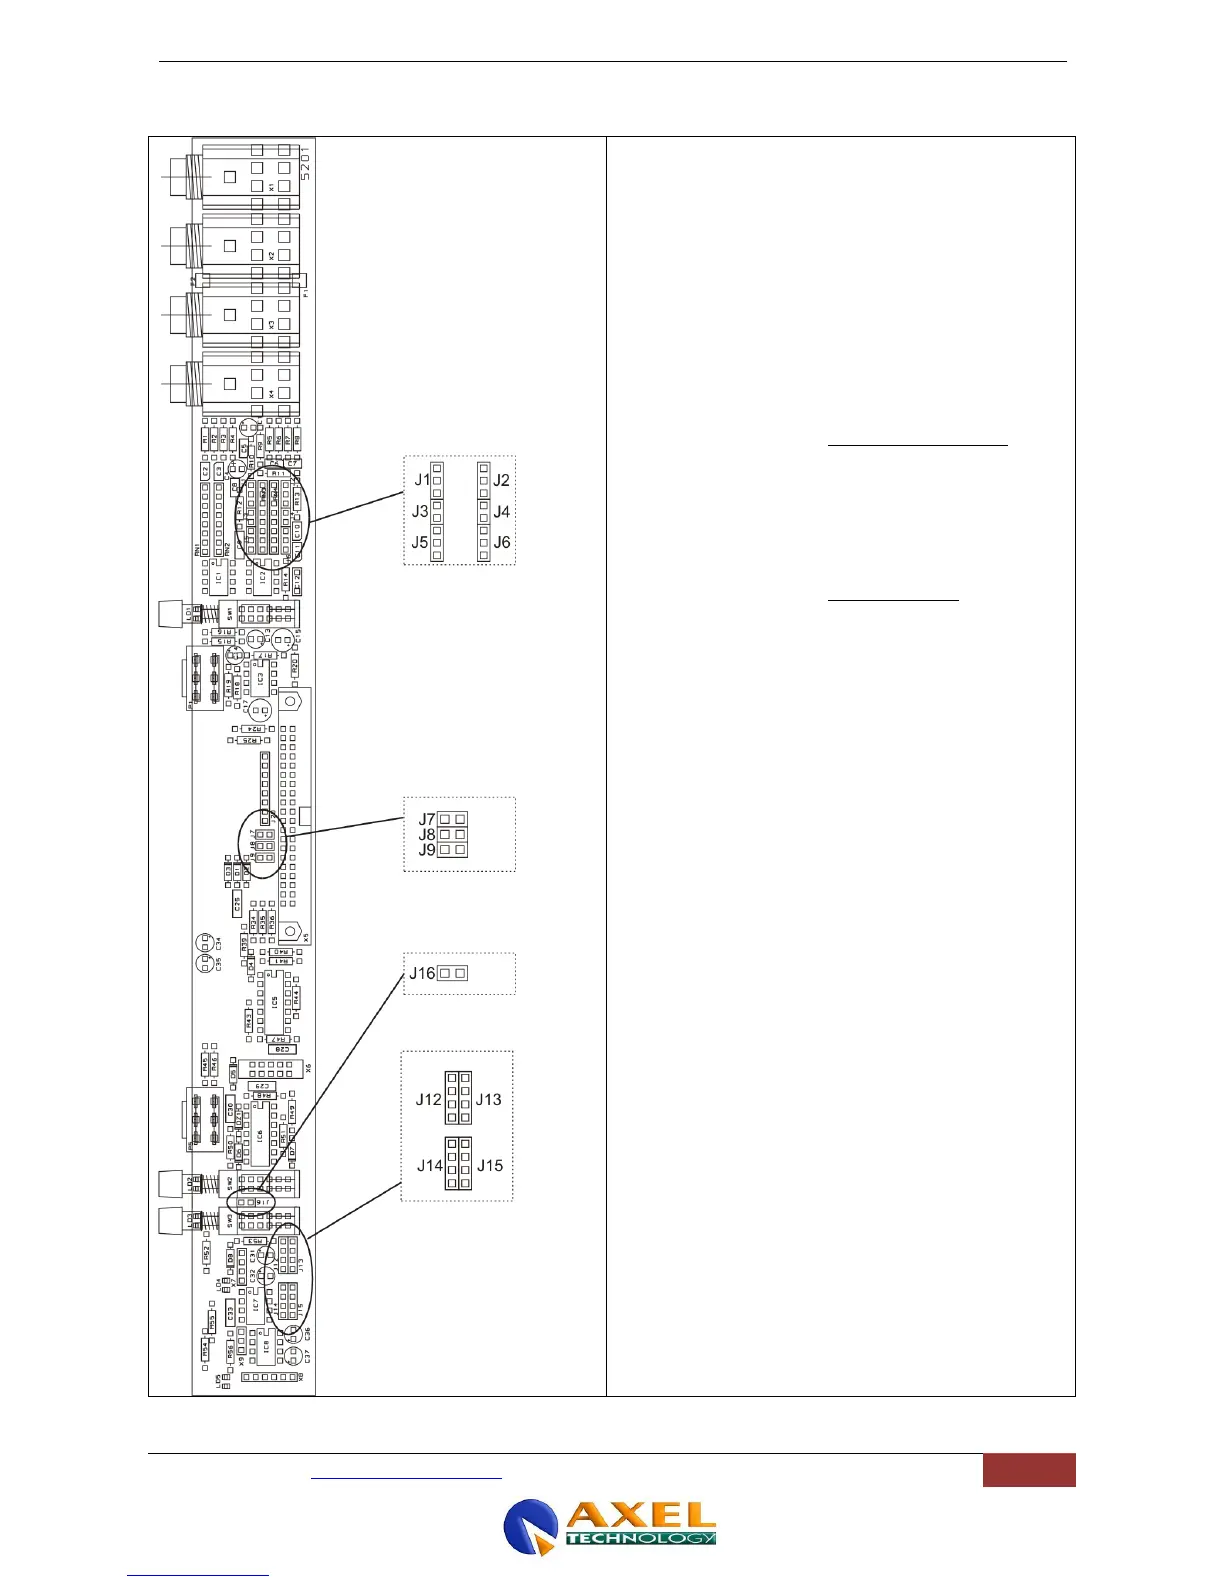
WITH JUMPER PRESENT:
After the module has started
or stopped, the start or stop
outputs remain active
(latched) J12,J13, J14, J15
must be in the OPTO
configuration
WITH NO JUMPER: the start
and stop outputs generate a
pulse (500mSec -
momentary) when the
module is started or stopped
J12,J13, J14, J15 must be
in the OPTO conf.
J12, J13, J14, J15
(OPTO / DIRECT)
They configure the START /
STOP INTERFACE as
optocoupled or direct driven
by the START button
**

Table of Contents

Other manuals for Axel Oxygen 5

Questions and Answers:

Question and Answer IconNeed help?

Do you have a question about the Axel Oxygen 5 and is the answer not in the manual?

Axel Oxygen 5 Specifications

General IconGeneral
BrandAxel
ModelOxygen 5
CategoryMusic Mixer
LanguageEnglish

Related product manuals