2: Conguration • 7
© 2016 Axia Audio - Rev 2.0
• Select the Simple Setup button to enter into a simple conguration screen for the xNode. The options avail-
able will vary based on the xNode.
• Enter descriptive text in the Source Name elds which describe what devices are connected to the xNode (e.g.
CD player, Turntable, PC Out-1, Aux Input)
• Enter descriptive text into the Name eld under the Destination section which documents what is connected
to the xNode’s outputs (e.g. Control Room Monitors, Headphone, CF Recorder, STL input)
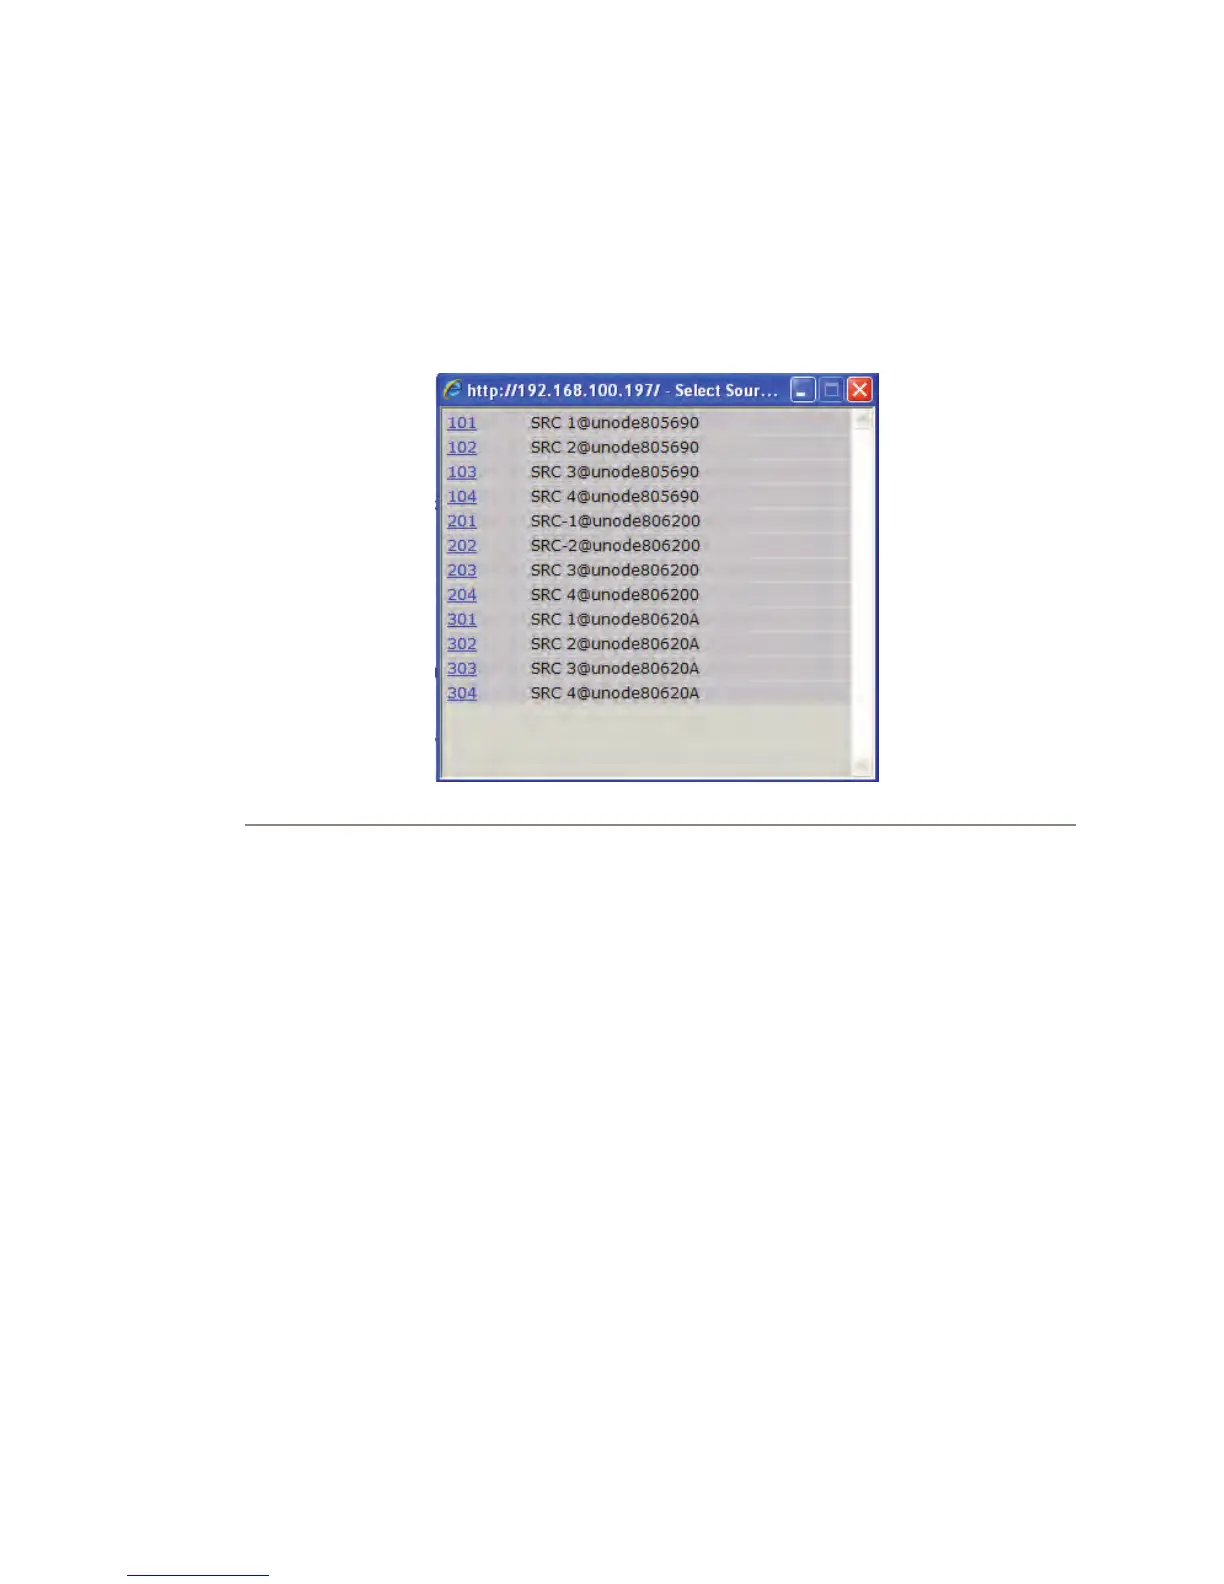
Figure 2-2
• The next step would be to dene the audio that is present at the output. This is done by choosing the browse
button next the channel text box. A popup will appear with a list of sources that are present on the network.
A sample of three xNodes freshly installed into a network is shown in gure 2-2. At this point, not many
sources have been congured with valuable descriptive names. Hopefully you see the value of the good
practice in using the naming elds. Once you have congured all your xNode sources and other Livewire
devices, this browse popup will have more descriptive information which will help you locate the correct
source to assign to an output (Destination).
If you notice in gure 2-2, the three xNodes are showing a default host name which provides little assistance to
the end user. To resolve this you can select the System link under the Advanced Options to change the host name to
something more descriptive (e.g. Studio1-MICs, TOC-AES1, SATRCK-GPIO1).With a descriptive host name ap-
plied to the xNode, a listing of available audio streams will be displayed in a more descriptive manner, i.e., Host-
Mic@Studio1-MICs Guest1@Studio1-MICs CD1@Ctrl1-AES WXYZ-tune@TOC-ANA1, etc.
You’re done! These steps were designed to get you up and running quickly, but if you need more details on other
conguration options, please continue to read this chapter.
For additional information on a particular xNode, look at the following chapters which are dedicated to each
model.