8 Instrument Care
© b2 electronic GmbH DHV0017 b2 EN 43
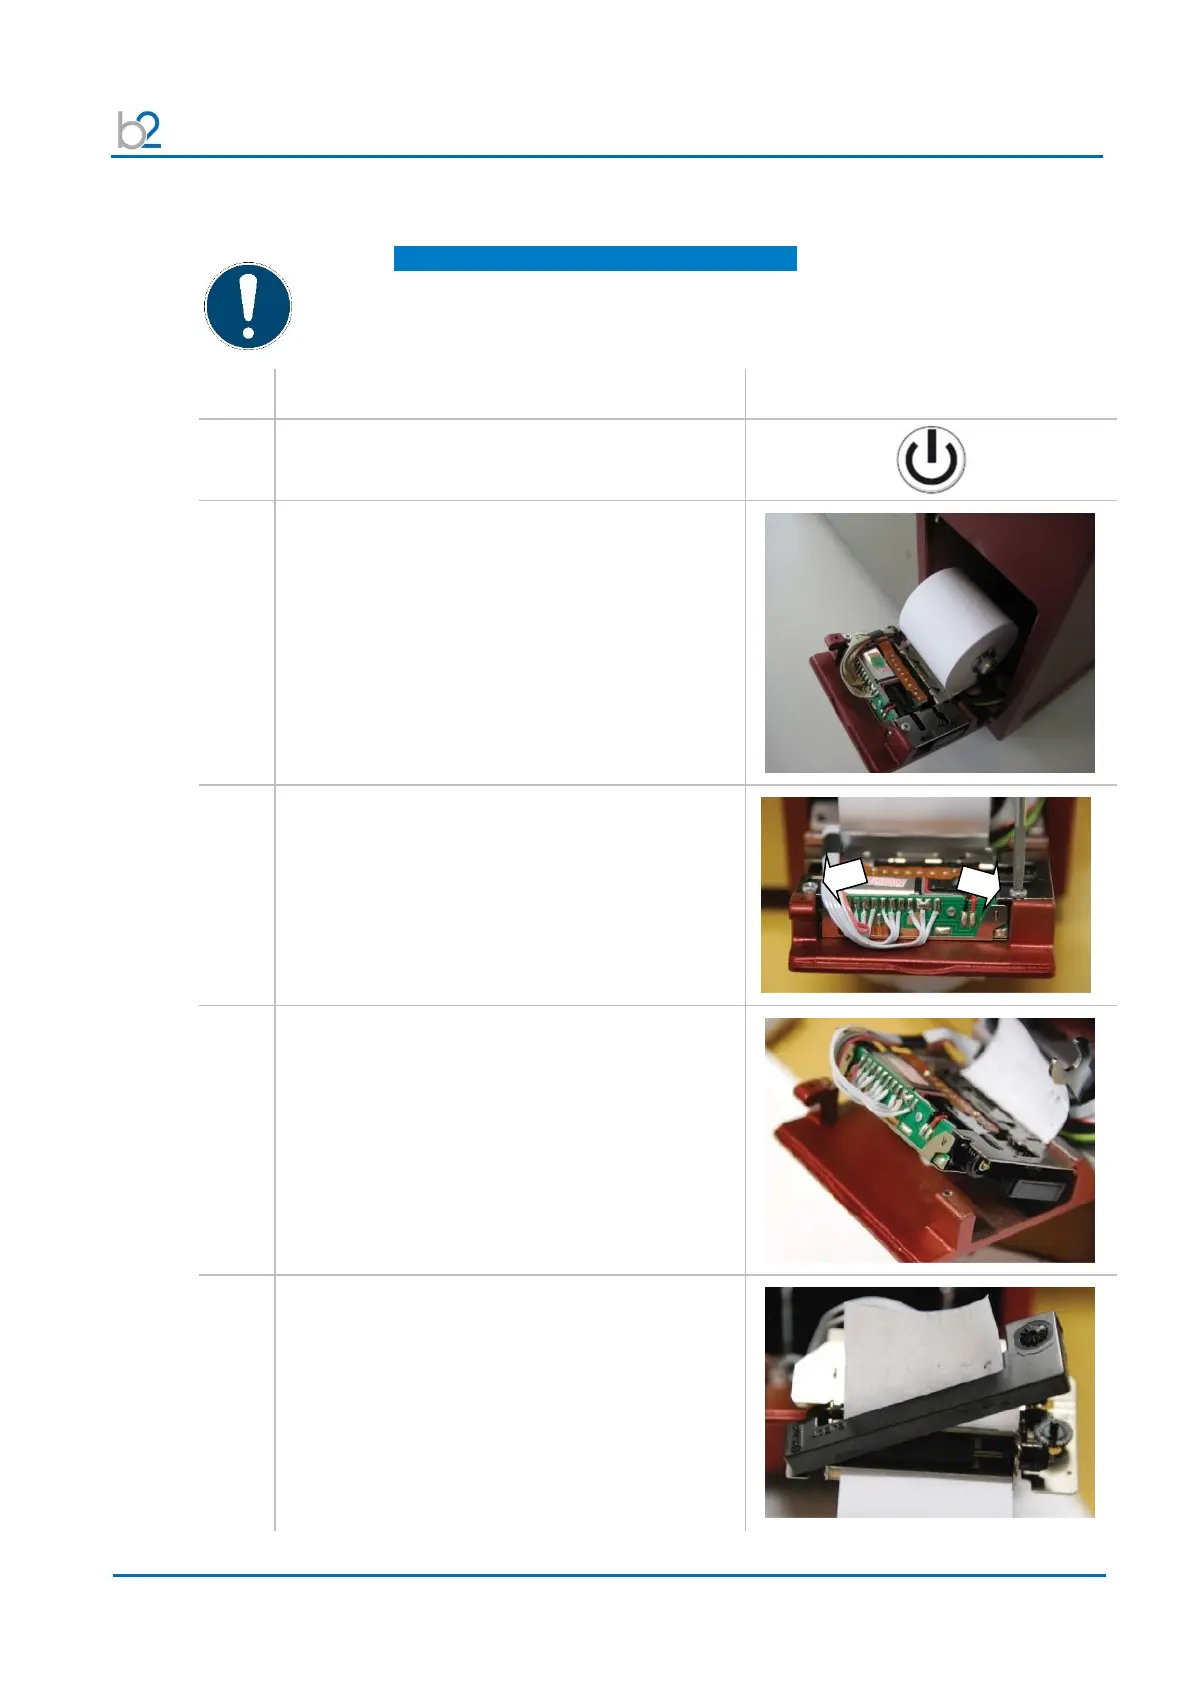
8.3 Replacing Printer Ink Ribbon
NOTICE
Only for models with integrated printer applicable.
To replace and install the printer ink ribbon, adhere to the following
recommendations and instructions:
Procedure (Ink Ribbon Replacement)
Pull out the hinged plate of the printer mechanism.
Unscrew the two fastening screws.
Note:
Phillips / Star screw driver is required!
Tilt the printer mechanism upwards.
Gently lift the printer mechanism from the groove
and remove it from the printer housing.
Flip over the printer mechanism.
Press the “EJECT” indication on the printer ink
ribbon and unlatch the ribbon.