28
4. OPERATING WITH THE MR3000DMS
4.1 Preparing the DMS for field use
Before entering in details about the WebUI (Web User Interface), the configuration of the DMS for a
monitoring session is explained.
It is recommended to set-up the MR3000DMS in the office for the use in the field. Depending on the
measurement task, you may consider the different power options. It is recommended to erase any
obsolete files on the SD card before you use the DMS for a specific measurement. Moreover, it is
also recommended to collect all the data once the measurement is finished.
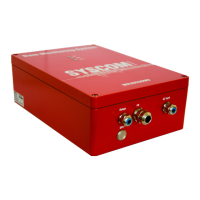
Be sure that the fuse (F1) is off when the DMS is not in the monitoring phase (for example during
transportation). You will switch on the device when you will start to use the MR3000DMS.
4.1.1. Initial settings
For the vibration monitoring of a dam, several DMS are necessary, depending on the dam
dimension and typology. To be more informed about the requirements, please refer to Syscom
guidelines for the dam vibration monitoring.
AC power is normally available at all the sites, and the internal battery ensures monitoring
continuity if power is lost. Otherwise, the DC version can be used to connect external power
sources, like solar panels.
First make sure to enable communication with MR3000DMS before installation in the field. For this
reason, please follow what has been described in chapter 3.1. To access the device firmware, it is
possible to connect the personal laptop directly to the device or to the nearest Ethernet switch.
Successively, the communication with the unit is needed, for example to change the trigger level or
to adjust the alarm scheme (e.g. add a person to the contacts or change a threshold level).
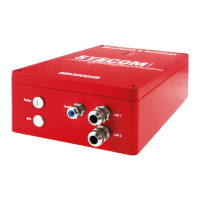
In case all the DMS are connected on the same local network, it is advisable to assign an IP
address to each device. Since the default IP address is 192.168.1.2 for every MR3000DMS, you
need to change it for every DMS, except one, which can remain with the default address. It is
important to change only the last number of the address to remain in the same subdomain. For
example, valid addresses are:
192.168.1.3
192.168.1.4
192.168.1.9
Wrong addresses are:
192.168.5.2
192.163.1.2
199.168.1.2
To do that, first set up a valid IP address on the LAN port of your laptop/PC, as in Figure 4.1.1.
Then, connect one DMS to a switch, change the address, disconnect the device and then connect
a new device to the switch and repeat the procedure (see Figure 4.1.2).