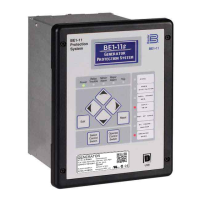
Functional Description
3-6
If the function is enabled, the LCD displays the trip level for the function which the user can adjust through
the use of the Raise and Lower keys. The incorporation of a fast scroll feature makes the adjustments
less cumbersome; the user can access this feature by holding the Raise or Lower pushbutton for one
second for each step of ten times the normal adjustment level. Pressing the SELECT pushbutton stores
the setting and progresses the menu to the reset level, where the user can adjust the settings as
previously described. Once the display shows the preferred reset level, pressing SELECT will move on to
the time delay for the protective function. This can range from zero seconds (instantaneous) to a
maximum specific to the function for which it is being set. The user can manipulate the time delay in the
same manner as the other options. The nonvolatile memory then stores these selections, and the relay
immediately begins monitoring the operation of the protective function.
NOTE
The relay does provide protection while you are setting user options. If a protective trip
occurs during menu activities, the relay will exit the menu display to announce the trip.
Any user changes not yet saved in nonvolatile memory will be lost. Similarly, if no keys
are pressed for two minutes, the relay exits the setup display menus, and any incomplete
setups will be lost.
The sync-check option, if applicable, follows the selection of the protective functions. The first screen
allows the user to either enable or disable the sync-check option in the usual manner. If sync-check is
disabled, the LCD display shows the ON screen (normal operation). If the function is enabled, the next
menu screen allows the user to synchronize on either a generator fast or a generator fast or slow
condition. Repeatedly pressing the Raise key toggles between the OVER FREQUENCY (generator fast)
and UNDER OVER FREQUENCY (generator slow or fast). When satisfied with the selection, the user
can go on to the next screen by pressing the SELECT pushbutton. The next two screens define the
voltage and phase window that the generator and bus inputs must remain within in order to announce an
in-sync condition. The following screen defines whether sync window time or slip frequency qualifies the
sync-check. Once the setting is chosen and adjusted, the menu gives the option of enabling or disabling
the dead bus function. If enabled, the screen displays the dead bus voltage level. If the sensed bus
voltage is less than this setting, the relay will announce a sync-check condition using the dedicated form C
output contact and illuminate the LED, regardless of the sync-check window parameters. This dead bus
voltage can be adjusted in the same manner as the previous settings. Pressing the SELECT pushbutton
will save all sync-check functions in the nonvolatile memory, exit the user setup menu, and begin sync-
check monitoring.