23
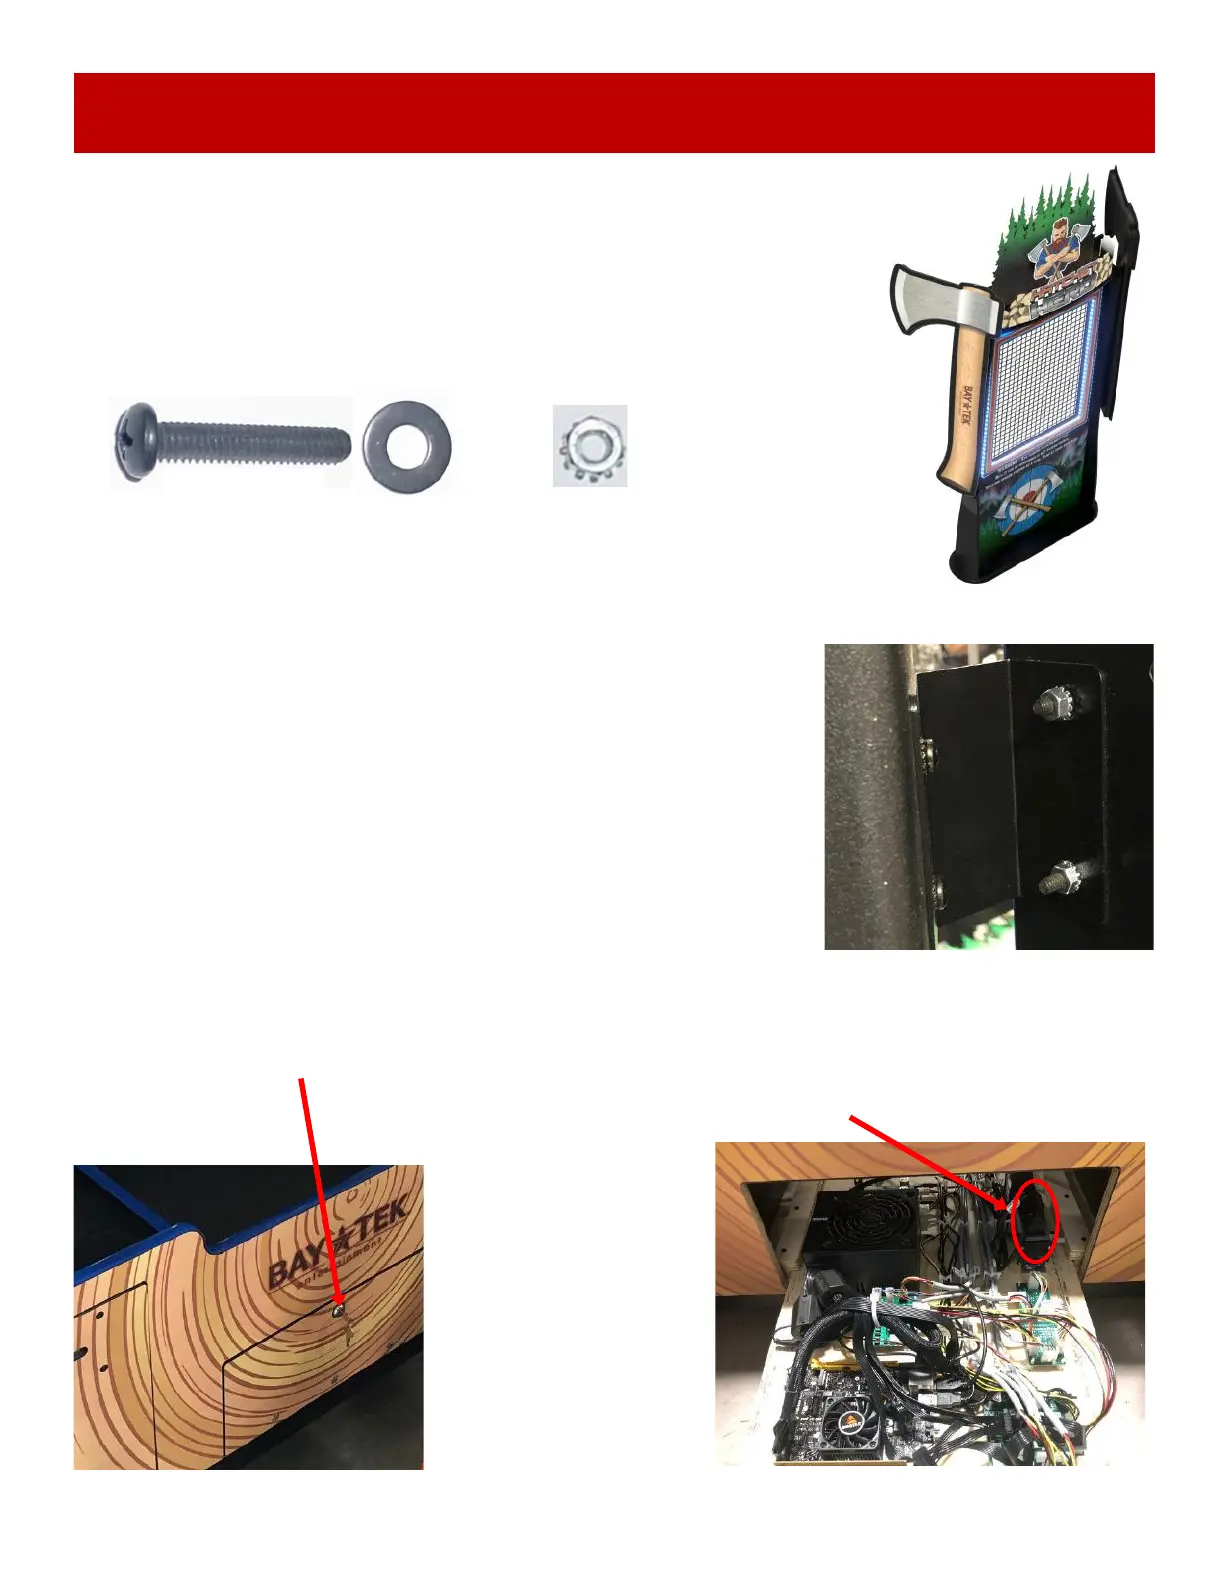
AXE MASTER SETUP
Locate both of the large axe assemblies:
The left axe (Label O) (Part # AAAX29000-L)
The right axe (Label P) (Part # AAAX2900-R)
Locate 8 each of the hardware needed for mounting axes.
(4 per side) Black ¼-20 X 1 1/2” Phillips head bolts and 2 of 1/4” black
washers and a nut.
Important:
2 people are needed for installing the axes.
One person will hold the axe in position, the other person can climb the
ladder and install the bolts, washers and nuts.
The mounting brackets will come already attached to the axes.
To secure to the game, insert a bolt and a washer into the wood on
the back side of the safety wall.
Slide the bracket on the bolt, and tighten the nut using a 7/16”
wrench.
Plug the CE29047 cable from the axe to the CE29065 cable inside
the marquee.
Follow the same process to mount the other axe.
A5WAFL090
A5SCPP025
A5NULO050
The game can now be plugged into the wall.
Open the front middle bottom door of the game, and slide out the electronics tray.
There is a power switch on the outlet located here.