31
EDS309x_D00012_03_M_XXEN/11.2014
6. Operation
6.1 Short description of insulation fault location (EDS mode)
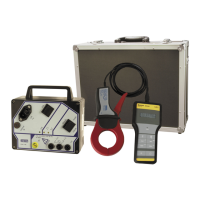
6.1.1 Commissioning the PGH18… for locating current injection
1. The PGH18… is to be connected first to PE in the system to be checked, see page 28
2. Then connect the PGH18… to the active conductors
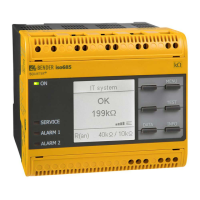
3. Connect device to U
S
and switch on
If the locating current I
L
is to be supplied by an IRDH575, select the EDS-Setup menu item on this de-
vice and set to EDS=On.
6.1.2 Insulation fault location using EDS195P
1. There must be no conductors in the measuring clamp and the measuring clamp must be sta-
tionary during
commissioning
2. Switch on EDS195P without current transformer using the button
3. Wait for the end of the self test and the message "No CT connected"
4. Set required current transformer type using the button
5. Connect selected current transformer and wait for end of the self-test
6. Fit measuring clamp to PE conductor between PGH18… (IRDH575) and, for example, PE rail to
demonstrate that the necessary locating current I
L
is flowing.
7. Place measuring clamp around the associated active conductors for the related outgoing cir-
cuit. Caution! Do not include PE in the cables in the clamp!
8. Read measured value and evaluate.
If the response value set has been exceeded, the "ALARM" LED flashes.
6.2 Detailed description of insulation fault location
For information on using the EDS309… without a permanently installed EDS system, see
page 42
For information on using the EDS309… in addition to a permanently installed EDS system, see
page 45
For information on using the EDS309… in diode-decoupled DC systems, see page 49
6.3 Description of a residual current measurement
Using the EDS195P it is also possible to undertake residual current measurements up to a value of 10
A, see page 49.
Risk of electric shock!
On touching live uninsulated conductors, death or serious injury may be caused.
For this reason avoid any contact whatsoever with active conductors on posi-
tioning the measuring clamp.