P-9000LT/F Low-Rise Pit Lift 32 P/N 5900022 — Rev. B — Nov. 2019
Connect the Buttons
The three Controls for the Lift are located on the Console cover. They do
not
come installed; you must
install them.
The three Controls are:
• Raise button. Not yet connected, described in this section. Used to raise the Platforms.
• Lower button. Not yet connected, described in this section. Used to lower the Platforms.
• Safety Lock Release button. Already connected, covered in Connect the Air Line. Uses
air pressure to push the Platforms off of their Safety Locks so that they can be lowered.
Because the Console and the Power Unit are shipped separately, you connect the Raise and Lower
buttons to the underside of the Console cover
after
the Console is assembled and the Power Unit is
put in place.
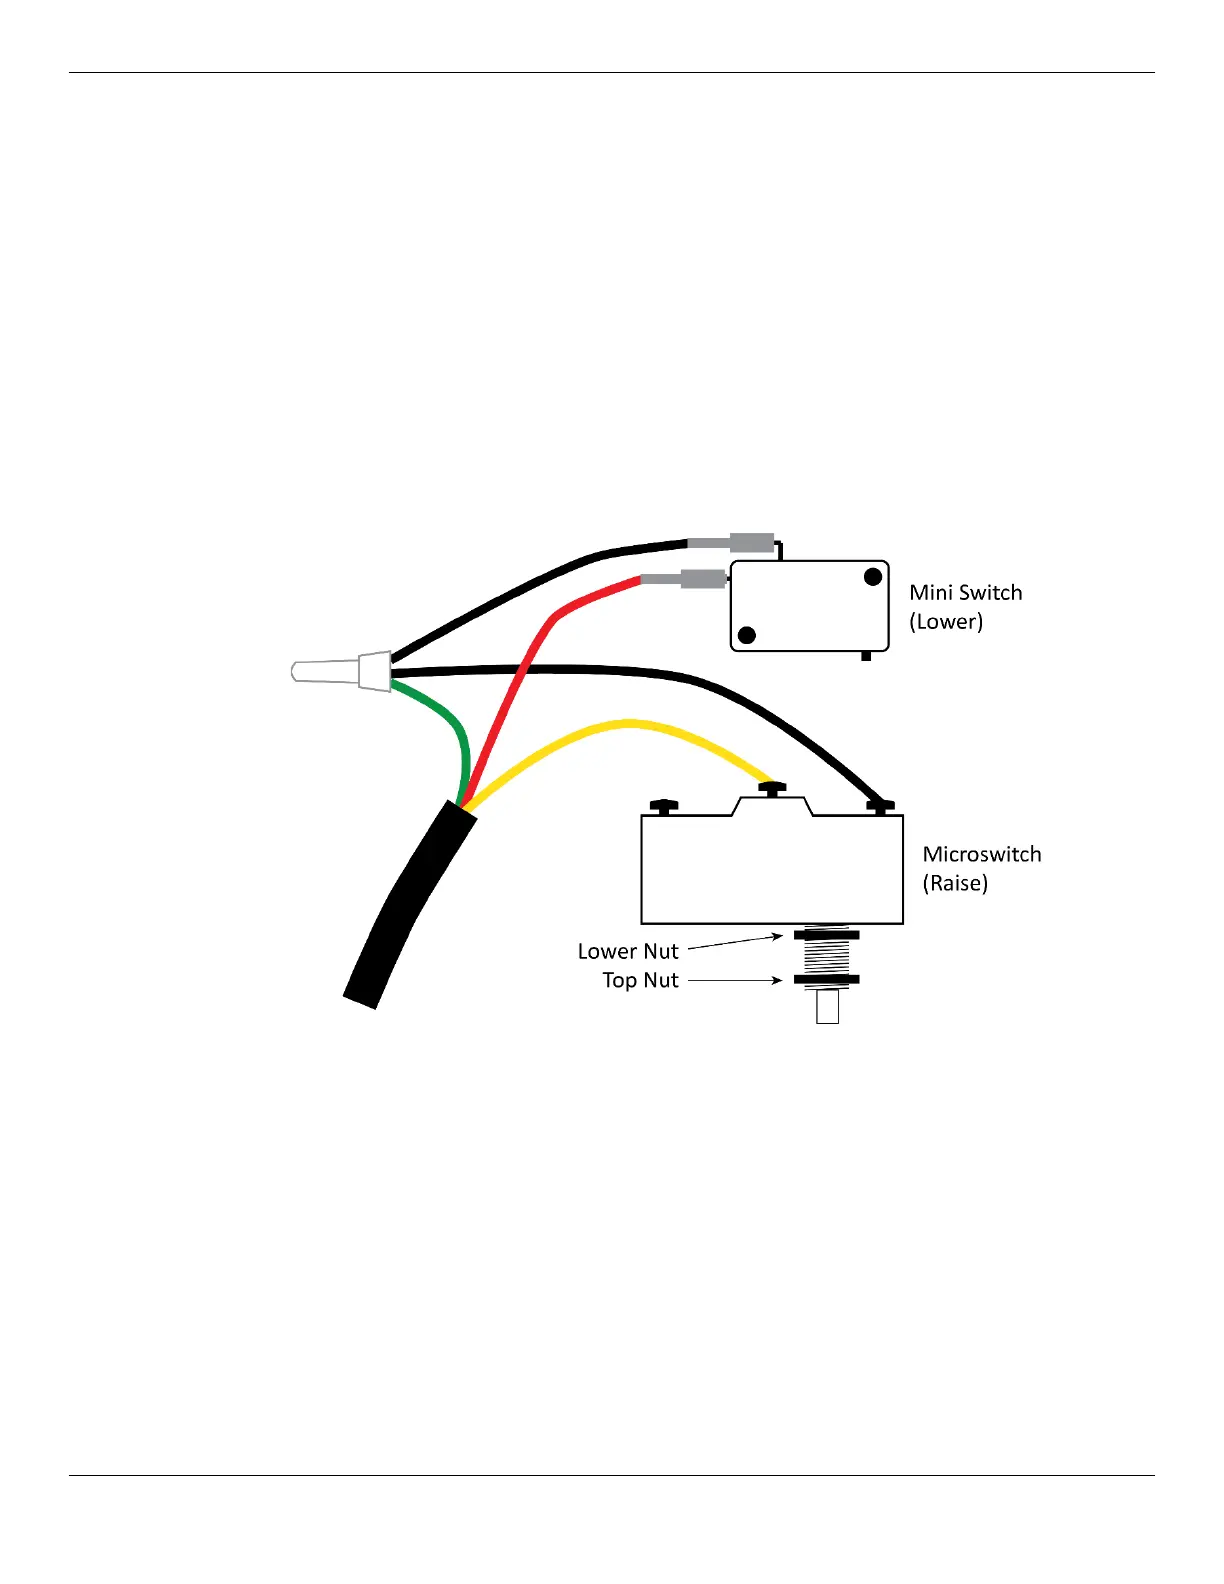
The wiring for the Mini Switch (Lower button) and Microswitch (Raise button) comes connected to the
Power Unit from the factory, as shown below.
Not necessarily to scale.
If any of the wires are disconnected or missing, refer to Troubleshooting.
Do
not
perform the following procedure until the Console is assembled and the Power Unit is installed
inside it, covered in Set Up the Console and Attach the Power Unit.
To connect the Controls:
1. Remove the front of the Console if it is currently in place.
2. On the Console Cover, note the locations of the Raise and Lower controls, then turn the Console
Cover upside down. Use care, the Air Line and the incoming air supply are connected.
3. Locate the Microswitch (connected to the wiring on the Power Unit) and the Button Guard.
4. Take the Top Nut off of the threads on the Microswitch.
5. Put the Microswitch and Lower Nut into place through the Console Cover.
The Microswitch is the Raise button.