PL-12000DP Series Parking Lift 49 P/N 5900285 — Rev. A1 — February 2023
Installing the Flex Tube
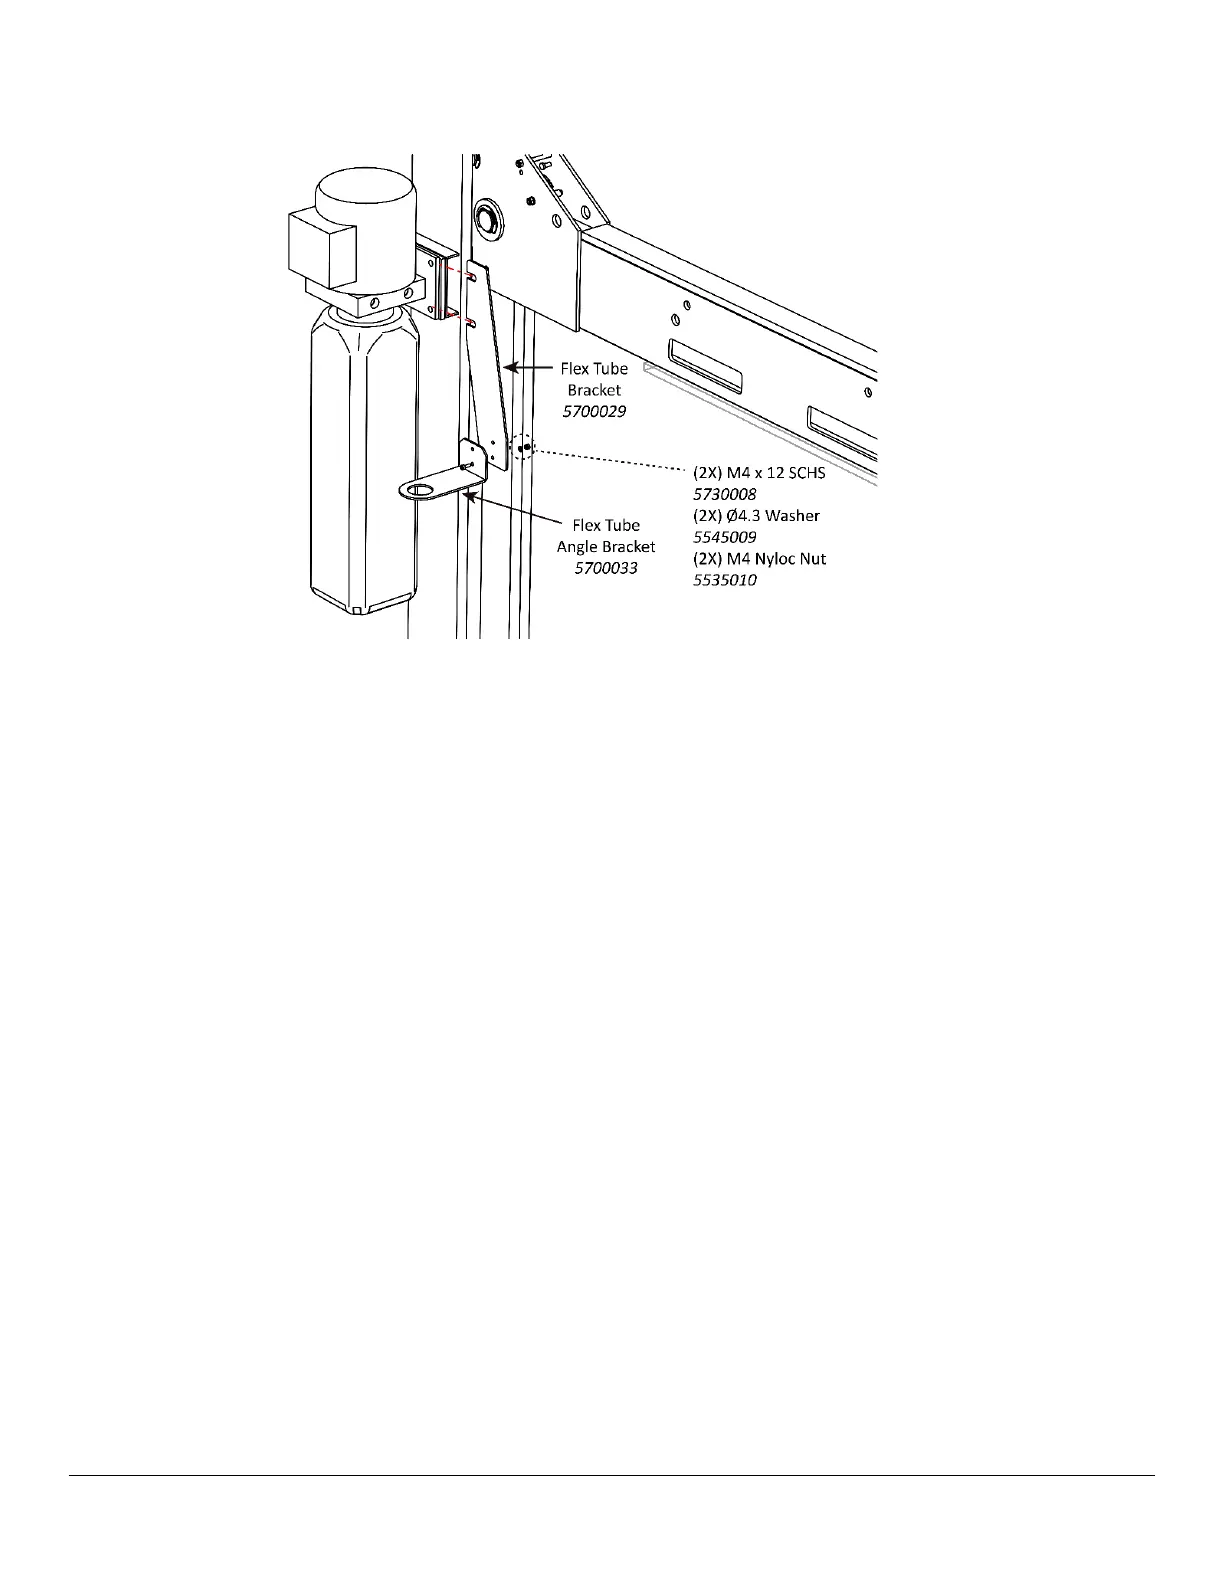
1. Locate the Flex Tube Bracket (5700029) and the Flex Tube
Angle
Bracket (5700033) from the
Parts Box.
2. Install the Flex Tube Bracket. Location options are between the Mounting Bracket and the Back
Plate or between the Back Plate and the retaining Nut.
NOTICE It is acceptable to install the Flex Tube Bracket between the Mounting Bracket and the
Back Plate. This allows the Flex Tube
Angle
Bracket (which holds the Pushbutton Air Valve and is
described in the next section) to be installed between the Back Plate and the retaining Nut. This
configuration is common, but not required. BendPak recommends orienting the Flex Tube so that the
exiting lines will be adjacent to the Power Unit and the Pushbutton Air Valve’s connections.
3. Connect the
Flex Tube Angle Bracket
to the
Flex Tube Bracket
using two Bolts, Washers,
and Nuts.
The Flex Tube
Angle
Bracket can be connected on either side of the Flex Tube Bracket.
4. When the Flex Tube
Angle
Bracket is in place, unscrew the Plastic Collar of the Flex Tube.
5. Holding the Flex Tube by the Plastic Collar, put the Threads through the hole on the Flex Tube
Angle
Bracket
from underneath
and let the other end hang loosely.
6. Screw the Plastic Nut back onto the Threads and tighten.
Measure Flex Tube and Cut-to-Length
7. Move the Lift Platforms to the Top Lock as described in this Manual.
8. Carefully measure, correctly mark, then accurately cut the Flex Tube at the measured length for
your Lift. The cut-to-length dimension is 52 (±1) in. / 1,320 (± 25) mm.
9. Loosely install the second Connector on the Flex Tube Angle Bracket.


 To Next Page