1818
DANGER !
ENSURE THAT BOTH THE POWER SIDE &
OFF SIDE SAFETIES ENGAGE PROPERLY
PRIOR TO LIFT OPERATION.
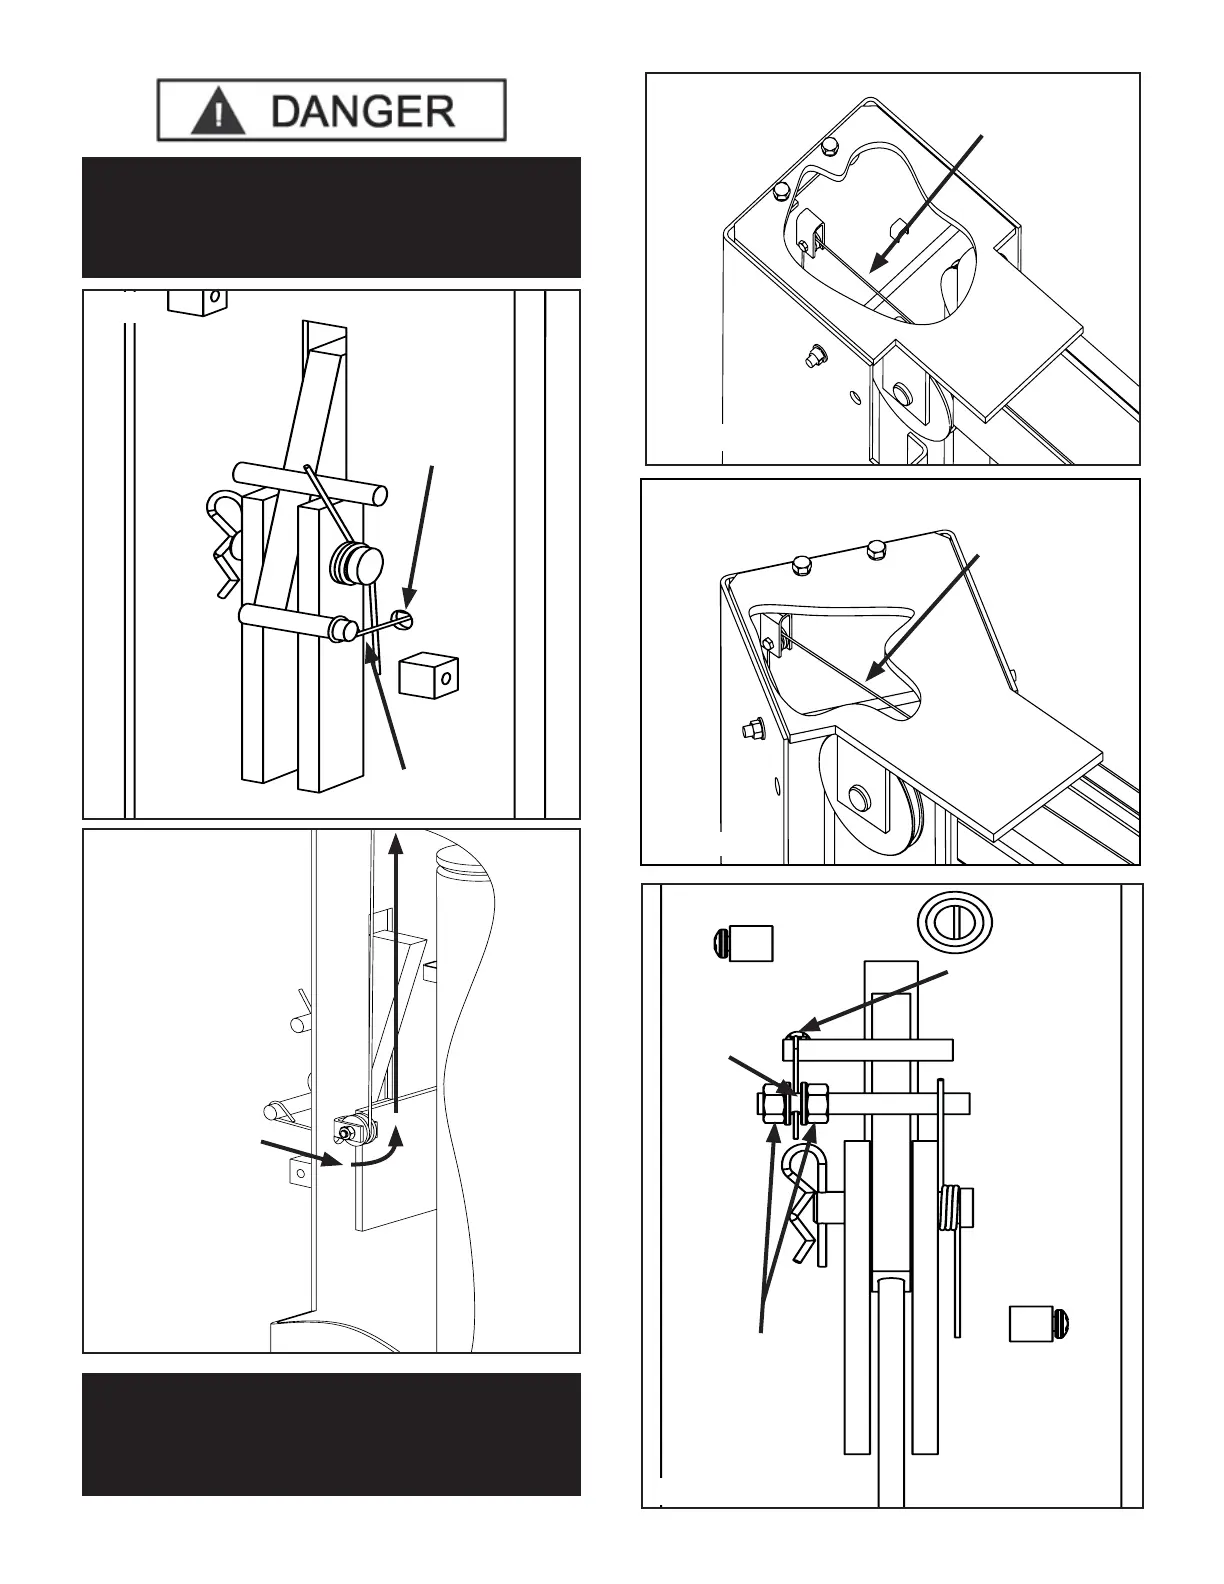
Fig 9.3
Slip looped end
over bottom pin
Insert non-looped
end of safety
cable through
hole in post
Fig 9.4
Route safety cable
under Off Side
safety sheave and up
towards Overhead
Assembly
NOTE: Post cut away
for clarity
Fig 9.5
Safety
Cable
XPR-10 Models
NOTE: Top plate cut away for clarity
Fig 9.6
Safety
Cable
XPR-10A Models
NOTE: Top plate cut away for clarity
Fig 9.7
Route safety
cable over the top
pin of the Power
Side Safety
Weldment
Route safety
cable the
hole in the
treaded pin
Tighten jam
nuts ensuring
safety cable is
centered in hole
NOTE:
MAKE SURE TO KEEP THE SAFETY CABLE
CENTERED WHEN TIGHTENING JAM NUTS ON
SAFTEY.