42
25 mm
(1")
1
2
23456
CC
CSI
KG
C
L
L
2
1
A
B
3
4
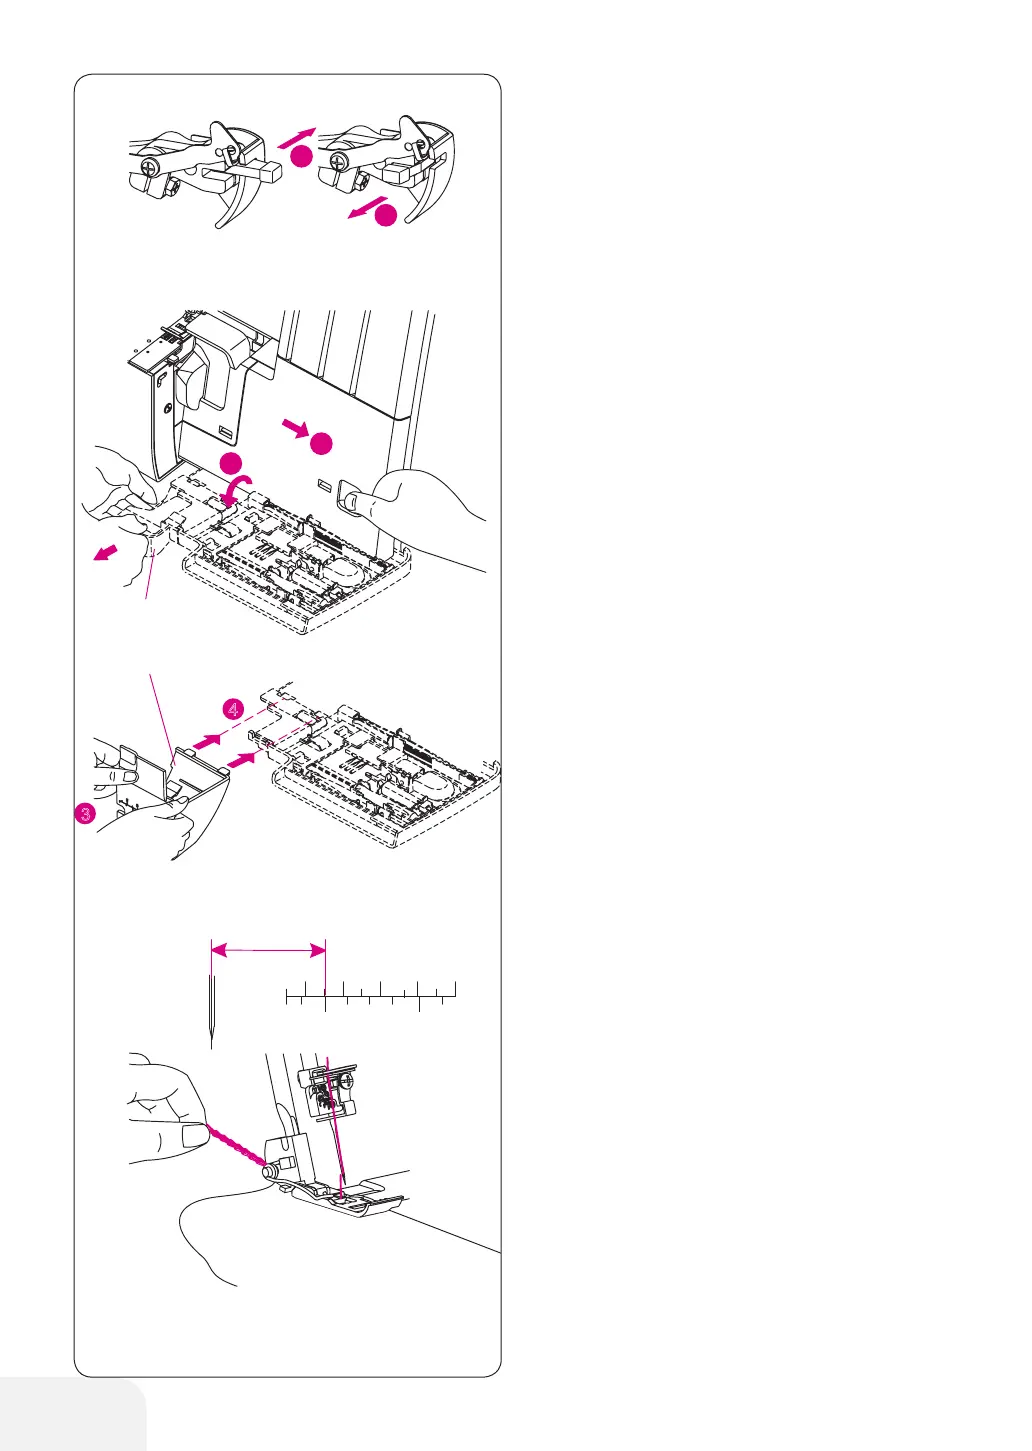
• Move knife into nonworking position
– Refer page 13 for instructions on placing upper
knife in nonworking position.
• Disengage upper looper
– Turn handwheel till driving shaft is at its most
right position, otherwise danger may occur.
– Push clutch button to the left and up (A) for
coverstitch/chainstitch or to the left and down
(B) for overlock.
• To re-engage upper looper
– Turn handwheel till driving shaft is at its most
right position, otherwise danger may occur.
– Push clutch button to the left and up (A) for
coverstitch/chainstitch or to the left and down
(B) for overlock.
• To install the seam guide plate
– Open the looper cover
– Remove knife cover (KG) and install seam
guide plate (CSI).
– The graduations on seam guide plate indicate
the distance from chainstitch needle. Use this
as a guide when checking the distance between
coverstitch left needle and fabric edge.
Machine set up
• Start and end of sewing
– When starting to sew, pull the thread chain
lightly to the rear of machine until the needle
penetrates the fabric.
– When starting to sew after threading the
machine, sew 2–3 cm on a scrap fabric and
chain-off to make a chain.
– At end of sewing, pull the fabric lightly to the
rear of machine and chain-off.
The 2-Thread chainstitch is sewn with 2 threads, one
needle and one looper. Normally, the machine trims
the fabric edge while the seam is being sewn.
However, a chainstitch seam can be placed at a
desired distance from edge of fabric by putting the
knife in a nonworking position, disengaging the upper
looper and installing the chainstitch seam guide
plate.