UNITE – Charging
13
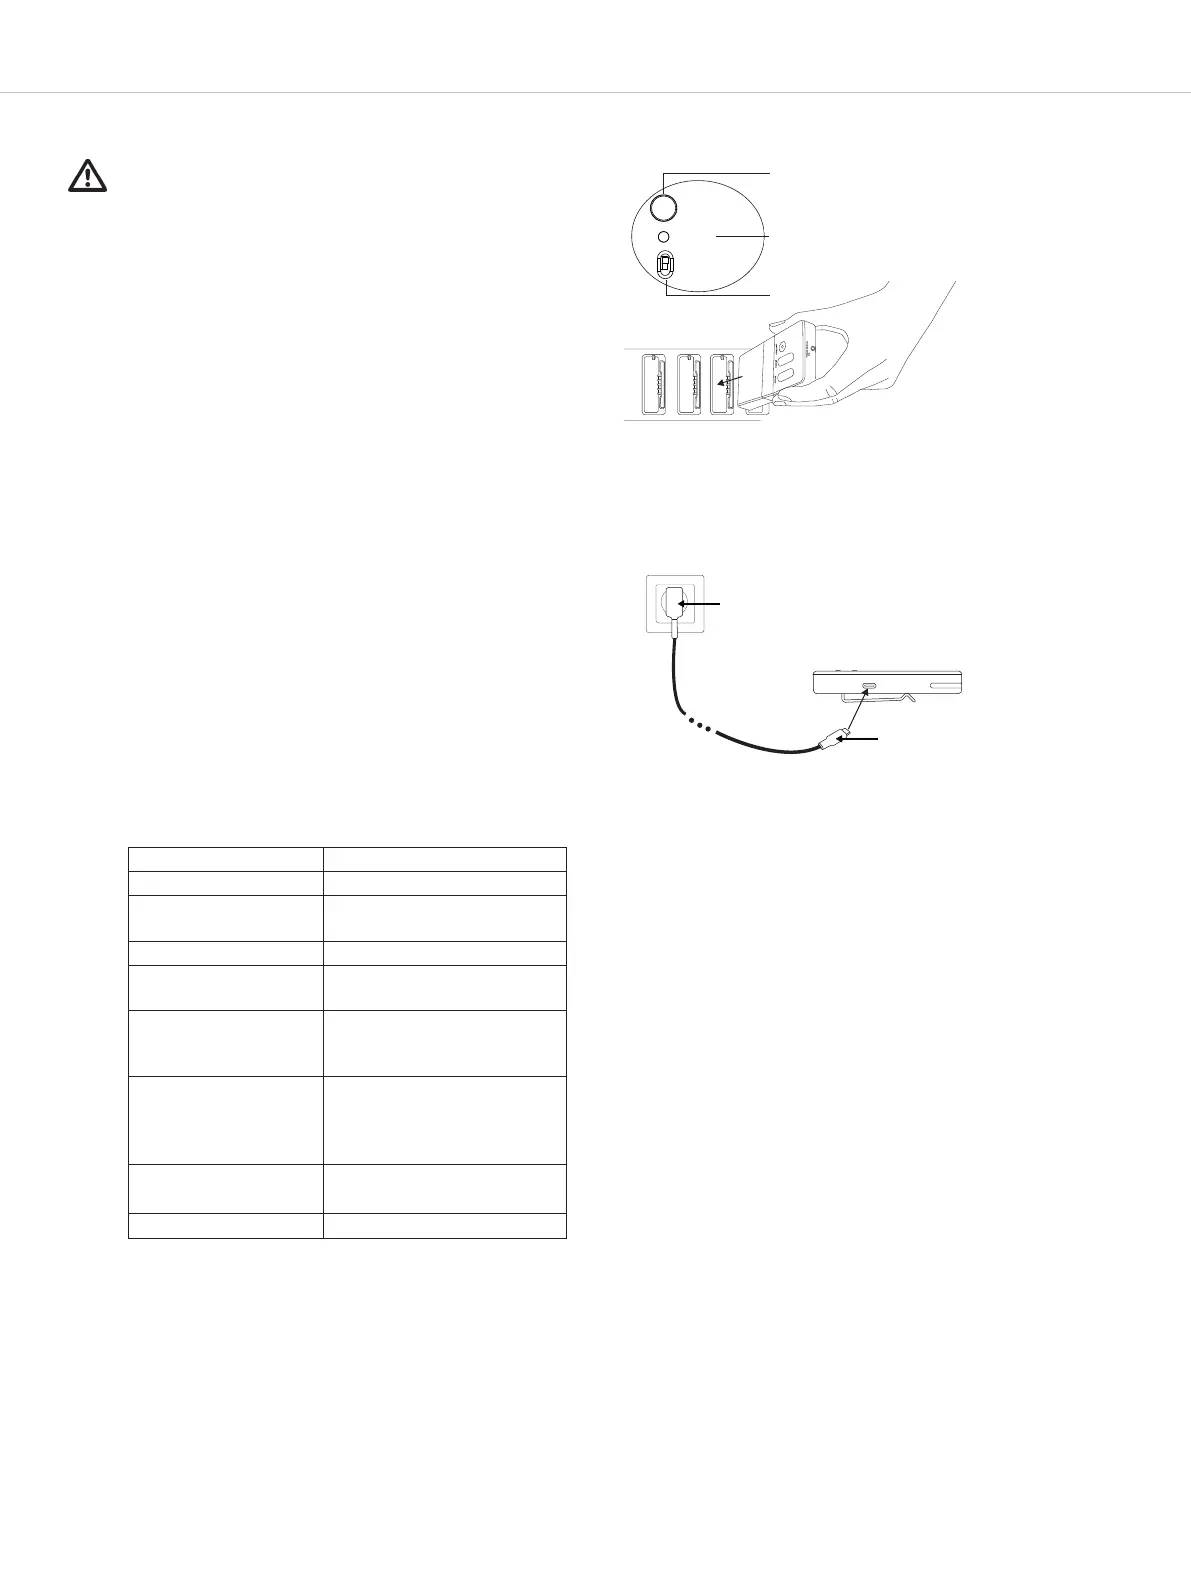
8. Charging
Before using the Unite syem for the fir time, you mu
charge the batteries integrated in the Unite TP or Unite
TH transmitters and Unite RP bodypack receiver. The
charging process and relevant charge atus is shown
on the atus light of the transmitter/ receiver.
There are two options for charging the battery:
1. Unite charger
• Connect the charger to an easily accessible power
outlet.
• Switch the charger to the position “Charge only” .
• Inse the transmitter/receiver into the charging com-
pament. Please ensure the device is placed into the
charging compament in such a way as to ensure
proper contact with the charger.
• The charging process will a automatically.
• It is not possible to use the transmitter/receiver during
charging.
2. USB power adapter
• Connect a separate USB power adapter to the USB
po on the transmitter/ receiver.
• Connect the plug of the USB power adapter to a
power outlet.
• The charging process will a automatically.
• It is not possible to use the transmitter/ receiver
during charging.
• The battery’s charge atus is shown on the LED indi-
cator of the relevant transmitter/receiver.
See the following table.
Charging with Unite charger
Charging with USB power adapter
USB power adapter
USB plug
type C
Display Charging atus
O The device is switched o
Flashing green slowly Charging mode 0–100%
Green Battery is charged
Flashing yellow slowly Pairing information is being
copied from the transmitter
10 seconds yellow Device information success-
fully copied to charger/devi-
ces
Flashing red slowly for
10 seconds
• More than one transmitter
in the charger at the a
of the pairing process
• Other pairing errors
Flashing green/yellow
rapidly
Device is being localised
Flashing red rapidly Charging error
Pair/Reset
Status
•
Pair & Charge
• Charge only
Table 3
Found on charger