UNITE – Initial operation
7
5. Simple initial operation of the Unite syem with one transmitter and factory-set group ID
Pair/Reset
S
tatus
•
Pair & Charge
•
Charge only
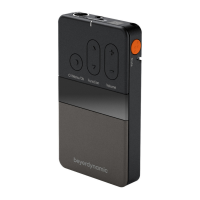
1. Before initial operation, charge the
battery in the Unite receiver and Unite
transmitter with a Unite charger.
S
et the switch on the Unite charger to
t
he “Charge only” position.
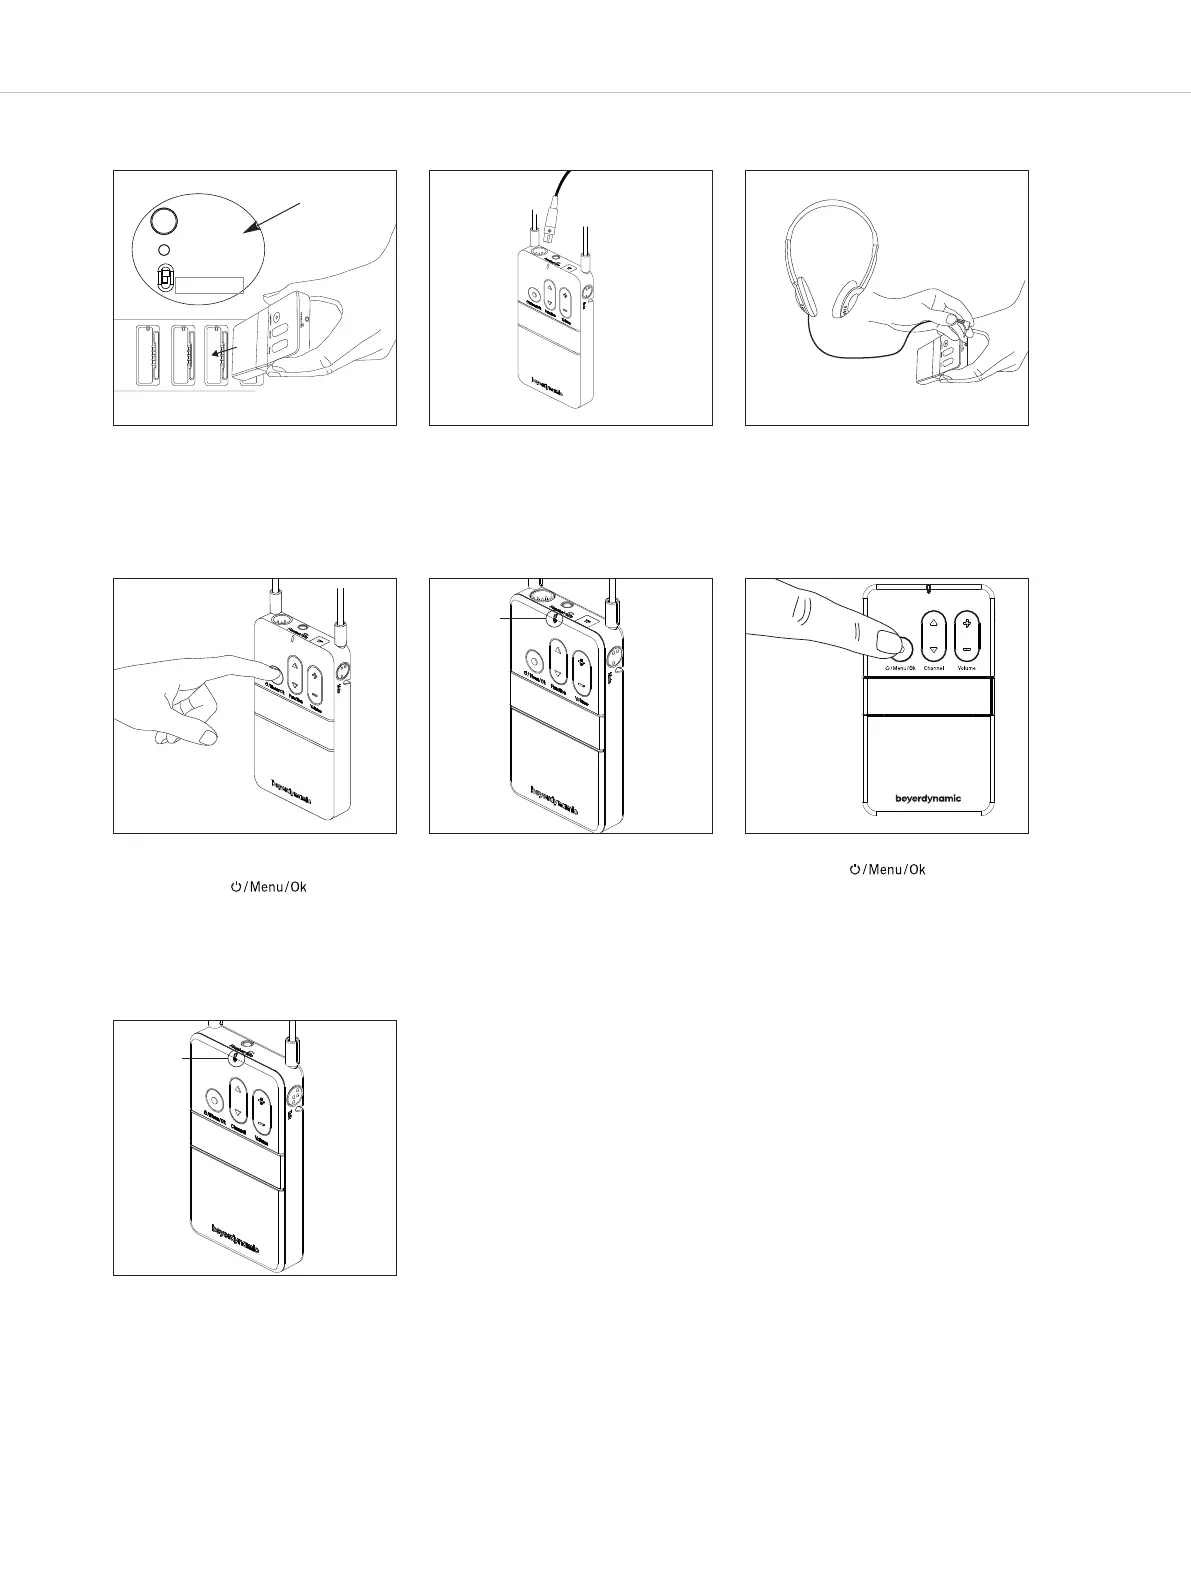
2. Connect a microphone or headset to
the bodypack transmitter.
3. Connect headphones to the
bodypack receiver.
4. Switch on the bodypack transmitter
or handheld transmitter by briefly
pressing the button.
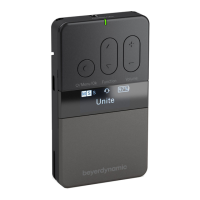
5. The status indicator on the transmitter
initially lights red. Once the transmitter
has found a suitable frequency, the
status indicator lights green to
indicate that the transmitter is ready
for operation. The factory-set name
“Unite” is displayed.
6. Switch on the receiver(s) by briefly
pressing the button.
s
tatus
indicator
U
nite
7. The status indicator on the receiver
initially lights red. Once the receiver is
connected to the transmitter, the
status indicator lights green. The
“Connecting” message on the receiver
display indicates that the connection
has been established. As soon as the
receiver is connected to the
transmitter, the name “Unite”, factory-
set in the transmitter, is displayed on
the receiver.
The Unite system is ready for
operation.
status
indicator
Unite
You will find a detailed description of the Unite system and its
operation in the following chapters of the system manual.
Found on charger