KW-231-114
NOTICE
Serious injuries are possible. New component
may suddenly become detached.
Check the thread.
Carefully screw in the new component. Observe
the tightening torques!
Perform a tightness test before commissioning!
After mounting all components of the liquid injection
system:
NOTICE
After assembly work on the compressor, there is
a risk of oil or refrigerant leakage
Perform a tightness test before commissioning!
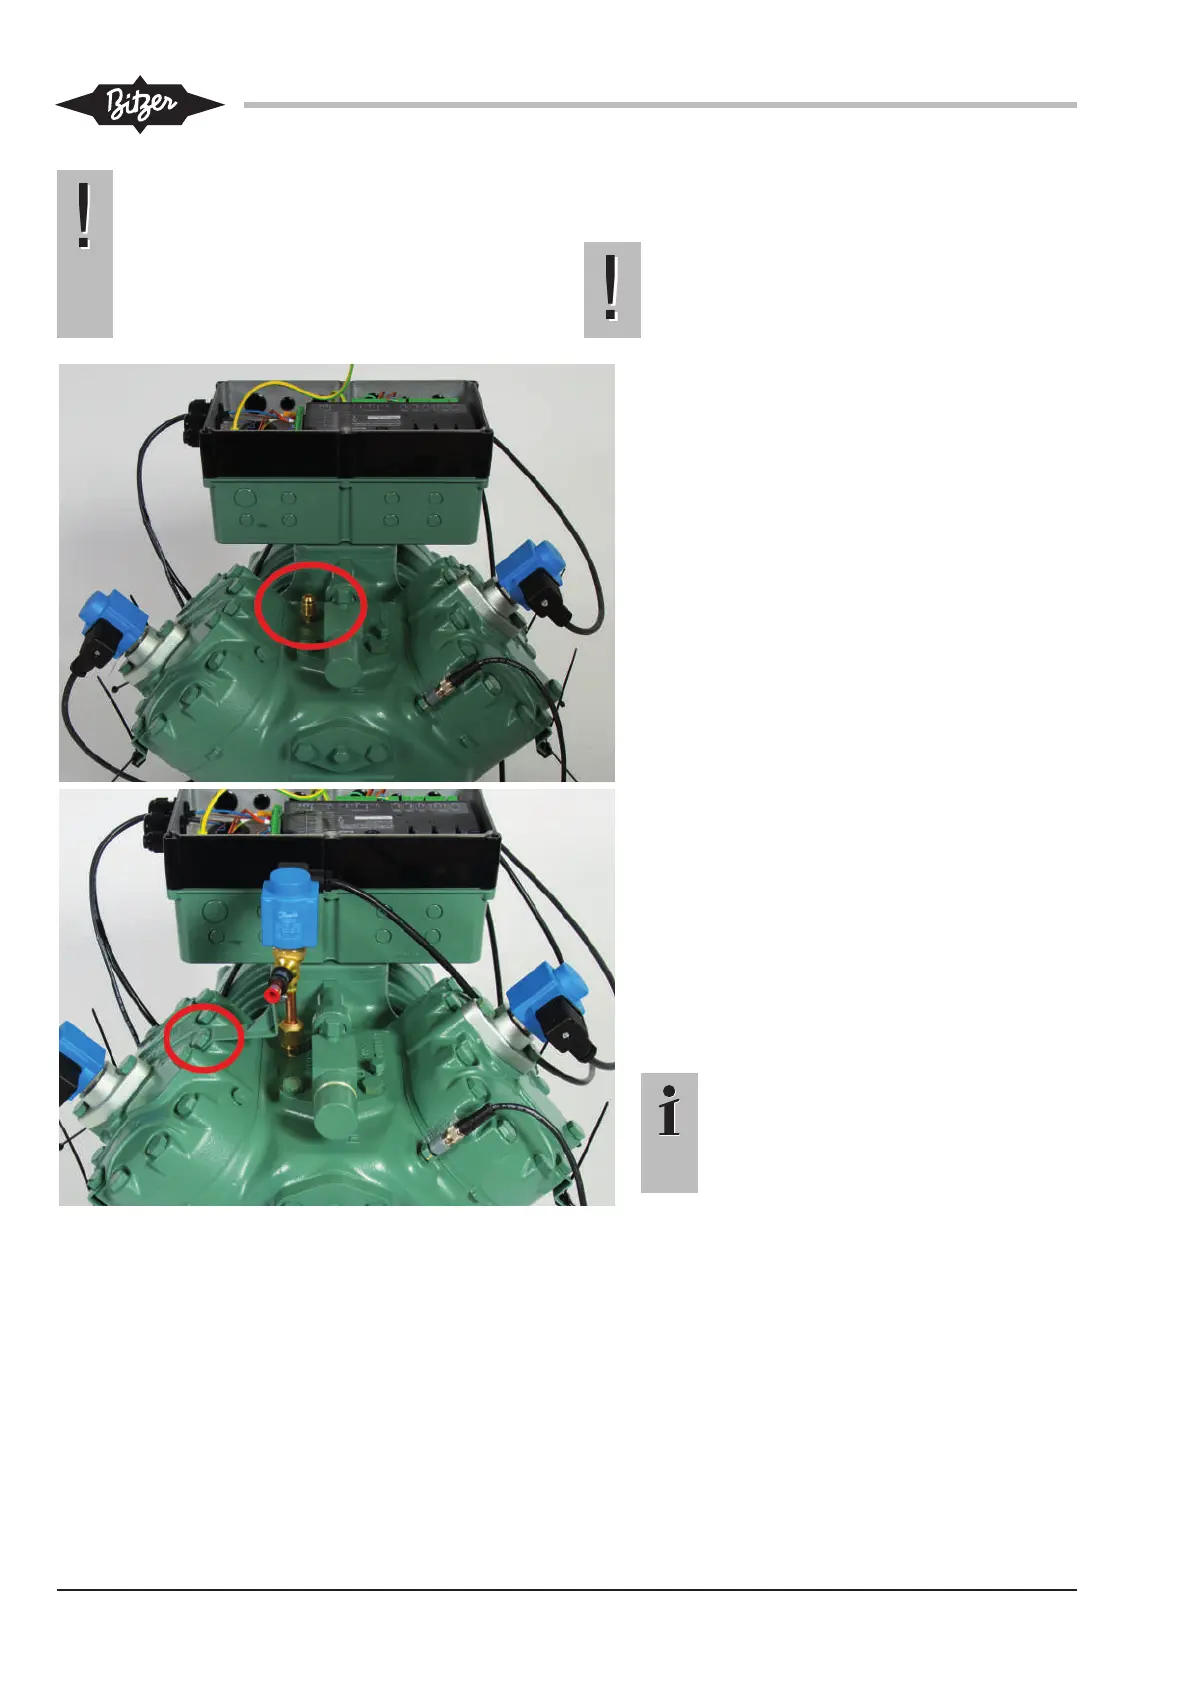
4-cylinder compressors 4JE-13Y .. 4FE-35(Y):
The 4-cylinder compressors are equipped with
an injection nozzle:
• Before installation, make sure that the injec-
tion nozzle is clean.
• Then remove the sealing plug (1/8 NPTF) and
screw the injection nozzle into place (tighten-
ing torque: 10-13 Nm).
• Wrap Teflon tape around the conical thread
(1/8 NPTF) to seal it.
• Screw the injection valve into place. It comes
premounted to the connecting line (including
screwed joints) leading to the injection nozzle.
• To avoid undefined vibrations and tensions in
the connecting line, secure the injection valve
through the fixing plate on the cylinder head.
• To this end, loosen the corresponding screw
on the cylinder head and tighten it again with
the fixing plate inserted (tightening torque: 80
Nm).
• Press the solenoid coil onto the armature until
it engages.
• Insert the electric connector of the device and
screw it down (tightening torque 5 Nm).
Information
Due to the position of fixing plate and
pipe clip on the cylinder head, the direc-
tion of pipe entry into the valve needs to
be considered for installation.