OM6003.PUB Page 30 DATE PRINTED: 4/7/11
© Blaze King Industries Canada Ltd June 2006 Version 1.07SIT
The Contemporary by Blaze King Owners Installation and Operation Manual
“This conversion kit shall be installed by a qualified service agency in accordance with the manufacturer’s
instructions and all applicable codes and requirements of the authorities having jurisdiction. If the
information in these instructions is not followed exactly, a fire, explosion or production of carbon monoxide
may result causing property damage, personal injury or loss of life. The qualified service agency is
responsible for the proper installation of the kit. The installation is not complete until the operation of the
converted appliance is checked as specified in the instruction manual supplied with the kit.” Before
performing this or any service procedure, make sure that the gas supply to the unit and the electrical supply
are shut off.
1. Main Burner orifice.
2. Valve Kit.
3. Conversion Sticker
CONVERSION KIT CONTENTS
To convert to an alternate fuel, follow these steps:
1. Open the front viewing door.
2. Remove the log set and brick panels.
3. Remove the log support plate screws.
4. Remove the burner assembly.
6. Remove the pedestal wrap
7. Using a 1/2” socket, unscrew the main burner orifice and replace with
alternate gas orifice. Note That the primary air bracket can be rotated to
removed orifice
8. See the separate gas valve manufacturers instructions supplied in the kit.
9. Replace in reverse.
The model Contemporary is designed to burn either
Natural Gas or Propane (LP) Fuel. Each heater leaves
the factory equipped for one specific fuel but it is a
simple operation to convert the heater to an alternate fuel
in the field. The original fuel type is marked on the
rating label:
NATURAL GAS PROPANE
LEAK TESTING:
CAUTION: DO NOT TEST FOR LEAKS WITH AN OPEN FLAME.
With the main burner “ON”, test the new pressure regulator using a soap solution
Check all fittings for leaks using the soap solution.
FUEL CONVERSION LABEL:
Fill out and attach the fuel conversion label #0630 provided in the kit and attach it to the stove near the upper right
hand corner of the approval label inside the left hand side door of the unit.
IMPORTANT: IF YOU CHANGED THE FUEL THE
AERATION WILL REQUIRE ADJUSTMENT - SEE PAGE 20
AERATION ADJUSTMENT
ALLOW THE UNIT TO BURN FOR AT LEAST 15 MINUTES TO CHECK THE FLAME PICTURE.
If you have converted from Natural gas to Propane you will have to INCREASE the aeration opening as propane re-
quires more primary air to burn correctly.
If you have changed from Propane to Natural gas you may have to REDUCE the aeration opening as Natural gas re-
quires less primary air to burn correctly.
Optional Conversion Kits
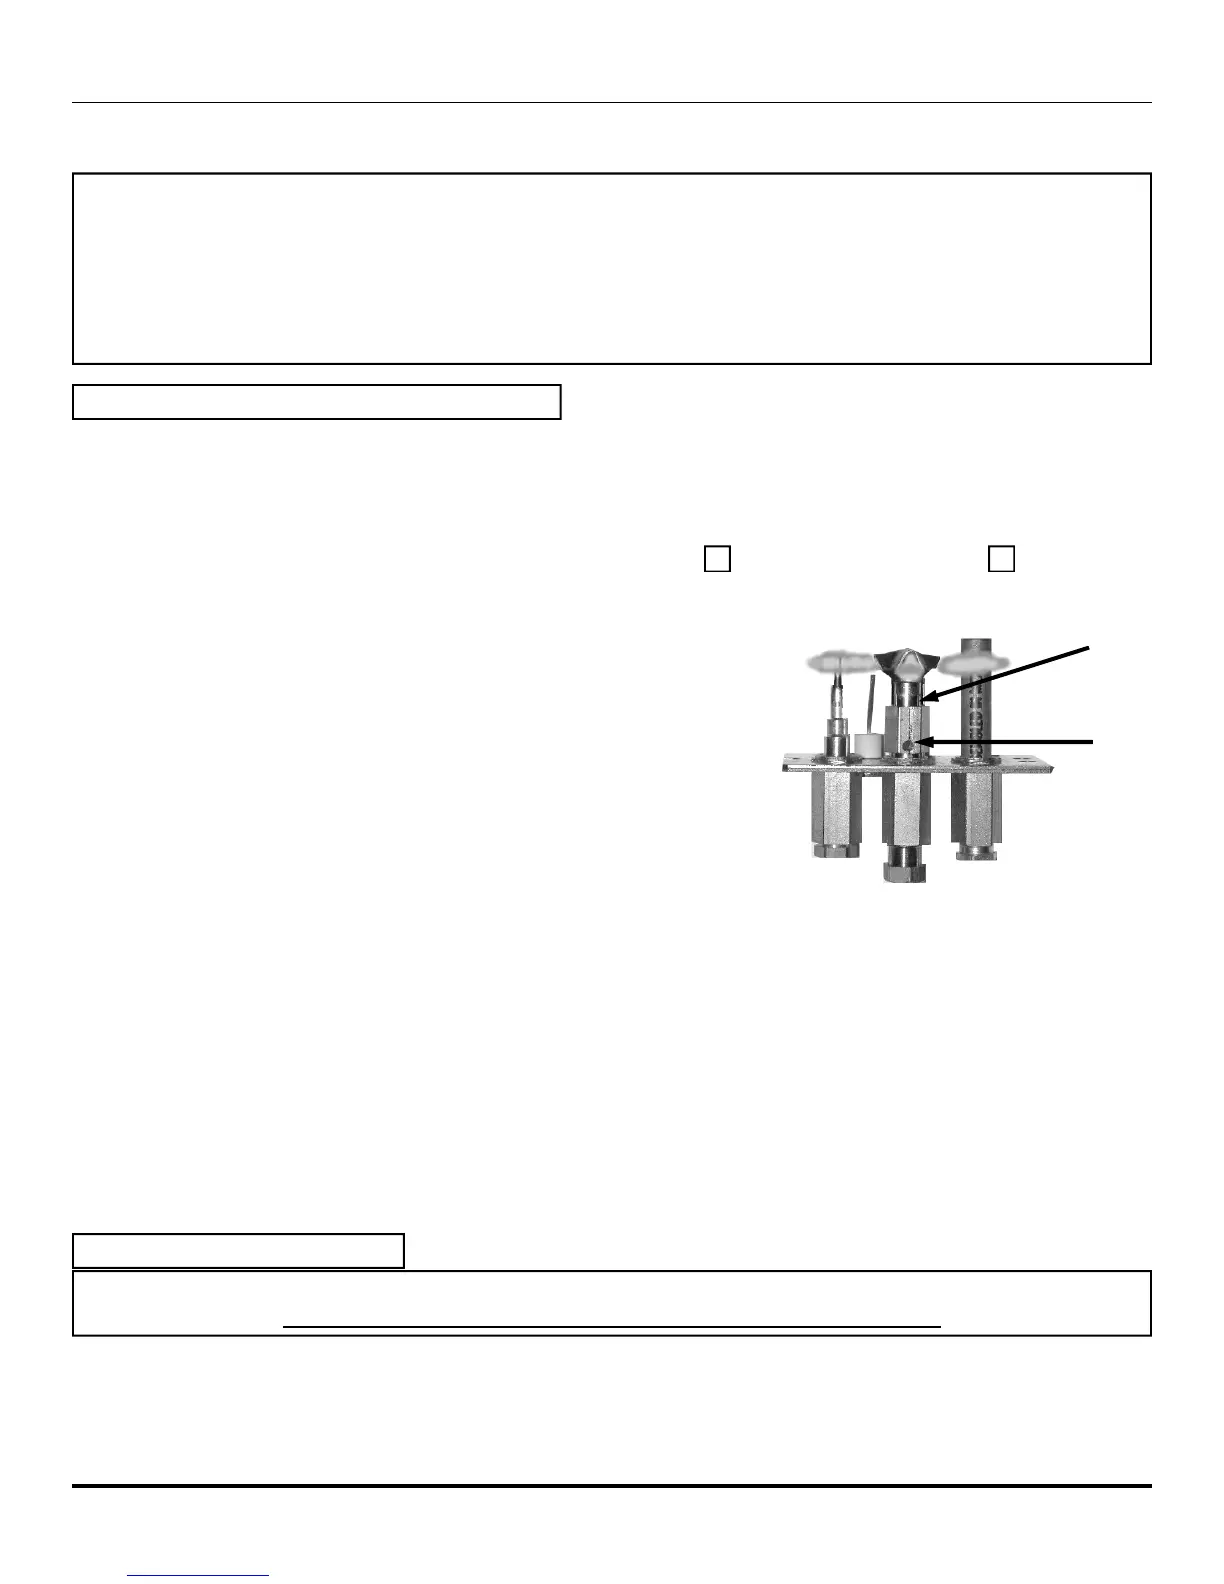
To Convert the Pilot fuel, follow these steps:
1. Use a 7/16” wrench to loosen the pilot hood
2. Push the little silver tab in and the little red tab should pop out.
3. The red tab out is used for Propane
4. The silver tab out is for Natural Gas
5. Re-tighten the pilot hood.
Pilot Hood
Fuel Type Tab
See page 32 for pilot
instructions.