07.7.1 Load model
1. Press the folder button on Cura Slicer and select the file of the model you want to
print.
2. Select the type of material you want to print with, in the material panel.
3. Adjust your model using the scale, positioning and rotate tools (note that these only
appear when the model is loaded into Cura).
4. In the print settings window, choose your profile layer height, infill support, and
build plate adhesion settings until you are satisfied with the configurations.
5. Press the Slice button.
6. When the slicing is done, press the preview button
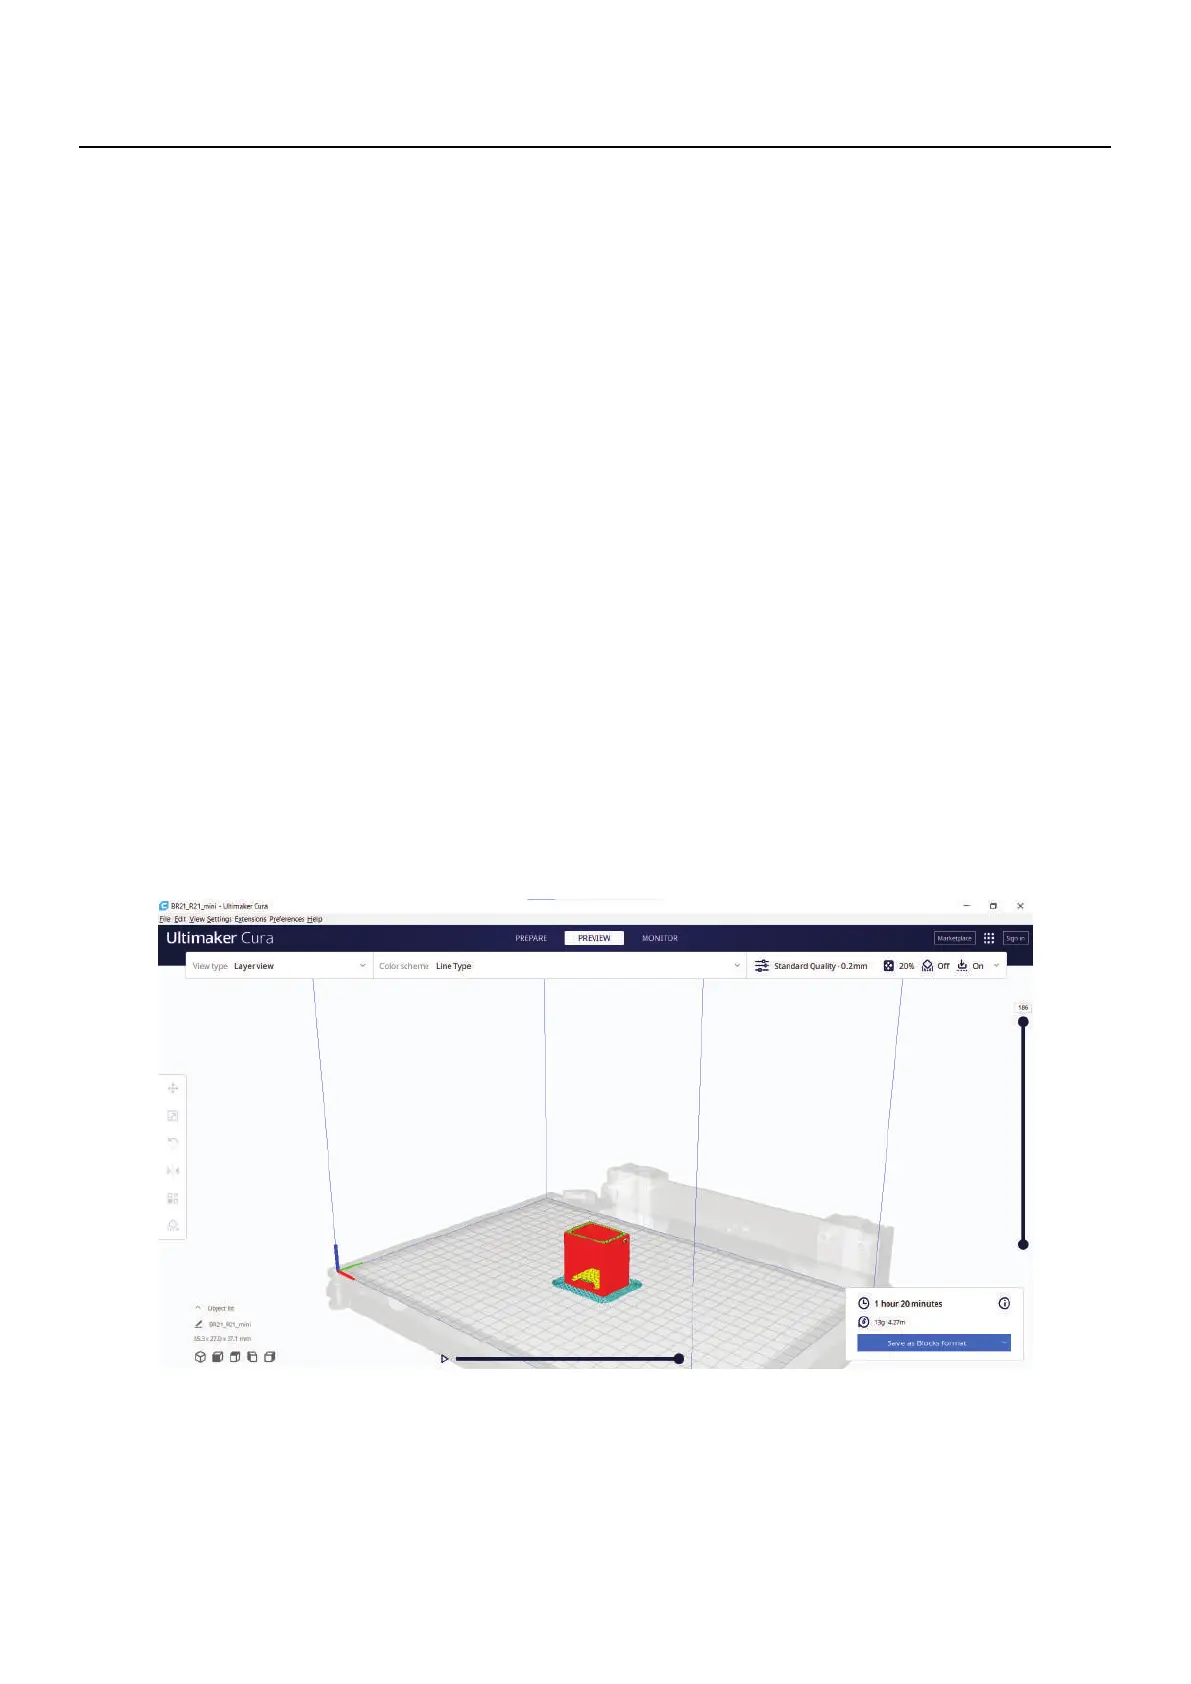
07.7.2 Print preview
You can see exactly how your model will be printed during the preview step. Use the
various color schemes to obtain various details about your model. You can see the dif-
You can inspect the
printing process layer by layer by scrolling the layer bar on the
rightside of the screen.
Make sure that the print characteristics are correct for the material to be used and the
print quality you want. Also check that the selected machine is the Blocks R21.
file to an USB drive.
07
Operation
ferent line kinds, distinguish infill from skin.
Once you are satisfied with the results save the gcode