21
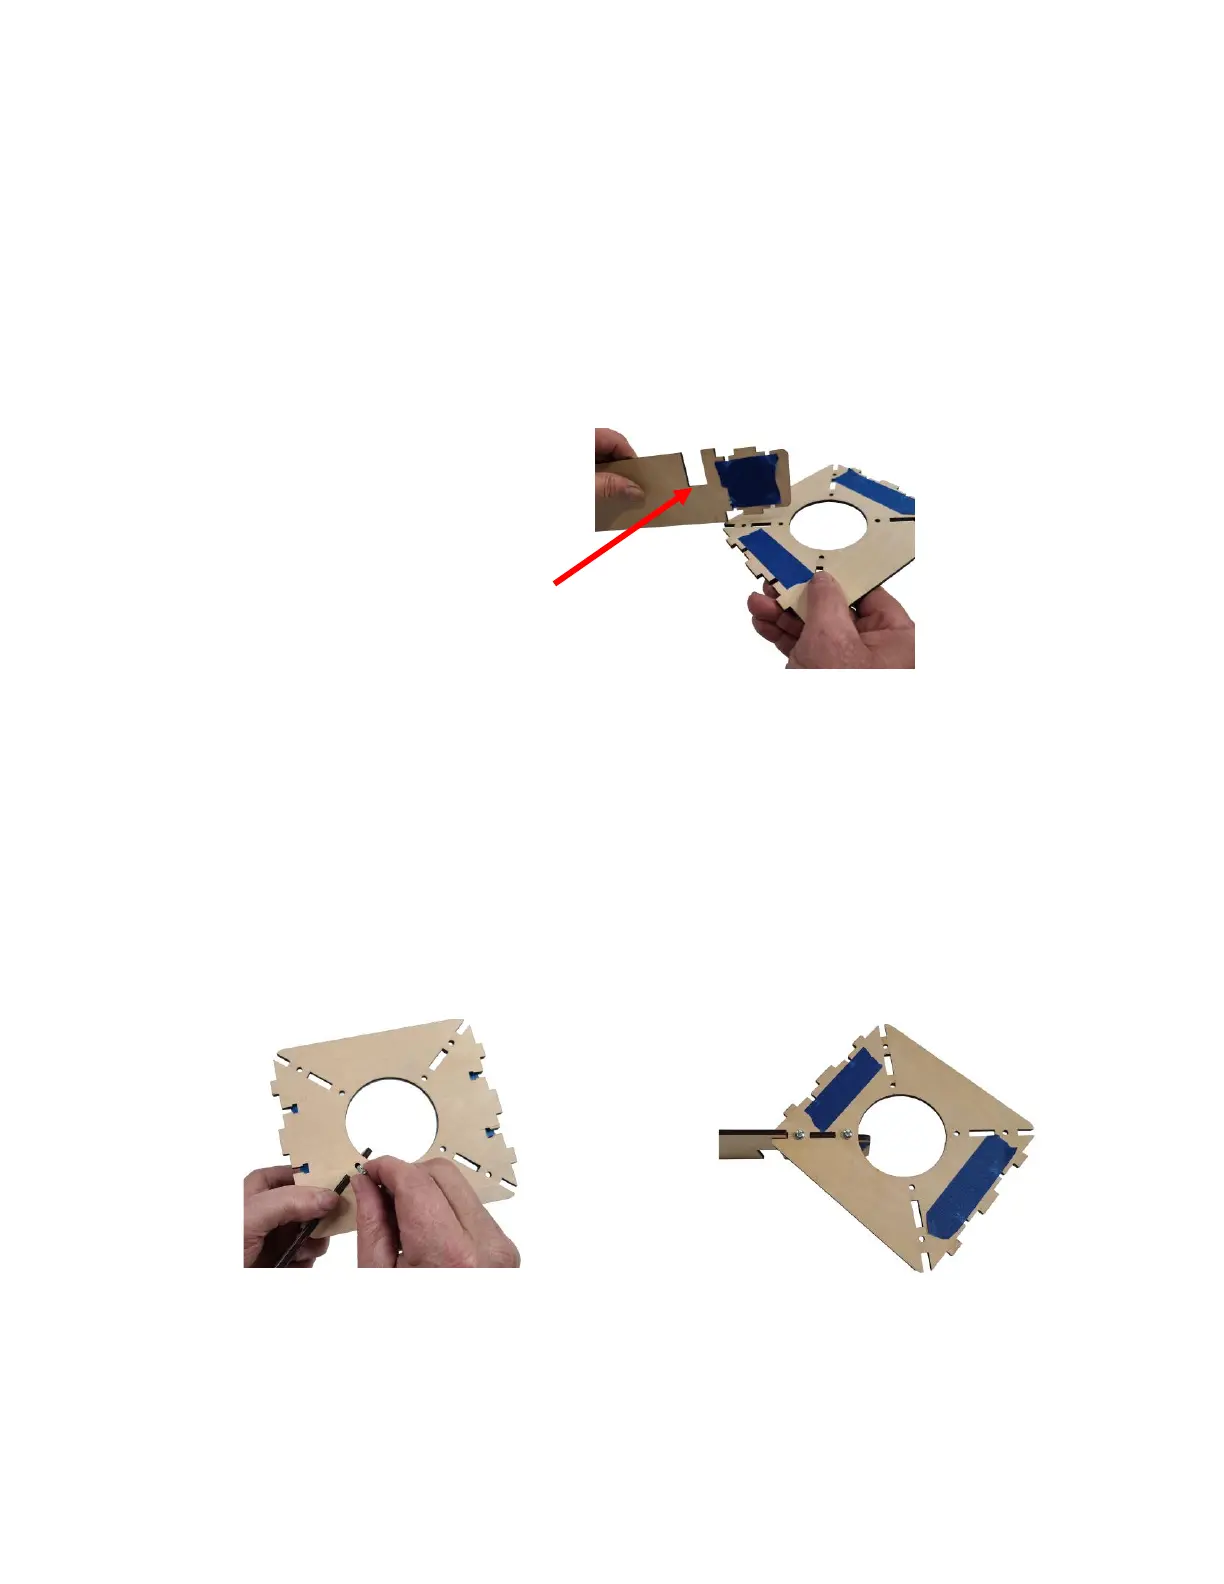
Step 3 Align the tab of the Torsion arm (QX2) with the
corresponding slot in the Torsion Plate (QX9).
Notice how the rectangular notch is oriented.
Make sure the cutout in each of the torsion arms is
oriented in the same way in the Assembly.
Step 4 Secure the Torsion Arm to the Torsion Plate using
two M4 x 16 Machine Screws (H14) as shown below.