Do you have a question about the Bogen 3000 Series and is the answer not in the manual?
Detailed steps for mounting the master clock on a wall.
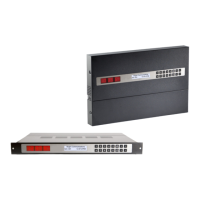
Instructions for installing the master clock in a standard equipment rack.
Prerequisites and initial setup steps before full installation.
Instructions for connecting the master clock via a line cord receptacle.
Steps for wiring AC power using a 14 AWG Romex cable.
Diagram identifying the ports and connectors on the rear of the master clock.
Guide for installing the remote antenna for wireless signal transmission.
Specific instructions for mounting the remote antenna unit.
Overview of wired system connection configurations.
Diagram and description of 2-wire digital communication system setup.
Wiring diagram and description for RS485 communication systems.
Wiring diagram and description for sync-wire communication systems.
Detailed installation procedures for various sync-wire inputs.
Details for 59-minute correction input configurations.
Details for 58-minute correction input configurations.
Configuration for National Time/Rauland sync-wire input.
Configuration for Rauland Digital sync-wire input.
Configuration for Dukane Digital sync-wire input.
Configuration for the Once a Day Pulse sync-wire input.
Procedures for fire alarm interface and network patch cable installation.
How to connect the fire alarm interface to the master clock.
Instructions for installing a network patch cable.
Guide to programming features using the master clock's LCD display.
Step-by-step guide to setting the time via the LCD display.
Step-by-step guide to setting the date via the LCD display.
Instructions for adding programmed events via the LCD screen.
Guide to viewing and editing programmed events on the LCD.
Procedure to add future schedule changes via the LCD.
How to view and edit future schedule changes on the LCD.
Steps to manually activate zones and durations via the LCD.
How to set the display format to 12 or 24 hour mode.
Instructions for configuring BELL messaging for zones via LCD.
Procedure for sending numeric messages to slave clocks via LCD.
How to select the primary time source using technician level menu.
How to select the secondary time source using technician level menu.
How to set sync-wire outputs for Clock 1 and Clock 2.
How to configure Daylight Savings Time settings via LCD.
Definitions and explanations of various sync-wire communication protocols.
How to set configurable durations for each zone via LCD.
How to set the RS485 data rate via LCD.
How to change the user level password via LCD.
How to adjust bias seconds for time offset via LCD.
How to set the time zone offset via LCD.
How to set the IP address for the master clock via LCD.
How to set the subnet mask for the master clock via LCD.
How to set the gateway address for the master clock via LCD.
How to set the DNS address for the master clock via LCD.
Methods to access the master clock's web interface.
Steps to access the web interface using DHCP.
Steps to access the web interface using a static IP.
Steps to access web interface via crossover cable.
Procedure for logging into the web interface with passwords.
Overview of the main menu options in the web interface.
How to view, edit, and add schedule events through the web interface.
How to add new events and set durations or countdown modes.
How to view and edit future schedule changes via the web interface.
Procedure to add future schedule changes through the web interface.
How to manually control zones and schedules via the web interface.
How to configure BELL and numeric messaging for individual clocks.
Accessing advanced system settings and diagnostics via the web interface.
Setting user password, RS485 data rate, and GMT offset.
Configuring input selection, backup selection, and clock circuits.
Setting Gateway IP, Subnet Mask, IP Address, DNS, and DHCP.
Configuring NTP server addresses and retry settings.
Displays MAC address, IP address, serial number, and software build date.
Setting display format, daylight savings, and zone durations.
Uploading, restoring, and downloading clock databases.
Answers to common questions regarding the master clock.