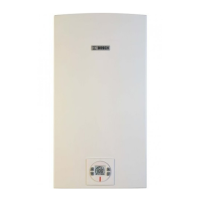
6 720 680 174 (2014/05)Therm 8000S
Installation instructions | 33
8.5 Control board diagnostics
To access the diagnostic menu, proceed as follow:
▶ Press ON/OFF button to turn off the appliance.
▶ Press and hold "Program" button and press ON/OFF
button to turn appliance ON.
▶ Release the button when '188' appears on the display.
The display should read 'P2' when the program button is
released. If not, repeat process.
▶ Press and release the button on the control panel until
the display reads 'P4'. You are now in the diagnostic mode of
the control board.
▶ When the display reads 'P4', press and release the
button once again and the display should read 'E.
▶ Use the and button on the control board to cycle
through different diagnostic modes available.
▶ Once in the selected diagnostic mode of your choice, press
and release the button to display the diagnostic
information.
Example: to read the flow rate in litters per minute while the
unit is flowing water, cycle to the '3d' mode and press the
button. A reading of 25 on the display would indicate the heater
is reading a flow rate of 2.5 litters/minute.
Once the information is obtained,
▶ Press the button again to return to the diagnostic
mode menu.
▶ Press or buttons until the letter “E” appears on
the display, to leave the diagnostic menu.
▶ Press button and in the display appear ‘P4’.
▶ Press ON/OFF button to turn off the appliance.
▶ Press ON/OFF button to turn ON the appliance.
Heater is ready for normal operation.
8.5.1 Working hours
To see how many hours the appliance has worked, please enter
the “Diagnostic menu”;
▶ Select the sub-mode “H0”.
Write the number that shows in the display.
▶ Select the sub-mode “H1”.
Write the number that shows in the display.
▶ Select the sub-mode “H2”.
Write the number that shows in the display.
After checking the sub-modes H0, H1 and H2, introduce the
values in the table below;
8.6 Fan speed adjustment
Diagnostic menu
E Entry/Exit into sub-modes
0d Set-point temperature (ºC)
1d Inlet water temperature (ºC)
2d Outlet water temperature (ºC)
3d Water flow (gallons/min) (l/min)
4d Gas type (LP or NG)
5d Fan speed (Hz)
6d Burner power (%)
7d Maximum power (kW)
8d Back flow temperature (ºC)
9d Exhaust temperature (ºC)
1)
1F Most recent error/failure
2F 2nd most recent error
Table 14
3F 3rd most recent error
4F 4th most recent error
5F 5th most recent error
6F 6th most recent error
7F 7th most recent error
8F 8th most recent error
9F 9th most recent error
10F 10th most recent error
H0 Numbers of hours - mode 0
H1 Numbers of hours - mode 1
H2 Numbers of hours - mode 2
1) Only available condensing models
Working hours
Number in H0 ______ _______ +
Number in H1 ______ (X 100) = _______ +
Number in H2 ______ (X 10 000) = _______ +
(H0 + H1 + H2) = Total of hours __________
Table 15
After installing the appliance, the minimum
power fan speed must be adjusted to
compensate for variation in vent pipe length.
Diagnostic menu
Table 14
 Loading...
