Pre Start Inspection and Operation
3.27
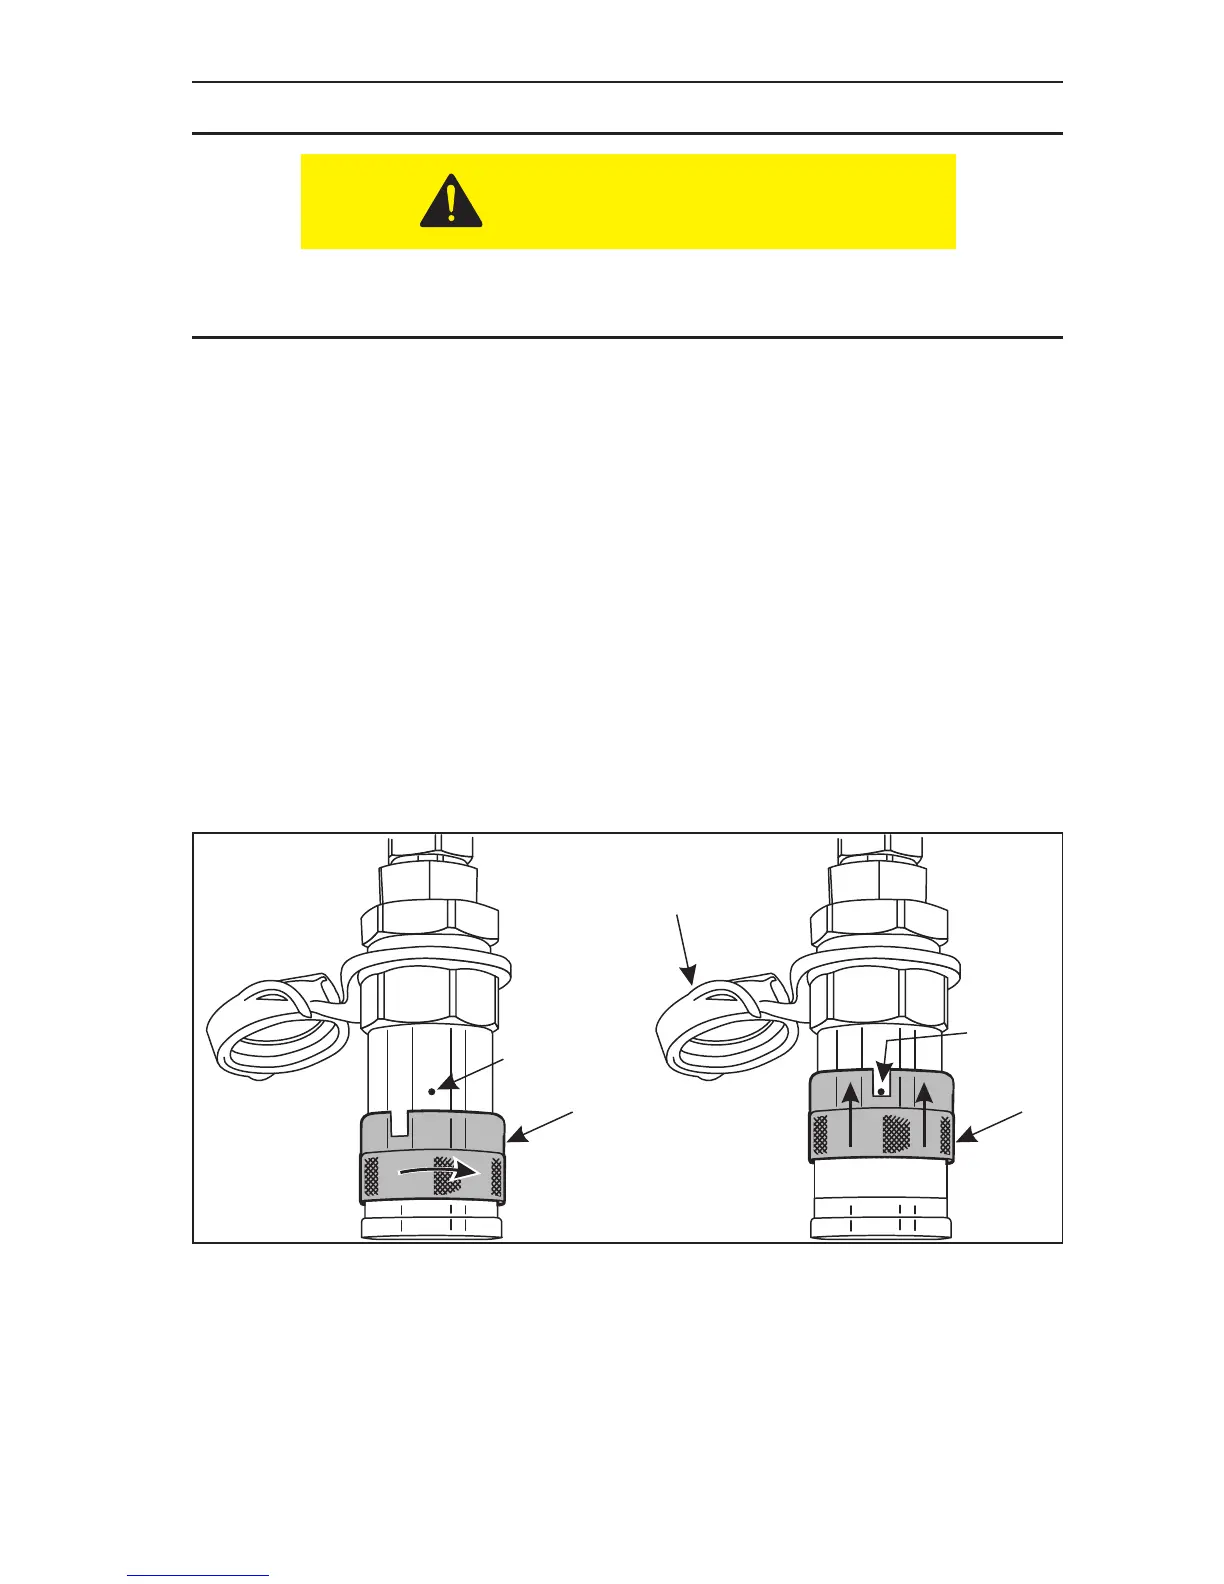
Removal of Hydraulically Powered Attachments
After use, the quick couplers and hydraulic uid will be very hot. Wear gloves when dis-
connecting the auxiliary hydraulic lines.
To remove a hydraulically powered attachment;
1. Lower the attachment to the ground and shut off the engine.
2. Relieve hydraulic pressure stored in the hoses. NOTE: To relieve pressure in
low ow side, move auxiliary control lever (see Item 2, Figure 3-39) back and
forth then leave in the detent. To relieve pressure in high ow side, depress push
buttons located on the pressure relief block (see Figure 3–37).
3. Some of the female couplings will have a lock button preventing accidental
disconnection. To release this type of quick connect, rotate the collar on the
female quick connect (Item 1, Figure 3–41) to align the notch on the collar with the
lock button (Item 2, Figure 3–41).
4. Slide the collar backwards on the female quick connect (Item 4, Figure 3–41) until
it stops against the lock button (Item 3, Figure 3–41). The male connector will be
released. Move the attachment hose away from the bulkhead tting.
5. If the female connector does not have the lock pin type collar, just slide the collar
backwards until the male connector is released.
Figure 3-41 Quick Connect Locking Collar
6. Repeat this procedure on the other hydraulic line.
7. Cover the hose connections with the dust caps (Item 5, Figure 3–41) and store the
hydraulic hoses to prevent damage. NOTE: If your hoses do not have dust caps,
keep hoses connected/coupled together to prevent dirt intrusion.
8. Follow the instructions in “Removal of Attachment” earlier in this section to
complete the attachment removal.
CAUTION
2
1
3
4
5